

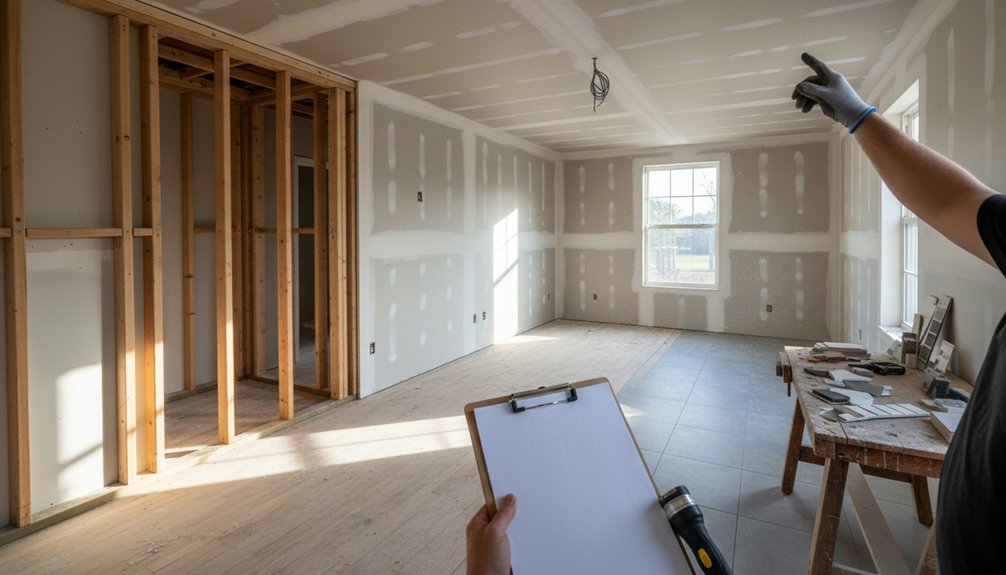
You assess a renovation before you buy by setting a hard budget ceiling (price + rehab + carrying costs + 10–20% contingency), then doing a code-focused showing walkthrough. Use a 3-bucket estimate: must-fix safety/code, must-function systems/layout, must-look finishes. Check structure for cracks, bounce, and out-of-plumb walls; confirm drainage, roof flashing, attic moisture, and ventilation. Verify permit history, system ages, and any work triggering drawings or utility upgrades. Next, you’ll see how to turn findings into a go/no-go plan.
Key Takeaways
- Set a fixed max budget: purchase price + rehab + carrying costs + 10–20% contingency, using line-item unit costs and quantities.
- Use the 3-bucket estimate (Must-Fix, Must-Function, Must-Look) to create a quick risk-aware budget range before bidding.
- Score the property against a one-page spec (Function, Structure, Systems, Fit); if it fails in five minutes, walk away.
- Inspect for deal-breakers: foundation cracks/bowing, roof and flashing failures, persistent moisture/mold, unsafe electrical, and major access constraints.
- Validate water management and ventilation: grading, gutters/downspouts, sump/drains, attic balance, and exhausts venting outdoors to prevent hidden damage.
Set Your Fixer-Upper Budget Ceiling

Before you price out materials or line up contractors, set a hard budget ceiling that includes the purchase price, renovation costs, carrying costs, and a contingency reserve. Treat it like an immutable constant: Max_Total = Price + Rehab + Carry + Contingency.
Build Rehab from line items (demo, structure, MEP, finishes, permits) and validate each with unit costs and quantities, not guesses.
Compute Carry as monthly interest, taxes, insurance, utilities, and HOA times schedule duration, then add schedule risk.
Set Contingency at 10–20% depending on inspection uncertainty and access constraints.
If you’re chasing Design trends, cap upgrade allowances so they don’t spill into core repairs.
Price Eco friendly materials explicitly; they often shift costs between products and labor.
Define What “Worth Renovating” Means for You
Although two properties can share the same price and scope, only one may be “worth renovating” once you encode your success criteria.
Start by writing a one-page spec: target use (primary home, rental, resale), timeline tolerance, and required performance upgrades (insulation, HVAC zoning, electrical capacity).
Define non-negotiables (layout, bedrooms, accessibility) and acceptable compromises (cosmetic finishes, minor footprint changes).
Then score each property against that spec using a simple rubric: Function, Structure, Systems, and Fit.
Fit includes neighborhood trajectory, Historical context, and whether the existing architecture can support current design trends without fighting the bones.
If you can’t map the finished state to your spec in five minutes, it’s likely not your project.
Estimate Renovation Costs Early (3-Bucket Method)
Next, you’ll estimate renovation costs early by splitting every line item into three buckets: Must-Fix (code/safety), Must-Function (systems/layout), and Must-Look (finishes).
You’ll assign each bucket a quick range (low/target/high) using per-unit heuristics (e.g., $/sqft, $/fixture, $/linear ft) and rough quantities from your walkthrough notes.
You’ll sum the ranges to get a fast risk-aware budget envelope before you commit to detailed bids.
Define Three Cost Buckets
When you need a fast, defensible renovation estimate, split the scope into three cost buckets you can price independently: Core Systems, Interior Finishes, and Exterior/Site.
This structure supports cleaner cost analysis and better budgeting strategies because you can map each item to trade scopes and code triggers.
Put life-safety and performance items in Core Systems: electrical service, panel, wiring, plumbing supply/drain, HVAC, water heater, structural repairs, insulation/air sealing, and any work tied to permits or inspections.
Put appearance and habitability items in Interior Finishes: drywall, flooring, cabinets, tile, paint, trim, doors, fixtures, and appliances.
Put envelope and access items in Exterior/Site: roof, siding, windows, drainage, grading, decks, paving, and landscaping.
Keep contingencies separate.
Assign Quick Budget Ranges
How do you turn three scope buckets into a number you can defend before you’ve opened walls or pulled permits? You assign ranges using code-driven assumptions, then add contingency.
For the “cosmetic” bucket, price by unit: paint, flooring, fixtures, and trim; use local $/sq ft benchmarks.
For “systems,” map each line item to likely triggers: electrical service upgrades, GFCI/AFCI, HVAC sizing, plumbing venting; use contractor minimums plus permit fees.
For “structural/layout,” assume engineered design, inspections, and rough-in reroutes; apply higher $/sq ft and longer schedule costs.
Set each bucket as low/likely/high. Add 10–15% contingency for cosmetic, 15–25% for systems, 25–40% for structural.
That’s usable Budget planning for renovation financing decisions.
Spot Fixer-Upper Red Flags During the Showing
Although a dated kitchen or worn flooring looks like an easy cosmetic upgrade, you should flag structural, moisture, and systems issues during the showing because they behave like hidden dependencies—costly, schedule-breaking, and hard to “refactor” later.
Start outside: check curb appeal for sagging gutters, failing grading, cracked walks, and roof-edge staining; then sample the neighborhood vibe for drainage, traffic noise, and neglected lots that can affect resale.
Inside, sniff for musty air, scan baseboards for swelling, and look for fresh paint patches that mask leaks. Test every faucet for pressure and slow drains, and open the electrical panel: mixed brands, double-tapped breakers, or scorch marks mean rework.
Note HVAC age, odd vent temps, and inconsistent room comfort.
Start With Structure: Walls, Floors, Framing
Before you price paint and fixtures, treat the structure like a base module you can’t safely ship without tests: walls, floors, and framing must load correctly, stay dry, and remain plumb.
Walk every room and sight along walls; measure out-of-plumb areas and note racked door frames, which can flag shear issues.
Check floor deflection by bouncing near spans; excessive flex can indicate undersized joists or compromised subfloor fastening.
In attics and basements, inspect framing for notches, bored holes, split members, and missing hangers; IRC requires proper bearing, connectors, and fireblocking at concealed vertical and horizontal pathways.
Probe for moisture staining at rim joists and studs.
Keep Landscaping ideas away from structural walls that need ventilation; tighten Home security by confirming solid framing at exterior door openings.
Quick-Check Foundation, Grading, and Drainage
Once you’ve confirmed the framing holds true, shift your fast pass to the foundation and the water paths that attack it: look for step cracks in masonry, horizontal bowing, spalled concrete, and any displacement at corners or mid-span walls.
Then check that the site actually sheds water. Confirm positive grade: the ground should slope away from the house and hardscapes shouldn’t drain toward walls. Note low spots, settled stoops, and ponding that raise flood risk.
Inspect gutters’ discharge points and any downspout extensions for splashback and erosion lines. Check for missing or clogged footing drains where exposed, and verify sump presence where basements sit below grade.
Evaluate soil stability: expansive clays, uncontrolled fill, and saturated soils amplify movement. Flag any damp efflorescence at the slab edge and monitor site drainage paths.
Scan the Roof, Attic, and Water Intrusion Signs
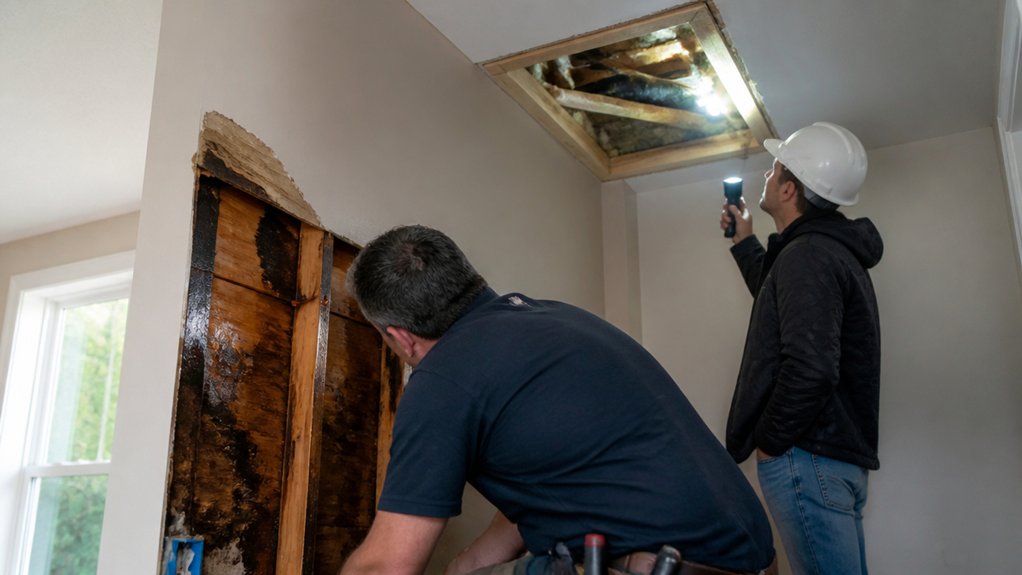
You’ll verify the roof covering and all flashings by checking for missing, cracked, or poorly lapped materials at penetrations, valleys, and edges where leaks typically initiate.
In the attic, you’ll confirm ventilation paths and insulation levels meet current requirements by spotting blocked soffits, insufficient ridge exhaust, and thermal gaps that can drive condensation.
Inside, you’ll flag moisture warnings—staining, efflorescence, peeling finishes, musty odor, and elevated meter readings—so you can trace water entry before you scope the renovation.
Roof Covering And Flashings
Although interior finishes can hide a lot, the roof covering and its flashings still leave a traceable pattern you can verify quickly. During your Roof inspection, walk the perimeter and scan planes for missing tabs, lifted edges, granular loss, soft spots, and uneven courses that signal poor fastening or deck issues.
Check valleys for continuous lining, tight laps, and debris dams. At penetrations, confirm boots sit flat, shingles lap correctly, and sealant isn’t the primary defense.
At walls and chimneys, look for step flashing with counterflashing let into reglets or properly lapped; exposed face-nailing is a defect. Verify drip edge at eaves/rakes and kickout flashing at roof-to-wall terminations.
If you find corrosion, gaps, or staining, budget targeted flashing repair, not broad “patching.”
Attic Ventilation And Insulation
Where does most hidden roof damage start showing itself first? In the attic, so you’ll inspect it like a system check.
Confirm Attic ventilation is balanced: soffit intake plus ridge/gable exhaust, with clear baffles at eaves so insulation doesn’t choke airflow. Look for darkened roof sheathing, rusty nail tips, and compressed or displaced batts near vents—signals of chronic heat and moisture loading at the deck.
Measure insulation depth and note gaps at top plates, chases, and around recessed cans; code-minded buyers target continuous coverage and proper air-sealing before Insulation upgrades.
Verify bath-fan ducts terminate outdoors, not into the attic. Check that ducts are insulated and sloped to prevent condensate backflow.
Photograph all anomalies for contractor pricing and negotiation leverage.
Interior Moisture Warning Signs
Attic findings should match what the living spaces and roofline show, so scan for interior moisture clues that signal active leaks, condensation, or ice-dam backflow.
In the attic, check sheathing for dark staining, frost, rusty fasteners, wet insulation, and compressed baffles; these are mold indicators and ventilation failures. Trace roof penetrations, valleys, and chimney flashing for drip lines and daylight.
Inside, look for ceiling rings, peeling paint, soft drywall, bubbled flooring, and musty odor.
Measure indoor humidity; sustained levels above ~60% point to inadequate ventilation or bulk water entry.
Verify bath and dryer exhausts terminate outdoors per code, not into soffits or attics.
Confirm gutters, downspouts, and grading discharge away from the foundation to reduce capillary wicking.
Quick-Check Plumbing, Electrical, and HVAC
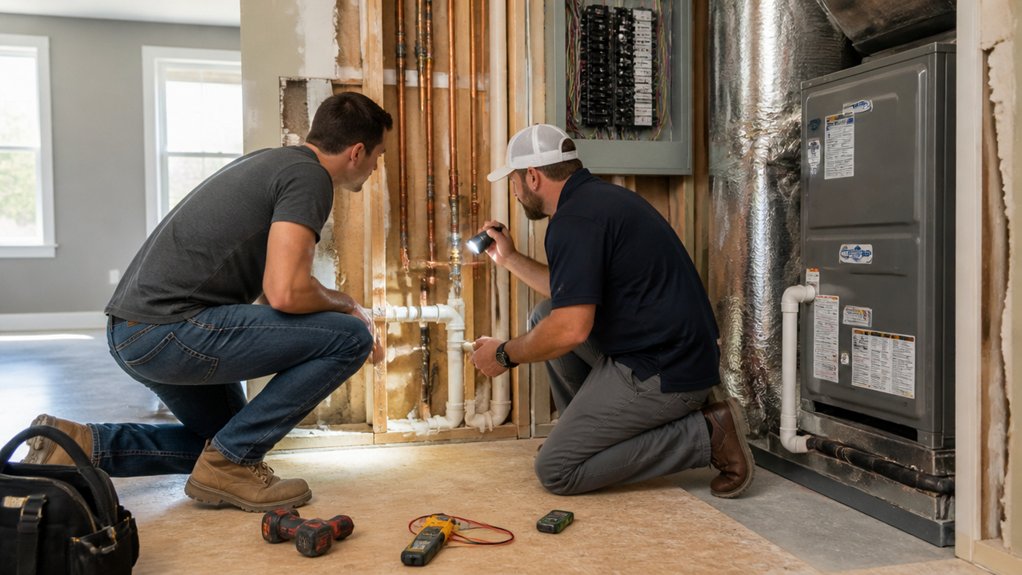
Before you price a renovation, run a quick systems check for code and safety red flags in plumbing, electrical, and HVAC.
Start at the shutoffs and visible supply/drain runs: confirm a main water valve exists, look for active leaks, corrosion, improper traps, and missing venting. Test plumbing fixtures for secure mounting, proper drainage, and functional shutoff valves. Note any polybutylene or galvanized lines that may trigger replacement.
Open electrical panels and verify labeling, amperage rating, bonding/grounding, and the presence of breakers (not fuses). Flag double-tapped breakers, aluminum branch wiring, or scorched conductors.
For HVAC, check equipment age plates, combustion venting, condensate routing, and duct insulation. You’ll also want GFCI/AFCI coverage where required.
Test the Layout: What Can You Change Cheaply?
Once you’ve flagged any plumbing, electrical, or HVAC constraints, test the floor plan for changes you can make without triggering major code scope or relocating “hard” infrastructure. Start with non-load-bearing partitions: you can often remove or reframe them with minimal structural review, but confirm joist direction, header needs, and any braced-wall requirements.
Widen door openings only after you verify egress width, swing clearances, and smoke/CO alarm locations. Improve flow by reworking furniture placement, not walls; check clear paths to exits and required landings at stairs.
Use built-ins, closets, and sliding doors to redefine rooms while keeping electrical circuits and lighting zones intact. Update perceived space with color schemes and lighting levels rather than moving windows or changing fire separations.
Separate Deal-Breakers From Nice-to-Haves
You can’t score a renovation if you don’t separate hard constraints from preferences, so you should flag true deal-breakers first (illegal additions, foundation movement, unfixable layout, budget killers).
Then you should list nice-to-have upgrades (finishes, fixtures, non-structural tweaks) and assign a priority and cost range so they don’t masquerade as requirements.
Treat it like a ruleset: fail fast on deal-breakers, then optimize the optional backlog by ROI, schedule impact, and risk.
Identify True Deal-Breakers
Although every renovation has surprises, a project only pencils out when you separate true deal-breakers (items that change the scope, schedule, or risk profile) from nice-to-haves (items you can defer, downgrade, or delete).
Start by flagging any condition that can’t pass inspection or permitting: active roof leaks, structural settlement, unpermitted additions, obsolete wiring (knob-and-tube, undersized panels), failing sewer laterals, and moisture intrusion that implies mold remediation.
Confirm egress, stair geometry, guardrails, and bedroom window sizes meet current code; if not, your layout may require redesign.
Validate HVAC capacity, combustion air, and venting; poor energy efficiency can force envelope upgrades to meet local requirements.
Treat Exterior landscaping as a deal-breaker only when grading or drainage violates setbacks or threatens the foundation.
Prioritize Nice-to-Have Upgrades
After you’ve flagged the true deal-breakers, rank every remaining upgrade by code impact, coordination risk, and return on scope. Start with items that trigger permits or inspections: moving plumbing fixtures, altering stair geometry, adding bedrooms, or changing egress windows. These upgrades can cascade into electrical load calculations, ventilation requirements, and fireblocking, so price them early and verify feasibility with local amendments.
Next, score coordination-heavy work: structural beam changes, HVAC relocations, and waterproofing details that depend on sequencing and qualified trades. If the schedule can’t support this, demote it.
Finally, treat finishes as flexible: decorative accents, cabinetry refacing, paint, and mid-tier flooring rarely affect compliance. Reserve luxury features—heated floors, steam showers, smart lighting—for last; they add complexity, require dedicated circuits or GFCI/AFCI protection, and can expand scope quickly.
Ask the Seller for Permits, Age, and Disclosures
Before you budget or schedule any renovation work, request the seller’s permit history, the install/upgrade dates for major systems (roof, HVAC, plumbing, electrical, windows), and all required disclosures.
Compare permits to visible conditions and listing claims to confirm scope, final inspections, and sign-offs. If work lacks permits, you may inherit correction orders, nonconforming wiring/plumbing, or resale and insurance issues.
Verify appliance and equipment age with serial numbers, invoices, and warranty transfers. Pull municipal records to confirm Property history, open permits, and prior code violations.
Review Seller disclosures for water intrusion, drainage, sewer backups, mold, asbestos, lead, or structural movement; cross-check against stains, grading, and crack patterns.
Put all discrepancies in writing and require documented cure or pricing adjustments before closing.
Bring a Contractor Walkthrough Before You Buy
If you’re serious about a renovation, schedule a paid walkthrough with a licensed general contractor (and, when appropriate, an electrician, plumber, or roofer) during your inspection window so you can spot code and constructability issues early.
Verify contractor credentials: active license, insurance, bonding where required, and experience with your jurisdiction’s permit process.
Bring a walkthrough checklist that targets safety and compliance: service-panel capacity, GFCI/AFCI coverage, knob-and-tube or aluminum wiring, plumbing supply/drain materials, venting, roof and flashing condition, attic ventilation, structural cracks, moisture intrusion, and fire separation around garages and furnaces.
Ask what work triggers permits, engineered drawings, or utility upgrades, and what inspections you’ll face.
Have them flag access constraints, asbestos/lead indicators, and load-bearing walls before you negotiate.
Build a Timeline, Add Contingency, Decide to Proceed
Once you’ve identified the likely scope and code triggers, map the renovation into a permit-to-final-inspection timeline and stress-test it with realistic buffers.
Build Timeline planning around jurisdictional review times, required trade sequencing, and inspection hold points (rough-in, framing, insulation, final). Assume rework cycles for failed inspections and backordered materials, and document who pulls permits and schedules inspections.
Pair the schedule with Contingency budgeting tied to code risk: service upgrades, fire separation, egress, structural corrections, and asbestos or lead abatement. Set a percentage plus line-item allowances for unknowns uncovered at demo.
Decide to proceed only if the timeline fits your move-in needs, financing covers contingencies, and your contractor can meet licensing and insurance requirements. If not, renegotiate or walk away.
Conclusion
You’ve now got a pre-purchase checklist that behaves like clean code: define constraints, validate inputs, and fail fast on red flags. You set a hard budget ceiling, classify scope with the 3-bucket method, and test structure first—walls, floors, framing—before cosmetic commits. You request permits and disclosures, then run a contractor walkthrough as your final integration test. If the numbers, timeline, and contingency still compile, proceed; if not, exit—no need to consult a sundial.