

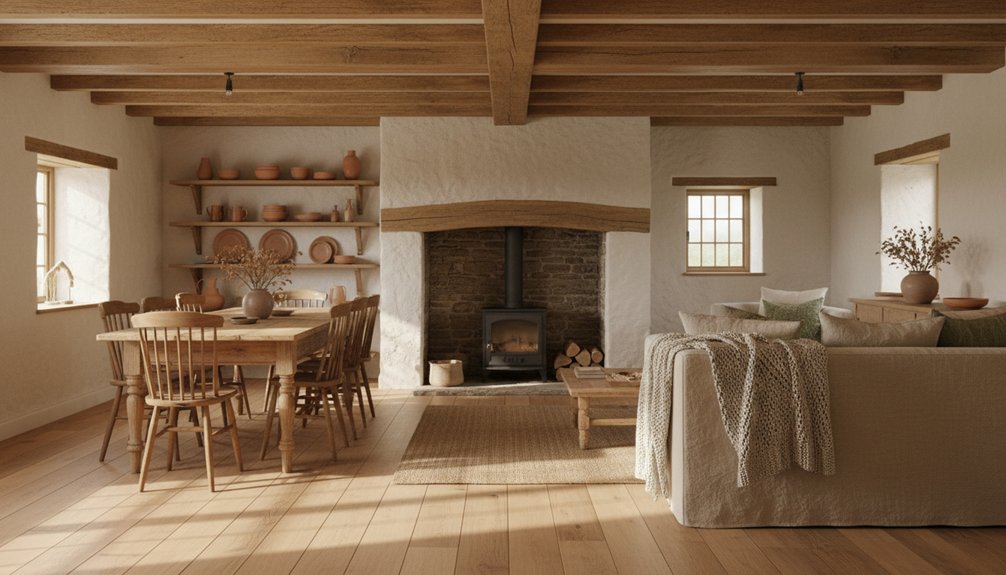
You’ll get a country‑warm detached cottage by planning your budget in livable phases, then starting at the top: check rooflines, flashing, gutters, and drains, and log cracks or tide marks room by room. Sort permissions early if you’re listed or in a conservation area. Stop damp with breathable lime repairs and steady ventilation, then seal drafts at thresholds, hatches, and sash windows with discreet upgrades. Finish with bone-and-sage paint, layered lighting, warm wood or stone floors, and woolly textiles—there’s more to refine.
Key Takeaways
- Set a phased budget with 10–15% contingency, prioritizing structural fixes first, then finishes, then cozy country details.
- Inspect roof, gutters, walls, floors, and services room-by-room to catch leaks, cracks, and damp before decorating.
- Prevent damp by lowering ground levels, keeping air bricks clear, using lime repairs, and adding discreet extractor ventilation in wet rooms.
- Reduce drafts with brush strips, caulk, and storm panels; tune sash windows and use breathable materials like wool, hemp, and linseed putty.
- Improve comfort with loft insulation, targeted wall insulation, and better layout flow using furniture placement, lighting, and built-in cottage-style storage.
Plan Your Detached Cottage Reform: Budget and Phases

Before you pick up a hammer, map out your detached cottage reform with a clear budget and a phased plan that keeps the charm intact while preventing costly detours.
List must-haves, then nice-to-haves, and price them with a 10–15% contingency for surprises.
Break the work into calm, livable stages: stabilize what you’ll touch first, refresh finishes next, then add the cozy flourishes that make it yours.
Set deadlines you can keep, and line up trades early so you’re not rushed into poor choices.
Track every receipt, and decide where you’ll splurge—handmade tiles, aged brass, or bespoke shelving—while saving on paint and fittings.
Tie interior décor to gardening tips by budgeting for window herbs, gravel paths, and lantern-lit borders.
Walk Through the Cottage: Roof, Walls, Services, Damp
With your budget and phases sketched out, take a slow, methodical walk through the cottage and let the building tell you what it needs first.
Start up high: check ridge lines, slipped tiles, flashing, and gutter falls—steady Roof maintenance stops small leaks becoming stained ceilings and swollen joists.
Move to walls and floors. Tap plaster for hollows, scan for hairline cracks, and note salt bloom or tide marks near skirtings.
Outside, clear earth from the base, keep air bricks open, and follow drains after rain; smart Damp prevention begins with shedding water, not sealing it in.
Then trace services like a careful host: locate stopcock, consumer unit, and boiler, test sockets, and look for tired pipework, drips, and odd smells.
Record every finding, room by room.
Get Approvals: Planning, Listed Rules, Party Lines
Although you’re itching to strip back layers and start making it yours, pause and secure the right permissions so the cottage’s story—and your budget—stays intact. Begin with a frank chat at the council and map what needs local approval: new openings, extensions, rooflines, flues, and changes to outbuildings.
If the cottage is listed or in a conservation area, read the heritage regulations early; they’ll shape windows, doors, pointing, and even paint finishes.
Draw up measured plans, a simple heritage statement, and a schedule of works, then line up your builder so quotes match the consented scope.
Check boundaries and any shared drains or access; if you’re near a neighbour’s wall, serve the correct party notices and agree surveyors before you start.
Stop Damp and Improve Ventilation: Without Wrecking Plaster
Once you’ve got consent in hand, tackle damp like a detective, not a demolition crew: start by tracing where the moisture enters and where it lingers. Check gutters, ground levels, and splashback, then map tide marks, salts, and musty corners. Record readings with a meter, but trust your nose and fingertips, too.
For Moisture control, clear air paths before you strip anything: unblock vents, lift a couple of boards to inspect voids, and keep lime plaster breathing by avoiding hard cement skim. Patch cracks with compatible lime, then let walls dry slowly with gentle heat.
Add discreet ventilation systems where people cook and bathe—quiet extractors on timers, or demand-controlled units—ducted neatly through cupboards. Finish by monitoring humidity, aiming steady, not bone-dry.
Seal Drafts and Upgrade Windows the Cottage Way

You’ll hunt down drafts the old-fashioned way—candle flame at skirting boards, sash cords, and door latches—then seal each whisper of cold before it steals your heat.
You can upgrade cottage windows with repaired sashes, slimline secondary glazing, or discreet brush seals that keep the wavy glass look while tightening the fit.
Finish with natural weatherproofing—wool draft excluders, hemp or flax caulk, and linseed-oil putty—so the house stays snug without losing its country grace.
Find And Seal Drafts
Where does that quiet chill sneak in when the fire’s steady and the rooms feel otherwise snug? You’ll find it along skirting boards, at door thresholds, around attic hatches, and where pipes pierce old plaster.
On a windy day, run a damp hand or a thin ribbon near joints; the flutter tells the truth. At dusk, a candle can trace leaks, but keep it steady and safe.
Start with tidy draft proofing: fit brush strips to doors, add a neat sweep, and bed gaps with paintable caulk that disappears under warm cream trim.
Press foam gaskets behind switch plates, and cap unused chimneys with a ventilated balloon.
Choose insulation methods that respect breathability, so the cottage stays cozy, not clammy.
Cottage-Style Window Upgrades
Although the glass looks solid, cottage windows often leak comfort through tired sash cords, worn putty, and hairline gaps at the meeting rails. You’ll feel it on your wrists, especially at dawn. Start by rehanging sashes so they glide true, then reset panes with fresh glazing and crisp, narrow muntin lines that keep the period look.
Next, add discreet interior storm panels or slim double-glazed inserts that preserve wavy glass character while cutting noise and chill. Choose latch sets and pulls in Vintage fixtures—aged brass or black iron—to match your door hardware.
Finish with café curtains or linen Roman shades that soften light without blocking views, and plan garden integration: align window seats, herb boxes, and climbing roses to frame every outlook with living charm.
Weatherproofing With Natural Materials
Once the sashes sit square, chase the remaining drafts the old-fashioned way with natural, breathable materials that protect timber instead of trapping it. Press wool felt into meeting rails, tuck hemp caulk into hairline gaps, and run a thin bead of linseed putty where glass meets muntin. You’ll feel the room steady, warmer, quieter, without that sealed-plastic chill.
Add natural insulation discreetly: pack sheep’s wool into the weight pockets, line shutter boxes with cork, and lay a flax underlay beneath rugs near the bay. For stormy edges, fit brush seals to the lower rail and a timber threshold with a snug sweep.
Finish exposed wood with weather-resistant finishes—pine tar, tung oil, or limewash—so rain beads off while the grain still breathes.
Add Hidden Insulation to Floors, Walls, and Loft

Once you’ve tamed the drafts, you can tuck warmth where no one sees it—beneath wide plank floors, behind plastered walls, and up in the loft.
You’ll lift boards or work from below to add discreet floor insulation, then slip breathable batts or blown fill into wall cavities without disturbing the cottage’s character.
In the loft, you’ll top up insulation neatly around rafters and eaves, keeping the roofline crisp and the rooms below quietly snug.
Discreet Floor Insulation
When you want a cottage to feel snug without changing its character, discreet insulation does the heavy lifting behind the scenes. You start underfoot, where drafts slip through old boards and chilled air pools along skirting.
Lift select floorboards or work from below, then fit sustainable insulation snugly between joists, keeping ventilation paths clear so timbers stay dry. Choose eco-friendly materials like sheep’s wool, wood fibre, or recycled denim; they buffer temperature, soften footfall, and suit a country-warm aesthetic.
Seal gaps at pipe penetrations and around the hearth with flexible, breathable tapes rather than hard foams. Finish with reclaimed boards or wide planks, and you’ll feel the change immediately: warmer mornings, quieter evenings, and floors that invite bare feet.
All while the cottage looks untouched.
Loft And Wall Upgrades
Warm floors set the tone, but you’ll keep that snug, country‑warm feel by tucking insulation into the loft and walls where heat quietly escapes. Lift a few boards, lay breathable mineral wool between joists, and seal gaps around pipes and hatches with draft tape so warm air can’t slip out.
In stud walls, choose blown‑in cellulose to preserve plaster lines and protect your Vintage accents from condensation and cold spots. Add a smart vapor control layer where needed, then refit skirting tight to the floor for a clean finish.
In the loft, top up to modern depth, keep eaves vents clear, and box around downlights safely. You’ll feel steadier temperatures and quieter rooms, without spoiling garden integration or charm.
Rework the Cottage Layout for Better Daily Flow
Although the cottage’s charm may lie in its quirks, you’ll feel the difference immediately when the layout stops fighting your day. Start by mapping your morning and evening routes: door to hooks, kettle to table, sofa to fire.
Widen pinch points by shifting doors to pocket or hinged reversals, and align openings so you can carry laundry, logs, and groceries without zigzagging.
Let Interior color schemes support the new flow: lighter tones on passage walls, deeper shades in sitting corners, so rooms read clearly at a glance.
Refine furniture arrangement with purpose—float the settee to create a straight walkway, angle chairs toward conversation, and keep side tables within an easy reach.
You’ll keep the cottage’s snugness while gaining calm, everyday ease.
Build in Cottage-Style Storage (Alcoves, Benches, Under-Stairs)
Because a detached cottage rarely wastes a single inch, you’ll get the most comfort by turning its odd nooks into hardworking storage. Frame alcoves with beadboard backs and shallow oak shelves, then balance books with baskets and lanterns for thoughtful alcoves decor that still feels lived-in.
Tuck a lift-top settle by the entry for boots, scarves, and market totes; you’ll gain benches seating that invites a pause while keeping the walkway clear.
Under the stairs, fit pull-out drawers for linens and pantry extras, or a tiny broom cupboard with a pegged door. Add iron latches, waxed timber, and linen labels so every built-in looks original to the cottage, not bolted on later.
Choose a Country-Warm Cottage Paint Palette
Start with three grounded hues and let the cottage’s light do the rest: a creamy bone for walls, a muted sage or smoke-blue for millwork, and a clay or ochre accent that nods to the surrounding fields.
Keep the bone slightly warm so it flatters old plaster and softens corners without looking yellow. Paint trim and built-ins in your sage/blue with a satin finish; it wipes clean yet still feels heritage.
Reserve clay or ochre for a pantry door, stair risers, or the inside of shelves, so color appears like a found layer.
In the Vintage kitchen, echo those tones on beadboard and a dresser base, then tie it outdoors with a porch rail color that complements weathered garden fencing.
Test swatches morning and dusk.
Layer Cottage Lighting: Task, Ambient, and Low-Level Glow
When daylight fades early in a detached cottage, layered lighting keeps every corner useful and softly romantic. Start with ambient glow: a linen-shaded pendant or opal glass ceiling light on a warm 2700K dimmer, so walls and beams read honeyed, not harsh.
Add task lighting where hands work—brass swing-arm sconces by the sofa, an adjustable lamp on the writing desk, and under-shelf LEDs for the pantry—aimed tightly to cut glare.
Finish with low-level light: candle-style bulbs in lanterns, toe-kick strips in the kitchen, and a small night lamp on the landing for safe, quiet movement.
Use Smart lighting scenes to shift moods instantly, and choose LEDs for energy efficiency without losing that fireside softness.
Pick Cottage Flooring That’s Warm, Tough, and Authentic
Though a detached cottage may take muddy boots, dripping dogs, and the daily drag of chairs, the right floor still sets a quiet, welcoming tone underfoot. Choose oak or reclaimed pine boards for Rustic charm, and let knots, saw marks, and softened edges tell their story.
If you need extra resilience, pick limestone flags or terracotta tiles in the entry and hearth zones; they hide grit, hold warmth, and age handsomely.
Keep finishes breathable and forgiving: hardwax oil or matte lacquer that you can spot-repair without sanding the whole room.
Match tones to your architecture—honey wood for low beams, cooler stone for brighter rooms—and run planks lengthwise to stretch narrow spaces.
With Authentic materials, you’ll gain patina, not problems.
Finish With Cottage Textiles: Curtains, Rugs, and Upholstery
You soften the cottage’s lines when you layer curtain textures—sheer linen under a weightier weave—so light stays gentle and private.
You anchor each room with cozy rug placement, tucking wool runners where feet land first and sliding a larger rug under key seating to quiet the floor.
You’ll keep the lived-in charm intact by choosing durable upholstery—tight weaves, washable covers, and forgiving tones that wear beautifully.
Layered Curtain Textures
As daylight shifts across cottage rooms, layered curtain textures keep the atmosphere soft, warm, and intentionally lived-in. You create calm by pairing a crisp linen inner panel with a weightier outer drape, letting each fabric temper the other’s light and movement.
Favor Textile layering that feels practical: washable cotton for daily ease, wool-blend for draft control, or a sheer voile to blur harsh views.
Choose Curtain styles that suit your windows and your rhythm. You’ll get tailored charm from pinch pleats, relaxed romance from café curtains, and quiet structure from simple rod pockets.
Add subtle checks, ticking stripes, or faded florals, then finish with wooden rings, iron brackets, and a generous hem that kisses the sill without dragging.
Cozy Rug Placement
When winter floors run cold and cottage corners feel a little spare, cozy rug placement pulls the whole room into a warmer orbit. Anchor your seating by tucking the front legs of chairs and sofas onto the rug, so conversation feels gathered, not scattered.
In a narrow cottage sitting room, run a runner from hearth to doorway to guide the eye and soften footsteps. Let a larger rug extend beyond side tables, giving lamps and books a steadier stage.
For Rustic charm, choose wool, jute, or a faded Persian look, then layer a smaller sheepskin where you land most often. Keep edges parallel to beams and thresholds, and leave a slim border of floor to frame the textile.
This rug placement reads intentional, warm, and lived-in.
Durable Upholstery Choices
Rugs may warm the floor, but durable upholstery carries that same comfort up into the places you perch and sprawl. Choose tightly woven linen blends, wool bouclé, or performance cotton that looks lived-in yet resists snags.
Slipcovers in stone or oat let you wash, rotate, and refresh without fuss, while double-stitched seams keep cushions square.
For Durable upholstery, ask for high rub counts and a sturdy backing; you’re buying calm, not constant reupholstery. Favor small-scale plaids, ticking, or muted florals that hide crumbs and paw prints, then layer a plaid throw for softness.
Mind Fabric longevity by keeping pieces out of harsh sun, turning cushions weekly, and spot-cleaning with gentle soap. Your cottage stays welcoming, season after season.
Conclusion
Now you’ve steered your detached cottage reform from budget to brushstroke, checking rooflines, services, and permissions, then taming damp, drafts, and gloomy corners with ventilation, snug windows, and layered light. Keep your palette country‑warm, your floors honest and hard‑wearing, and your textiles generous—curtains that puddle softly, rugs that hush footsteps, upholstery that invites lingering. Like a hearth’s steady ember, each careful choice gathers comfort, until the whole house glows and welcomes you home.