


Start by fixing the fabric of your 1970s semi: trace leaks, check damp bridges and DPCs, test draughty windows, and review electrics, heating, and ventilation. Set a realistic budget with a 10–20% contingency, then replan flow from door to kitchen to living zones before opening walls—confirm load-bearing, isolate services, and test for asbestos. Bring in daylight with larger openings or skylights, then add honest timber, textured brick, matte metals, and warm layered lighting. Keep going to see how each choice locks together.
Key Takeaways
- Start with a full fabric and services survey; fix damp, roof leaks, wiring, ventilation, and insulation before cosmetic upgrades.
- Replan the layout for clear circulation and storage; zone spaces with furniture, under-stairs solutions, and durable flooring in high-traffic areas.
- Open up only after confirming load-bearing walls and asbestos risks; use correctly sized beams and crisp reveals to suit rustic-modern joinery.
- Boost daylight and warmth with larger openings, slim-framed glazing, skylights, and airtight detailing; keep materials breathable and weatherproof.
- Choose patina-friendly finishes—oiled timber, limewash or clay paint, matte metals, textured brick, and natural textiles—to balance rustic character with modern calm.
Assess Your 1970s Semi: What to Fix First

Before you pick reclaimed beams or limewash, you need to read your 1970s semi like a building surveyor: start with the fabric and the systems that keep it dry, warm, and safe. Check the roof covering, flashings, and gutters for leaks, then trace any staining to its source.
Inspect cavity walls for damp bridges, failed DPCs, and uninsulated voids. Test windows and doors for draughts; you can keep Vintage charm while tightening tolerances and upgrading seals.
Lift a corner of carpet to assess slab moisture and unevenness before you add finishes. Review electrics, consumer unit, and bonding; then assess boiler age, pipe insulation, and ventilation rates.
Prioritise airtightness, insulation, and safe wiring to raise energy efficiency without trapping moisture.
Set the Contemporary Rustic Look and Budget
You’ll set the tone by defining rustic-modern as clean-lined joinery and matte metals paired with honest timber, textured brick, and warm, natural finishes that suit a 1970s semi’s proportions.
You’ll then prioritise high-impact updates—flooring, lighting, and kitchen fronts—so the materials read cohesive before you spend on secondary rooms.
You’ll lock a realistic budget and keep a contingency buffer for hidden wiring, uneven subfloors, and plaster repairs that often surface once you start opening things up.
Define Rustic-Modern Style
While rustic-modern style borrows the weathered honesty of a 1970s semi, it sharpens the look with clean lines, quiet detailing, and a restrained palette.
You’ll balance Vintage charm with modern comfort by pairing tactile, imperfect surfaces with crisp geometry: matte oak, limewashed walls, hand-thrown ceramics, and blackened steel.
Let original brick, aged pine, or a slightly patinated fireplace stay visible, then frame them with slim profiles and simple reveals.
Keep colours grounded—clay, off-white, soot, and soft greys—so texture does the talking.
Choose lighting that feels utilitarian yet refined: opal glass, aged brass, powder-coated metal.
You’re aiming for warmth without clutter, contrast without gloss, and a home that feels settled, not staged.
Prioritize High-Impact Updates
Rustic-modern works best when you pick a few bold moves that set the tone and keep the spend under control. Start where your 1970s semi shows most: the entry, kitchen sightlines, and main living wall. Swap heavy internal doors for oak-veneered slabs, black iron levers, and clear glazing to pull light through.
Next, anchor the room with one authentic material: a limewashed brick feature, reclaimed beams, or wide-plank engineered oak. Keep the palette calm—chalky whites, warm greys, muted greens—then add Vintage charm through aged brass, wool throws, and patinated hardware.
Choose Mid century accents strategically: a teak sideboard, slim-legged dining chairs, or a globe pendant. Upgrade lighting and handles before you chase bigger changes.
Set Budget Contingency Buffer
Because 1970s semis hide surprises behind plaster and chipboard—uneven subfloors, tired electrics, damp-prone external walls—set a contingency buffer before you lock in reclaimed oak, limewash, or black steel details, and ring-fence it so the contemporary rustic look doesn’t get diluted by last-minute “make-do” swaps.
Aim for 10–20% depending on survey findings and how far you’re moving services. Treat it as Contingency planning, not spare cash: you’ll spend it on levelling compounds, upgraded RCD protection, breathable insulation, or rot repairs that protect timber finishes.
Build budget flexibility by splitting your spend into “structure first” and “finish later.” If costs spike, pause on bespoke joinery, swap to off-the-shelf cabinets with solid wood fronts, and keep money reserved for flooring, lighting, and ironmongery.
Replan the Layout for Better Daily Flow
After you’ve stripped the 1970s semi back to its bones, you can replan the layout so everyday movement feels natural instead of forced. Map your routes: front door to coat drop, kitchen to dining, sofa to stairs, and keep them clear. Position durable oak or brick-look porcelain where traffic is heaviest, then soften edges with wool runners so the rustic feel stays practical.
Build zones with Furniture arrangement, not new walls: a bench and hooks by the entry, a pantry run beside the cooker, and a dining table aligned to sightlines. Put storage where you pause—under-stair drawers, mudroom cubbies, deep window seats.
Finally, sync indoors with Outdoor living by lining up doors, paving, and a sheltered eating spot.
Open Up Walls Safely in a 1970s Semi
Before you knock through a wall in a 1970s semi, confirm what’s holding the house up and what’s merely dividing space. Check the loft for joist direction and look for doubled studs, beams, or posts that hint at load paths. Bring in a structural engineer if you’re unsure, then plan temporary supports before you cut anything.
Expect surprises: concrete lintels, steel straps, and uneven plasterboard over blockwork. Isolate electrics, cap plumbing, and test for asbestos in textured coatings or old vinyl adhesive.
When you open the wall, specify an appropriate RSJ or flitch beam, and pack bearings onto sound masonry. Keep reveals crisp so reclaimed timber trims can add Vintage charm, and position Retro furniture to suit the new spans.
Add Daylight: Windows, Doors, and Skylights
Once you’ve opened up walls safely, you can pull daylight deeper into the 1970s semi by enlarging window openings where the structure allows.
You’ll sharpen the contemporary rustic feel with slim-framed glazing, timber reveals, and glazed doors that link the kitchen and living areas to the garden.
Add a well-placed skylight over darker circulation zones or the stair to wash textured plaster, brick, and oak in soft top light.
Expanding Window Openings
Because many 1970s semis were built with modest, tightly framed openings, expanding your window and door apertures can change the feel of the entire house—more daylight, longer sightlines, and a stronger connection to the garden.
Start by checking structural loads: you may need a new lintel or steel beam before you cut wider. Keep reveals deep where you can; they suit rustic interiors and help shade summer glare.
Plan window framing early so brick, block, and insulation lines stay clean at the jambs and sill. Use durable membranes and cavity trays to manage driving rain.
Then choose timber or alu-clad frames that sit proud or recessed to match the facade rhythm. During glass installation, specify warm-edge spacers and toughened panes where impact risk is higher.
Finish with breathable plaster and robust oak boards inside.
Skylights And Glazed Doors
Two well-placed upgrades—rooflights and full-height glazed doors—can shift a 1970s semi from dim and compartmentalised to open, warm, and weather-aware without rewriting the whole plan.
Put rooflights over the stair or kitchen run to pull sun deep into the centre; choose slim aluminium or timber-lined frames to suit your rustic palette. Specify solar-control glazing and trickle vents so you don’t trade light for overheating.
Angle openings to capture skyline views while screening neighbours with deep reveals or external fins. At the garden face, compare glazed door styles: a simple French set suits narrow bays, while a lift-and-slide gives clean thresholds and wider spans.
Use oak boards, black hardware, and insulated upstands to keep the detail honest and tight.
Upgrade Warmth: Insulation, Heating, and Drafts
Although you can add rustic beams and limewash to soften a 1970s semi, it won’t feel truly contemporary—or comfortable—until you tackle heat loss. Start with the fabric: top up loft insulation, consider insulated plasterboard on cold external walls, and seal suspended floors with rigid insulation where access allows. You’ll lift thermal comfort and energy efficiency without changing the home’s character.
Next, hunt drafts like a surveyor. Fit brush seals to letterboxes, add compression strips to doors, draught-proof loft hatches, and foam gaps around pipes and sockets on external walls. Keep ventilation intentional with trickle vents or a decentralised MVHR where rooms run damp.
Then modernise heat. Balance radiators, insulate pipes, upgrade controls, and size a heat pump or boiler to the improved envelope.
Pick Rustic Materials That Wear In, Not Out
Once you’ve stopped the heat leaking out, choose finishes that gain character under real use rather than look tired after a year. Aim for solid timber, waxed oak, and reclaimed joinery that you can sand, oil, and repair.
Pick limewash, clay paint, or tadelakt in splash zones so scuffs read as patina, not damage.
Use aged brass, blackened steel, and leather pulls where hands land daily; they’ll darken and soften naturally.
Specify wool, linen, and heavy cotton for curtains and upholstery so you get texture, breathability, and fewer static shocks.
Add a few honest accents—hand-thrown ceramics, vintage finds, a chunky beam mantel—to balance Vintage charm with modern comfort.
Keep sealants matte, low-VOC, and easy to refresh.
Floors and Walls: Warm Finishes for a 70s Semi

Because a 70s semi often comes with cold concrete slabs, bouncy chipboard, and hard gloss paint, your floors and walls need finishes that add warmth, hide day-to-day wear, and still feel honest against the era’s straight lines.
Start underfoot: choose wide-plank oak, reclaimed pine, or cork to soften acoustics and take dents gracefully; keep boards matte with hardwax oil.
If you’ve got sound slabs, lay clay tiles or microcement in a warm greige, then layer natural rugs.
On walls, swap sheen for mineral paint or limewash; they diffuse light and mask patchy repairs.
Use timber battens or tongue-and-groove to break up long corridors.
Let color palettes bridge Vintage furniture: ochres, smoked greens, and off-whites.
Rustic-Modern Kitchen and Bathroom Essentials
You bring the rustic-modern shift into your 1970s semi by anchoring the kitchen and bathroom with reclaimed wood cabinetry that adds grain, warmth, and a lived-in edge.
You balance that softness with industrial fixtures—matte black taps, brushed steel pulls, and exposed-metal lighting—that feel crisp and purposeful.
You finish it off with hard-wearing surfaces and clean-lined hardware, so the rooms read contemporary without losing their honest, rustic texture.
Reclaimed Wood Cabinetry
How do you bring warmth into a crisp, contemporary layout without losing the clean lines? You start with reclaimed wood cabinetry that carries history in its grain, knots, and softened edges, then pair it with simple, slab-like profiles to keep the silhouette calm.
In a 1970s semi, you can use taller pantry runs to straighten out awkward wall lengths, while floating vanity units visually lighten tight bathrooms.
Let the boards’ natural variation do the talking; choose a consistent stain tone or clear matte oil to control contrast and prevent the space from feeling busy.
Thoughtful cabinetry design hides modern storage needs—deep drawers, pull-outs, and integrated bins—so the room reads uncluttered.
Finish with careful joinery and aligned reveals.
Industrial Fixtures And Finishes
Once reclaimed wood sets the tone, industrial fixtures and finishes sharpen the rustic-modern edge without cooling the room. You’ll get the balance right by choosing matte black taps, aged brass pulls, or brushed stainless that echoes appliance fronts while resisting fingerprints.
In the kitchen, hang slim steel pendants over the island and pair them with an enamelled sink or concrete-look worktop so grain and grit play together. Specify cabinet latches with exposed screws and keep edges crisp to suit the 1970s footprint.
In the bathroom, use framed mirrors, fluted glass, and a wall-mounted mixer with a knurled handle for confident grip. Choose microcement or large-format porcelain to cut grout lines, then finish with warm LEDs so metal reads inviting, not harsh.
Lighting, Hardware, and Joinery That Tie It Together
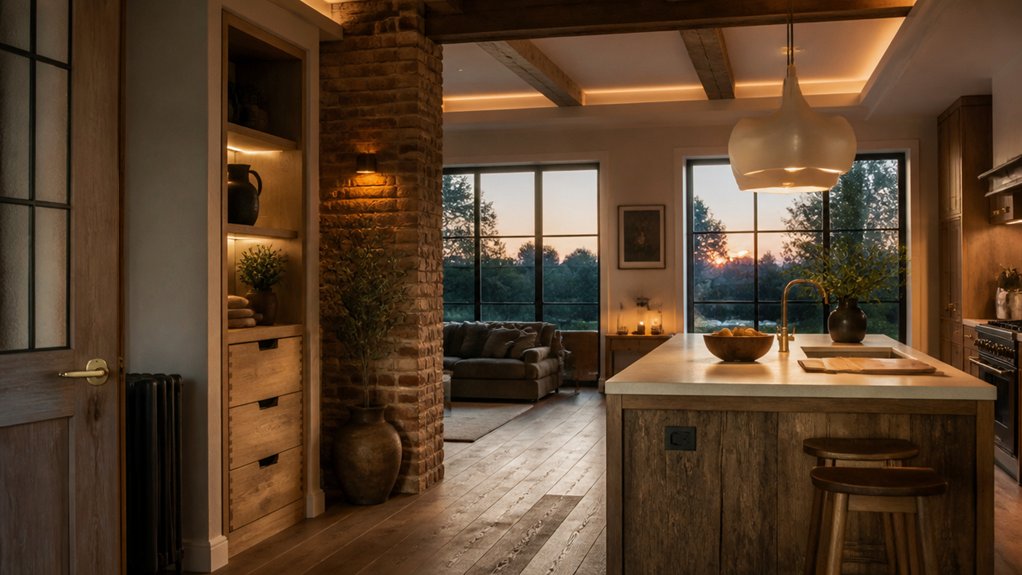
Although the plaster, timber, and brick set the tone, lighting, hardware, and joinery are what make a 1970s semi read as one coherent contemporary-rustic home. You layer ambient lighting first: warm ceiling washes to soften old corners, then low pendants over the island to sharpen grain and patina without glare. Add dimmers everywhere so day-to-night shifts feel intentional, not improvised.
Next, you standardise hardware finishes across rooms—brushed bronze, blackened steel, or aged nickel—so every door pull and tap speaks the same dialect. Keep profiles simple, let texture do the work, and repeat one finish on hinges for continuity.
Finally, you tighten joinery: shadow gaps, aligned reveals, and flush skirting that respects uneven walls yet reads crisp.
Conclusion
When you turn a 1970s semi into contemporary rustic, you don’t just renovate—you tune it. A neighbour on our street opened one blocked-up window and found the original brick reveal; that single detail lifted the whole house, like tightening one loose string and hearing the guitar ring true. Spend where it matters: structure, insulation, daylight. Then let oak, limewash, and blackened steel age honestly. You’ll feel the flow change every day.