

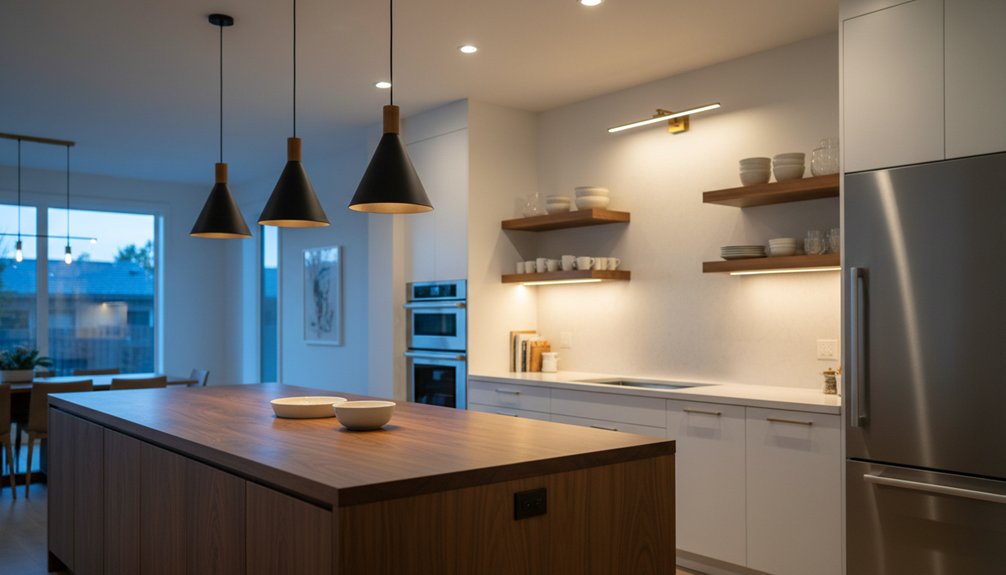
You’ll get the best mix of style and function by layering ambient, task, and accent lighting and zoning it for circulation, prep/sink, cooking, and dining. Keep color consistent at 2700–3500K with CRI ≥90 so food and finishes don’t look patchy. Add continuous under-cabinet LED strips mounted 1–2 inches behind the face frame to cut shadows. Hang island pendants 30–36 inches above the counter and dim everything for control. Next, you’ll see layouts that prevent glare and scalloping.
Key Takeaways
- Layer ambient, task, and accent lighting to balance safety, style, and control across circulation, prep, cooking, and dining zones.
- Use consistent LED color temperature (2700–3500K) and CRI ≥90 across fixtures for cohesive ambiance and accurate food color.
- Install under-cabinet LED strips 1–2 inches behind cabinet faces with diffusers to brighten counters evenly and reduce shadows and glare.
- Hang island pendants 30–36 inches above countertops, space them 24–30 inches apart, and keep outer fixtures 6–12 inches from edges.
- Plan downlight placement over task areas, not centered in aisles, and choose fixtures with accessible drivers and components for easier maintenance.
Layer Kitchen Lighting: Ambient, Task, Accent
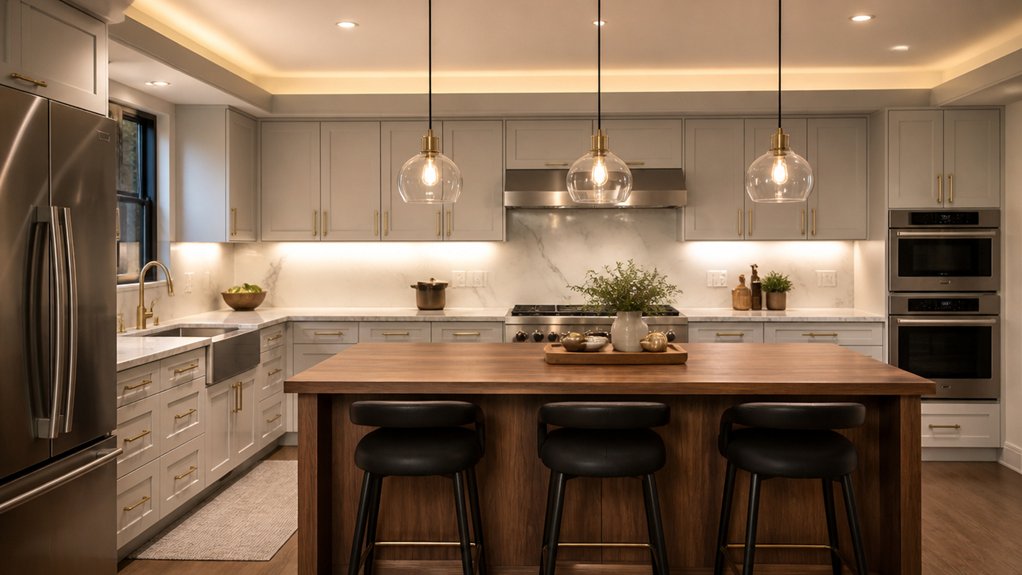
Although a single ceiling fixture can “light” a kitchen, you’ll get safer, more controllable results by layering three lighting types—ambient, task, and accent—so each one meets a specific performance goal.
Define Kitchen lighting zones by function: circulation, sink/prep, cooking, and dining.
Provide ambient light for uniform orientation using ceiling-mounted sources that limit glare and keep luminance ratios reasonable across vertical and horizontal planes.
Add task lighting at work areas to reach higher illuminance where knife work and reading labels occur, and specify high CRI (90+) to support accurate color judgment.
Use accent lighting to highlight cabinetry, artwork, or architectural features without competing with task needs.
Separate lighting control zones so you can dim independently, schedule scenes, and reduce energy use.
Under-Cabinet Kitchen Lighting: Types and Placement
Once you’ve set your ambient and accent layers, under-cabinet lighting becomes the primary task system for countertops because it puts light exactly where you cut, read labels, and measure.
Choose LED tape, linear bars, or puck modules; tape gives the most uniform wash, while pucks create scallops best reserved for display.
Target 3000–3500K, 90+ CRI, and dimming that matches your driver (ELV/0–10V).
Mount fixtures 1–2 inches behind the cabinet face frame to reduce glare and aim light toward the backsplash-to-counter work zone.
Use continuous runs across sink and prep spans, and bridge cabinet breaks with jumper leads.
Keep wiring accessible and follow NEC requirements for listed drivers and protected connections.
Decorative fixtures stay secondary here.
Kitchen Island Lighting: Size, Spacing, Hanging Height
For kitchen island lighting, you’ll size pendants or a linear fixture to the island’s length and required task illuminance, not just aesthetics.
You’ll space multiple fixtures evenly and maintain consistent edge setbacks to control shadows and glare across the work surface.
You’ll set hanging height to preserve clear sightlines while keeping the light source close enough for effective, uniform coverage.
Choosing Fixture Size
How do you choose a fixture size that lights your island evenly without crowding the sightlines? Start with island geometry: measure length and width, then reserve at least 6 inches of clear edge on all sides for visual comfort and task reach.
For a single linear pendant, target a body length about 2/3 to 3/4 of the island length. For multiple pendants, choose diameters that fit within that same usable zone.
Keep fixture size proportional to ceiling height: taller ceilings can handle deeper or wider profiles, while 8-foot ceilings favor slimmer forms.
Check photometrics: select lumen output and beam spread that cover the work surface, not the room. Prioritize scale balance over ornament.
Spacing And Hanging Height
Even if you’ve nailed fixture size, you won’t get clean, even task light until you set spacing and hanging height to control glare, shadows, and beam overlap.
For pendants over an island, space centers 24–30 inches apart, or about 1/2 to 2/3 of each fixture’s diameter, so beams overlap without hot spots. Keep the outer pendants 6–12 inches in from the island edge to reduce facial glare and keep light on the work zone.
Set bottom-of-shade height 30–36 inches above the countertop; if ceiling height exceeds 9 feet, raise in 3-inch increments to maintain sightlines.
If you’re near walls, maintain wall spacing of at least 12–18 inches to prevent scalloping and shadow bands.
Kitchen Light Bulbs: Lumens, Color Temp, CRI
Although fixtures and layout set the stage, the bulb’s specs determine what you actually see and how accurately food and finishes read. Start with lumens: plan roughly 30–50 lumens/ft² for ambient light, then verify task zones hit higher targets without glare. Compare packages by delivered lumens, not watts.
For Kitchen bulb types, choose LED for efficacy, dimming availability, and long rated life; confirm compatibility with your dimmer (ELV/triac) to prevent flicker.
Set Light color temperature by function: 2700–3000K for warmer, 3500K for neutral, 4000K for crisp. Specify CRI ≥90 (R9 included) so meats, greens, and cabinetry stains look accurate. Keep CCT consistent across lamps.
Accent Lighting Ideas for Cabinets and Shelves
For cabinet and shelf accents, you’ll get the most uniform task wash by mounting under-cabinet LED strips at the front rail and specifying low-glare diffusers and dimmable drivers compatible with your controls.
You should size strip output to the counter depth and keep consistent CCT/CRI with your general lighting to meet typical residential visibility expectations.
For open shelves, you’ll place small spotlights near the leading edge and aim them at the vertical display plane to control beam spread, minimize scalloping, and reduce direct glare.
Under-Cabinet LED Strips
When you install under-cabinet LED strip lighting, you add controlled, low-glare accent light that improves both task visibility and cabinet/shelf presentation.
Specify high-CRI (≥90) strips at 2700–3000K for warm finishes or 3500–4000K for neutral work surfaces, and target 150–300 lux on countertops.
Use continuous aluminum channels with diffusers to reduce dotting and meet good glare control practices.
For LED strip customization, choose cut points, corner connectors, and tunable-white drivers so you can match cabinet depth and visual tone.
Keep it energy efficient lighting by selecting strips with high efficacy (≥90 lm/W) and dimmable, UL-listed Class 2 power supplies.
Separate these strips on a dedicated dimmer-compatible circuit for predictable control.
Shelf Spotlight Placement
Under-cabinet LED strips handle broad, even countertop illumination. Shelf spotlights add precise accent control for cabinet interiors and open shelving.
For effective Shelf spotlight placement, aim fixtures 30–45° toward the back panel to minimize glare and highlight objects, not the lamp. Keep beam angles tight (15–25°) for glassware and art pieces; use 36–60° for stacked dishes and pantry bins.
Space spotlights 12–18 in. apart, or align one per shelf bay, centered on the viewing axis. Specify 90+ CRI, 2700–3000 K, and dimming to match ambient layers.
For kitchen shelf lighting, recess housings where possible, maintain ventilation clearances, and select UL/ETL-listed drivers rated for enclosed cabinetry to meet safety requirements.
Dimmers and Smart Controls for Kitchen Lighting
Although your fixtures define the look of your kitchen, dimmers and smart controls define how well that lighting performs across tasks, meals, and cleanup. Specify LED-rated, reverse-phase (ELV) dimmers to prevent flicker, pop-on, and drop-out at low levels. Match the control’s minimum load to your driver/lamps, and verify compatibility lists from the luminaire manufacturer.
Add smart switches or 0–10V controls where you need repeatable scenes: prep, dining, and night-light. Use Voice control through platforms that support local execution or robust cloud uptime, and set default levels to comply with household glare limits.
Program schedules and vacancy logic to improve energy efficiency, and enable power monitoring to validate savings. Require secure pairing, firmware updates, and manual override at the wall.
Kitchen Lighting Layout Mistakes to Avoid
Because your kitchen’s wiring and ceiling boxes lock in fixture placement for decades, layout mistakes can’t be “fixed” with brighter bulbs—they usually create shadows on the workplane, glare in common sightlines, and uneven illuminance that fails basic task-lighting targets.
Don’t center downlights on the room; place them over task zones and offset from cabinet faces so your body doesn’t block light at counters.
Avoid large spacing-to-mounting-height ratios; keep downlight spacing about 0.8–1.2× ceiling height above the workplane to limit scalloping.
Don’t mix Color temperature across layers; hold 2700–3500K with consistent CRI to prevent patchy food appearance.
Skip fixtures that you can’t service; plan Lighting maintenance access for drivers, lamps, and filters, and keep undercabinet runs continuous to prevent dark gaps.
Conclusion
When you layer ambient, task, and accent light, you’ll meet both aesthetics and performance targets in a code-minded layout. You’ll boost usability with under-cabinet task runs and correctly scaled island pendants, then fine-tune output using specified lumens, 2700–4000K color temperature, and high-CRI sources (90+). Add dimmers or smart controls to maintain consistent illuminance. Particularly, the U.S. DOE estimates LEDs use at least 75% less energy than incandescent lighting, improving efficiency.