

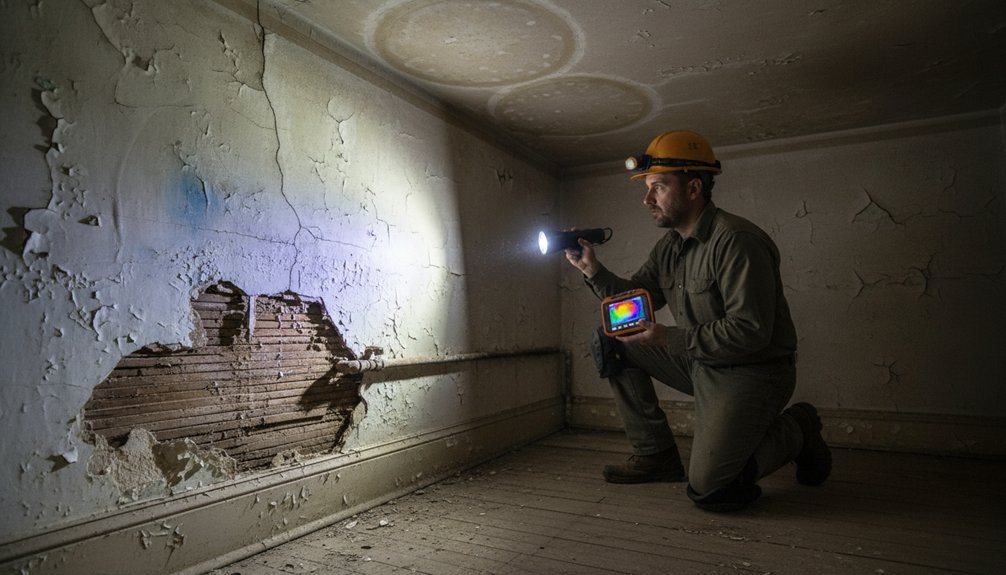
Start with a methodical walk-through: scan rooflines, flashing, gutters, and attic sheathing for stains, mold, and sagging. Check foundations and interior walls for stair-step cracks, widening gaps, and sloped or bouncy floors. Hunt moisture by smelling for mustiness, pressing for soft drywall or flooring, and tracking stains after rain. Open the panel to flag knob-and-tube, scorch marks, or double taps, and watch the meter for plumbing leaks. Next, you’ll see which inspections and buffers matter most.
Key Takeaways
- Inspect rooflines, flashing, gutters, and ceilings for sagging, missing shingles, overflow stains, and bubbling paint that signal hidden leaks.
- Check foundations and walls for stair-step cracks, widening gaps, sloped or bouncy floors, and shifted piers; document and consult a structural engineer.
- Track moisture clues—musty odors, soft drywall, cupped floors, loose tiles, and swelling trim—and use a moisture meter after rain or HVAC cycles.
- Test plumbing for silent leaks and corrosion: watch the water meter, listen for running toilets, and look for blue-green stains, rust water, or pipe flaking.
- Flag safety risks by testing windows and doors for racking, counting ungrounded outlets, and noting flickering lights or outdated, crowded electrical panels.
Walk-Through Checklist: Older Home Deal-Breakers
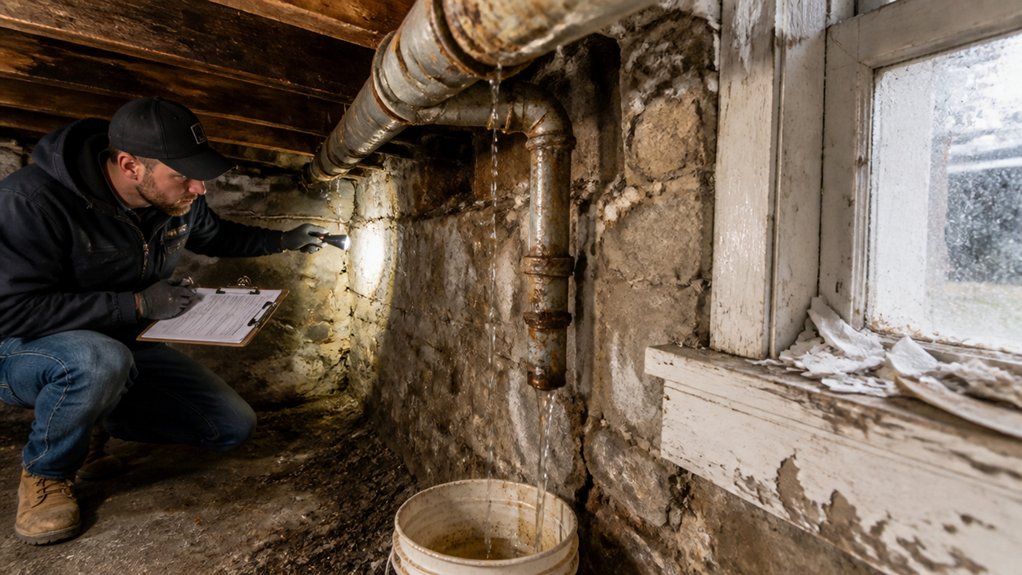
Before you fall in love with an older home’s character, run a fast but disciplined walk-through to spot deal-breakers that can turn a renovation into a money pit.
Start outside: scan rooflines for sagging, missing shingles, and failed flashing; check gutters and downspouts for overflow stains.
Inside, smell for persistent mustiness, then look for ceiling stains, bubbling paint, and warped trim that signal active leaks.
Test windows: operate sashes, note rot, and check for lead paint warnings.
Inspect electrical: count ungrounded outlets, note flickering lights, and flag a crowded, outdated panel.
Check plumbing: run taps, watch for slow drains, and inspect under sinks for corrosion.
Protect Historical features, but don’t let interior decor hide cracks, stains, or DIY shortcuts.
Foundation Red Flags in Older Homes
Start by scanning the foundation and interior walls for step cracks, widening gaps, or patched areas. Then confirm whether floors feel sloped, bouncy, or uneven as you walk.
Next, test doors and windows: you’re looking for sticking, new rubbing marks, or frames that sit out of square. If these issues cluster in the same area or appear to be worsening, you’re likely seeing structural movement that needs professional evaluation before you renovate.
Cracks And Uneven Floors
Although old houses often settle over time, certain cracks and floor dips can signal foundation movement that you can’t ignore. Inside, measure crack width and direction: stair-step cracks in masonry, widening diagonal drywall cracks, or gaps that reopen after patching deserve attention beyond interior décor touch-ups.
Use a marble or level to map slopes; note where floors dip near load-bearing walls or span long distances. In basements and crawlspaces, look for shifted piers, cracked footings, or separated mortar joints.
Outside, check whether drainage aims toward the house, and whether landscaping features like raised beds, downspouts, or hardscaping trap water at the foundation line.
Photograph and date findings, then consult a structural engineer before you plan finishes.
Doors And Window Misalignment
When a foundation shifts even slightly, doors and windows often show it sooner than finished surfaces do. Check whether doors rub, swing open by themselves, or won’t latch without lifting. Inspect the door frame: look for uneven gaps at the top and sides, split jambs, or shims that have slipped.
Move to windows and test every unit. If you have to force it, note where it binds. Examine the window sash for racking: one corner sits higher, gaps change across the perimeter, or locks won’t align. Also look for cracked caulk lines, wrinkled paint, and daylight at the sill.
Compare issues room to room; a consistent pattern along one wall often points to differential settlement. Document findings before you renovate, and consult a structural pro if changes appear recent.
Water Damage Clues (Stains, Smells, Soft Spots)
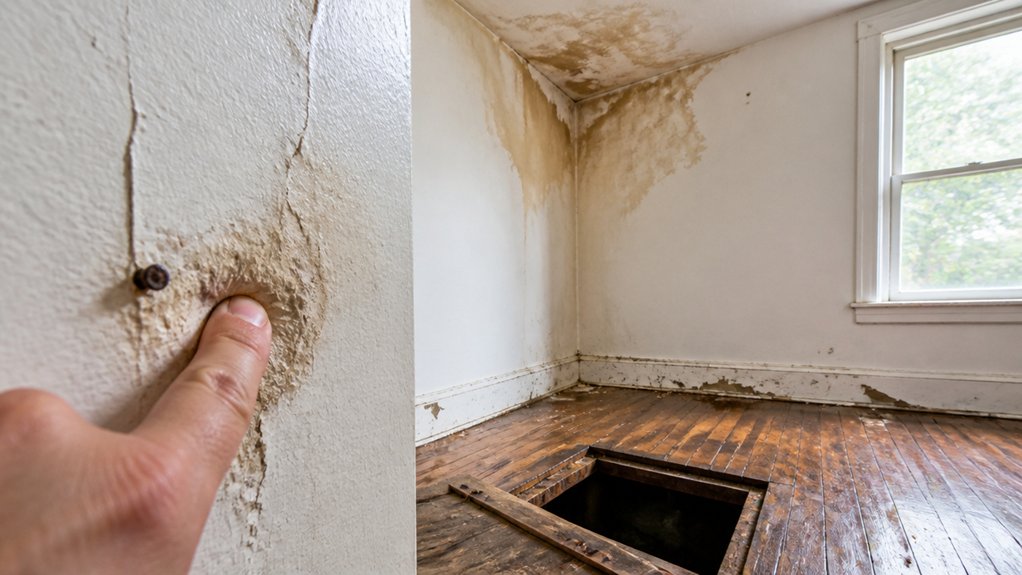
You can often spot water damage by scanning ceilings, walls, and trim for stains, yellowing, bubbling paint, or uneven discoloration.
Trust your nose too—musty or earthy odors usually point to persistent moisture in cavities, basements, or poorly ventilated rooms.
As you walk the house, press lightly on floors and around windows and tubs, since soft spots and spongy surfaces can signal rot or hidden leaks.
Telltale Stains And Discoloration
Before demolition dust and fresh paint can mask it, water damage often announces itself through stains, discoloration, odors, and subtle texture changes. Scan ceilings first: yellow-brown rings, dark halos around fixtures, and uneven paint sheen can mark old leaks.
Check exterior walls and window heads for vertical streaking that follows gravity. In bathrooms and kitchens, look for blotchy grout lines, rusty fastener marks, and swollen trim edges. Note alterations where materials meet—baseboards, crown, and tile backsplashes—because leaks often telegraph there.
On finished surfaces, flag paint peeling and wallpaper bubbling, especially in localized patches. Compare suspect areas to adjacent dry zones; moisture signatures usually fade outward with irregular borders, not crisp lines. Photograph and measure spots to monitor changes.
Musty Odors And Soft Spots
Even if surfaces look clean, a persistent musty odor and localized soft spots often reveal active or recurring moisture behind finishes. Don’t mask it with air fresheners; track it. Start at basements, crawlspaces, bathrooms, and under sinks, then move to exterior walls and around windows.
Note when smells intensify after rain or HVAC cycles, which can indicate damp insulation or hidden mold.
Test suspicious areas methodically. Press gently on drywall, trim, and subfloor near toilets, tubs, and exterior doors; spongy give, crumbling wood, or loose tile often signals rot. Look for swelling, peeling paint, rusted fasteners, and buckled flooring near the soft spots.
Use a moisture meter if you can, and trace upward to the likely leak source before planning any demolition.
Hidden Electrical Risks (Knob-and-Tube, Panels, DIY)
Although the wiring sits behind plaster and trim, older homes often hide electrical systems that can’t support modern loads or meet current safety standards. Start by identifying knob and tube wiring in attics, basements, or open cavities; look for ceramic knobs, tubes, and brittle cloth insulation, and confirm whether circuits were improperly spliced or buried under insulation.
Next, inspect the service panel: you’ll want clear labeling, intact knockouts, no scorch marks, and sufficient amperage for today’s appliances. Check for double-tapped breakers, mixed wire gauges, and aluminum branch wiring.
Finally, evaluate DIY electrical risks: reversed polarity, open grounds, overloaded receptacles, extension-cord “permanent” runs, and unpermitted junction boxes. If you spot any of these, bring in a licensed electrician before demolition starts.
Plumbing Red Flags Behind Walls and Floors
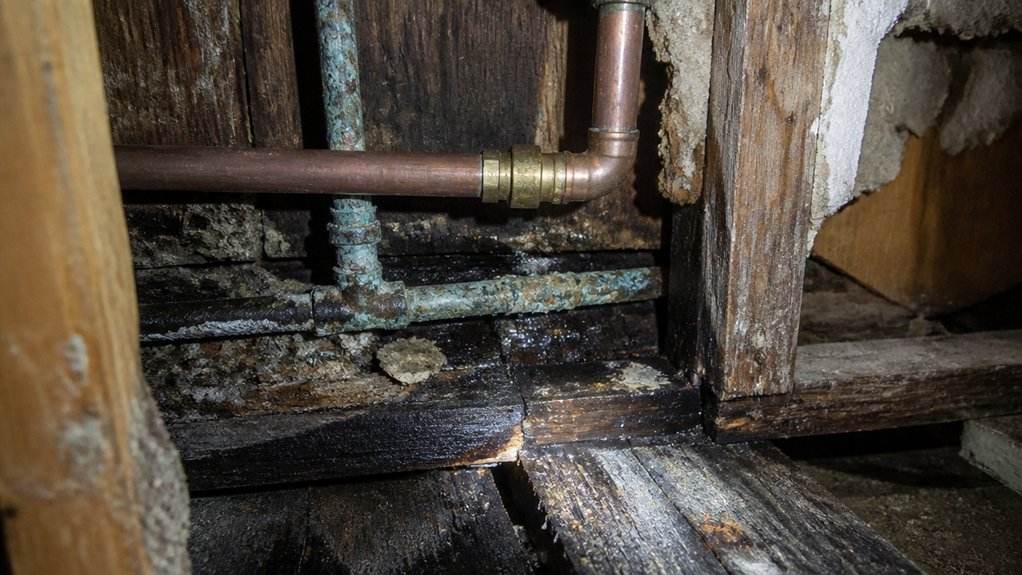
You’ll want to scan walls, ceilings, and flooring for persistent moisture stains, since they often indicate slow leaks or past water intrusion.
You should also test multiple fixtures for low water pressure, because inconsistent flow can point to supply restrictions or failing lines.
If you spot discoloration, flaking, or mineral buildup near exposed sections, you’re likely seeing hidden pipe corrosion that may extend behind walls and under floors.
Persistent Moisture Stains
Why do moisture stains keep reappearing after you’ve cleaned, painted, or patched the surface? You’re likely dealing with an active leak or condensation trapped behind finishes. Treat the stain as evidence, not a cosmetic flaw.
Map the stain’s edges with pencil, then recheck after showers, laundry cycles, or rain to see when it grows. Feel for soft drywall, cupped flooring, or loose tile, and note musty odors for Mold prevention planning.
Use a moisture meter on adjacent surfaces; compare readings to a dry control wall. Inspect accessible plumbing joints under sinks and around tubs, and check penetrations where pipes pass through framing.
If you open the area, add moisture barriers and replace damp insulation before refinishing.
Low Water Pressure Signs
When water pressure drops at one fixture—or throughout the house—treat it as a diagnostic clue, not an inconvenience. Note whether it happens only at peak use, after a toilet refills, or when multiple taps run.
Compare hot versus cold at the same faucet; a difference can narrow the issue to a localized supply path or a valve that’s partially closed.
Check under sinks for kinked connectors, clogged aerators, and failing shutoff valves, then verify the main shutoff is fully open.
Listen for constant running at toilets and watch the water meter with all fixtures off; movement points to household leaks.
Low pressure can also signal a hidden break under floors, undermining Water conservation goals. Document patterns before you renovate.
Hidden Pipe Corrosion
Where does corrosion hide in an older home’s plumbing system? It often starts at joints, shutoff valves, elbows, and any changeover between metals, then spreads inside walls, under slabs, and beneath fixtures.
You can’t rely on visible pipe alone; corrosion may thin the interior while the exterior looks intact, accelerating pipe degradation and pinhole leaks.
You should watch for blue-green stains, rust-colored water, metallic taste, recurring clogs, or damp drywall and warped flooring near bathrooms and kitchens.
Check exposed copper for pitting and white crust, and galvanized for flaking or bulges.
During renovation planning, schedule a corrosion inspection: pressure-test suspect lines, scope drains, sample water for pH and hardness, and verify bonding/grounding to reduce galvanic action.
Replace compromised runs, not just fittings.
Roof and Attic Warning Signs to Check
Even if the roof looks fine from the street, the attic often reveals early clues that water, heat, or structural issues are already developing. Start with a Roof inspection: look for missing, curled, or brittle shingles, soft decking at eaves, and flashing gaps around chimneys and valleys.
Inside, scan sheathing for dark stains, mold specks, or white mineral trails that indicate past leaks. Check rafters for cracking, sagging, or sistered repairs that signal load problems.
Assess Attic ventilation by confirming soffit and ridge vents aren’t blocked by insulation or debris, and note excessive rust on nails, warped sheathing, or damp insulation.
Finally, inspect gutters and downspouts for overflow marks that can drive water back under shingles.
HVAC and Ventilation Problems That Trap Moisture
Because older HVAC setups often move air unevenly, they can quietly trap moisture in wall cavities, basements, and attics long before you see visible mold or rot.
Start by checking whether supply and return vents balance airflow: closed or undersized returns can leave rooms clammy and pressurize hidden cavities. Inspect the air handler and ductwork for sweating, rust, or microbial staining, and confirm the condensate line drains freely without backups.
Measure indoor relative humidity during typical operation; sustained readings above 60% signal poor moisture control and reduced HVAC efficiency.
Next, evaluate ventilation quality in kitchens, baths, and laundry areas: verify fans vent outdoors, run at adequate airflow, and use timers or humidity controls.
Finally, review filter loading and coil cleanliness, since restricted airflow increases condensation risk.
Insulation Gaps and Air Leaks You Can Feel
Although you can’t see insulation gaps and air leaks without opening walls, you can often feel them during a careful walkthrough. On a cool or windy day, move slowly along exterior walls, especially near corners, knee walls, and attic hatches, and note any cold drafts on your hands or face.
Check around window and door casings, baseboards, and outlets for air leakage, and listen for whistling. Use a smoke pencil or a tissue to confirm airflow direction and strength.
During an insulation inspection, look for uneven room temperatures, cold floors over crawlspaces, and condensation on interior glass that signals chilled surfaces.
If you can, review utility bills for spikes that suggest heat loss.
Pests, Rot, and Failing Structural Wood
When you renovate an older home, pests and moisture often reveal themselves first in the wood framing and sheathing, so you should evaluate these areas before you plan any cosmetic work.
Start in basements, crawlspaces, and rim joists, then move to window sills, porch connections, and roof edges where water concentrates.
Probe suspect lumber with an awl; sound wood resists, while softened fibers indicate wood rot.
Look for mud tubes, frass, exit holes, and hollow-sounding members that suggest a pest infestation.
Check for sagging joists, split beams, or crushed posts that signal load-path failure.
Track stains to their source, because recurring leaks keep damage active.
Document locations and extent so you can prioritize repairs logically and sequence work safely.
Inspections to Book + Budget Buffer to Add
After you’ve flagged any suspect wood and moisture paths, get targeted inspections on the calendar so you can confirm root causes, price fixes accurately, and lock in a realistic scope.
Start with a licensed home inspector, then add specialists: structural engineer for sagging floors or cracked masonry, pest inspector for termites/carpenter ants, HVAC tech for combustion safety, plumber for drain scopes, electrician for panel and knob-and-tube, and a roofer for flashing and decking.
If you’re changing grades or adding patios, book a drainage or soils consult tied to your landscaping design.
Ask for written findings, photos, and repair ranges you can compare across bids.
Then add a 15–25% budget buffer for hidden damage, code upgrades, and finish impacts to Home decor selections.
Conclusion
Before you swing a hammer, you walk the rooms like a flashlight beam: slow, steady, unsentimental. You trace foundation cracks, follow rust-colored stains, and press for spongy flooring that gives under your shoe. You sniff for damp air, note hot outlets or dated panels, and listen for pipes that knock behind plaster. You check vents, feel drafts at trim, and scan joists for frass or rot. Then you book inspections and pad your budget.