


Start by choosing your main goal (deep focus, calls, or task switching) and set two constraints like noise and shared hours. Place your desk slightly off the window and out of the doorway sightline, with your monitor perpendicular to light to cut glare. Map three zones—Deep Work, Calls, Admin—and label trays so tools stay put. Build a “power wall” with mounted strips and labeled cables. Keep essentials within 30–45 cm, then refine weekly for smoother days.
Key Takeaways
- Set one primary goal and two constraints, then design three zones: Deep Work, Calls, and Admin, each with dedicated tools.
- Keep the deep-work zone visually quiet: limit active projects, store extras, and reset surfaces daily in two minutes.
- Optimize ergonomics: feet flat, knees 90–100°, forearms level, monitor at eye height, and essential tools within 30–45 cm.
- Reduce glare and eye strain: place monitors perpendicular to windows, use adjustable window treatments, and add soft, front-facing lighting.
- Cut friction with power and cables: create a labeled “power wall,” mount surge strips, route cables in channels, and bundle slack with Velcro ties.
Choose a Home Office Layout Goal First

Before you move a desk or buy organizers, decide what you want your home office layout to achieve—deep focus, fast task switching, frequent video calls, or minimal physical strain—because each goal requires different placement, lighting, and storage choices.
Write your top goal and two constraints (noise, shared space, hours) so you can judge every change against them.
If you need deep focus, reduce visual clutter and keep only one active project in reach; research links clutter to higher perceived stress.
If you switch tasks often, create distinct zones: a “current work” surface and a “reference/printing” spot to cut context-switch costs.
For frequent calls, plan a consistent background using personalized decor and controlled lighting.
For strain reduction, prioritize ergonomic accessories and keep high-use items within forearm reach.
Pick the Best Desk Location (Focus vs. Foot Traffic)
If you place your desk facing away from the door, you’ll register every approach as a surprise, which can pull your attention off-task and raise stress.
Turn your desk so you can see the entry and position it outside main walk paths—aim for at least 3 feet of clearance behind your chair to keep foot traffic from brushing past you.
Create a traffic-free desk zone by aligning your chair with a wall or corner and routing household movement along the room’s perimeter instead of through your workstation.
Facing Away From Door
Why does facing away from the door feel surprisingly stressful for some people, even in a quiet home office? Your brain keeps monitoring for unexpected approach, which increases vigilance and can fragment attention.
If you can’t rotate the desk to see the entry, reduce “startle” cues with Privacy barriers: place a low bookcase or plant behind you to block motion, or use a chair with a higher back to narrow your visual field.
Pair that with lighting strategies that lower glare and boost perceived safety. Aim a desk lamp toward your work surface, not the doorway, and avoid bright backlighting that silhouettes passersby.
If possible, add a soft wall sconce near the door so changes in light don’t spike your alertness.
Traffic-Free Desk Zones
Although an open spot near the hallway can feel convenient, putting your desk in a traffic path often taxes attention because your brain automatically tracks nearby movement and sound, increasing interruptions and task-switching.
Choose a location that’s naturally shielded from pass-through routes: a corner, alcove, or the far end of the room. Treat these as traffic free zones—no walking behind your chair, no door-to-desk sightline, and no shared storage that pulls people past you.
If you can’t relocate, create Quiet zones with a bookcase, screen, or plants to block motion cues and dampen noise. Aim for 3–4 feet of clearance behind you and place printers, files, and chargers outside your reach zone to cut “quick stops.”
Angle Your Desk for Light and Fewer Interruptions
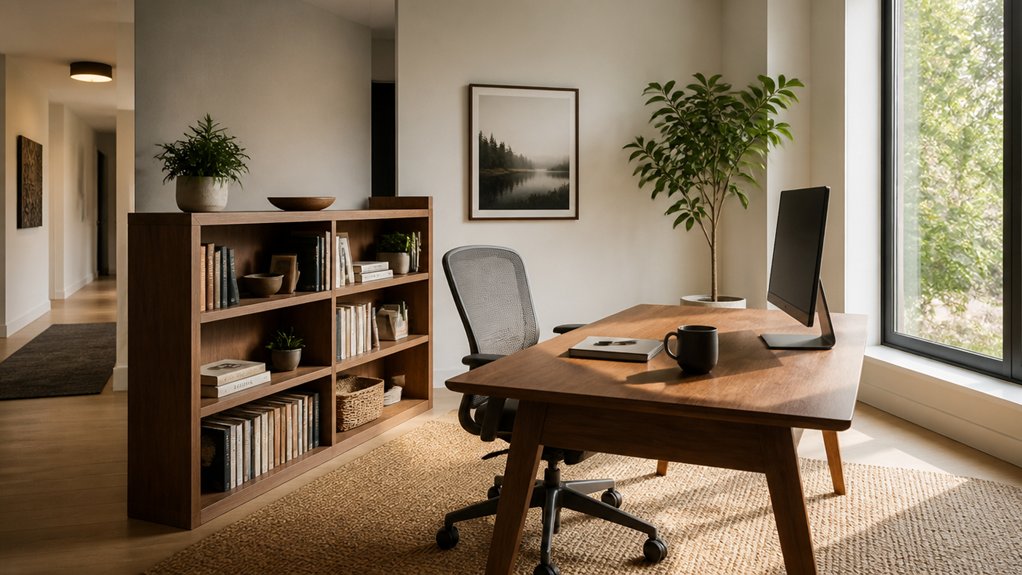
Angle your desk so you face the window at a slight offset, which gives you steady daylight without direct glare on your screen.
Keep the door and main walkway out of your direct line of sight, since frequent motion cues pull your attention even when you don’t engage.
This simple rotation boosts visual comfort and cuts interruption triggers, helping you stay focused longer.
Position Desk Toward Window
When you position your desk to face a window—slightly off-center instead of square-on—you’ll get steadier daylight on your work surface while keeping glare out of your direct line of sight. Aim for a 20–30° angle so your screen stays readable and your eyes don’t constantly adapt between bright outdoors and darker tasks.
Use Natural lighting as your primary source, then control contrast: place your monitor perpendicular to the window, lower brightness, and match it to room luminance.
Add Window treatments like light-filtering shades or adjustable blinds to cut harsh midday sun without making the room cave-dark. If reflections persist, choose a matte screen protector and keep the window behind your non-dominant shoulder to reduce squinting.
Finish by keeping frequently used tools in the lit zone so you don’t reach into shadow.
Reduce Doorway Sightlines
Natural light helps you stay alert, but your line of sight matters just as much for staying calm and focused. If your desk faces the doorway, every movement triggers orienting responses that fragment attention.
Reduce doorway visibility by angling your desk 30–45 degrees away from the door while keeping the window in your peripheral view. This simple sightline management cuts “startle checks” and lowers perceived interruptions without blocking access.
Keep the door within a quick head turn, not your direct gaze, so you control when you engage. If you can’t rotate the desk, add a tall plant, screen, or bookcase that masks the doorway from your seated position.
Pair this with a small task light to prevent glare when you shift angles. Re-test after a day and adjust.
Claim the Wall With Outlets (Your “Power Wall”)
Because cord clutter and outlet-hunting add friction to even simple tasks, you’ll lower stress and smooth your workflow by designating one outlet-rich wall as your “power wall.” Place your desk and charging station along this wall so your laptop, monitor, task light, printer, and phone dock plug in without crossing walkways or dangling behind your chair.
Mount a surge-protected power strip (or under-desk raceway) to keep plugs accessible but contained. For better power outlet organization, label each plug and keep a spare outlet open for temporary devices.
Route cables in adhesive channels down one leg, then bundle slack with Velcro ties so nothing drags. Add wall-mounted storage (a narrow shelf or peg rail) above the strip for chargers, adapters, and a small power bank.
Map Three Zones: Deep Work, Calls, Admin
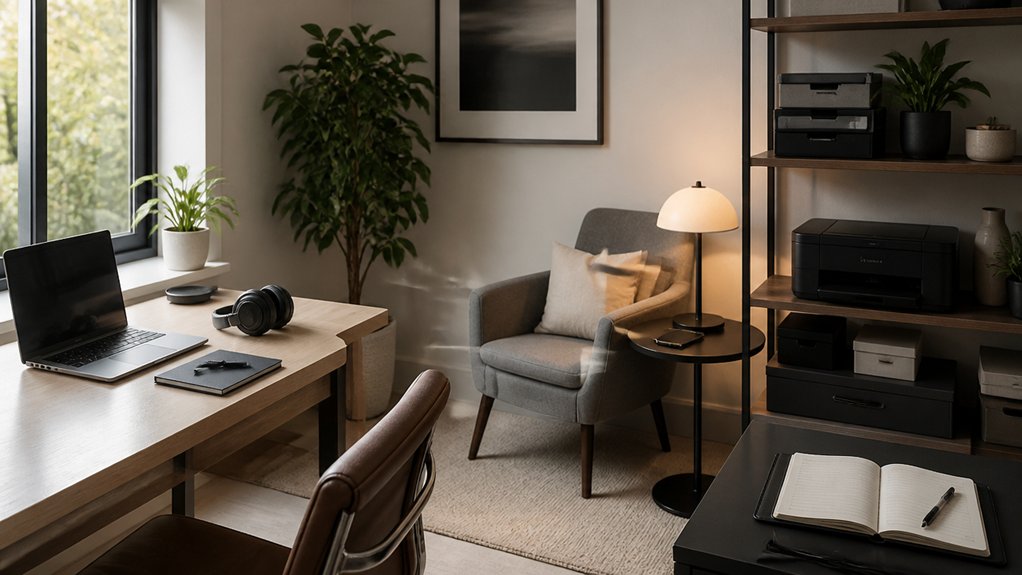
Although one desk can handle everything, you’ll reduce context switching and decision fatigue by mapping three clear zones—Deep Work, Calls, and Admin—so each task has a default place and setup. Use Zone separation to encode habits: when you sit in a zone, you know what “good work” looks like without redeciding.
Place your Calls zone near your door or a window so you can stand, pace, and keep your voice steady; keep headset, webcam, and a simple notepad there.
Put Admin near storage and your “Power Wall” so scanning, charging, filing, and shipping happen in one loop. Label each zone with a small tray or caddy for its tools.
This reduces tool-hunting and improves Workflow efficiency across your day, measurably.
Set Up a Deep-Work Zone With Minimal Reach
Set your deep-work zone by drawing a distraction-free perimeter: keep notifications, extra screens, and visual clutter out of your forward field of view.
Align your chair and desk so your elbows stay near 90°, wrists neutral, and the monitor sits at eye level to reduce strain that breaks focus.
Limit arm’s-reach tools to only what you’ll use in the next 30–60 minutes—keyboard, mouse, notebook, and water—while everything else moves outside your reach.
Define Distraction-Free Perimeter
When you draw a clear boundary around your primary work surface, you cut down on “micro-distractions” that repeatedly pull your attention off-task. Keep a 2–3 foot perimeter around your desk that stays function-only: laptop, one notebook, water, and a single pen cup. Everything else goes behind you or in closed storage to reduce visual clutter and lower attentional switching costs.
Control background noise at the perimeter, too: place a soft surface (rug, curtain) within the zone to dampen reflections, and position a fan or white-noise source outside your reach so you can’t fidget with it.
Route chargers and cords along the back edge with clips; a clean edge prevents impulsive tidying. Reset the perimeter at day’s end in 60 seconds.
Optimize Chair-Desk Alignment
A distraction-free perimeter works best if your chair and desk don’t force constant reaching, twisting, or re-positioning. Start by setting chair height so your feet rest flat and knees sit near 90–100 degrees; this supports circulation and reduces fidgeting.
Adjust seat depth so you’ve got 2–3 fingers between the seat edge and the back of your knees for seating comfort without pressure.
Bring the chair close enough that your elbows stay near your sides, then set desk height so forearms run level to slightly downhill, helping ergonomic posture and lowering shoulder load.
If your desk is fixed, use a footrest or seat cushion to keep angles consistent.
Align your torso square to the desk to minimize micro-rotations.
Limit Arm’s-Reach Tools
Because every extra reach adds time and small postural shifts, you’ll work calmer and faster if you limit what lives inside your arm’s-reach zone to only the tools you use for deep work. Keep your keyboard, mouse, primary notebook, and water within a 30–45 cm radius, centered on your midline to reduce shoulder abduction and neck rotation.
Place a vertical document holder or monitor riser among your ergonomic accessories only if you use it daily; otherwise, store it off-desk.
Move chargers, mail, and secondary devices to a side shelf so you don’t cue task-switching.
If you want decorative accents, keep one small item behind the monitor, not beside your hands.
Reassess weekly: if you didn’t touch it, relocate it.
Keep Your Core Tools Within One Arm’s Length
Although a sprawling desk can look productive, your workflow improves and your stress drops when you keep the tools you use most within one arm’s length. Put your keyboard, mouse/trackpad, phone, and primary notebook in a semicircle around your dominant hand, with the monitor centered and the top at eye level to reduce neck flexion.
Use a simple test: if you reach and your shoulder lifts or your torso twists, move the item closer or remove it.
Add Ergonomic accessories like a wrist rest, document holder, and footrest so you maintain neutral wrists and hips.
Pair that with lighting solutions: place a task lamp opposite your dominant hand, aim it at documents (not the screen), and keep glare low to cut eye strain.
Create a Call Zone With Clean Backgrounds
Set up a dedicated call zone so you’re not improvising your camera angle, lighting, and acoustics each time you join a meeting.
Choose a neutral, non-reflective backdrop (plain wall, solid curtain, or bookcase with minimal items) to reduce visual noise and keep attention on your face.
Control distractions by removing clutter from the camera frame, parking cables and peripherals out of sight, and placing a “do not disturb” cue at the zone’s edge to cut interruptions.
Neutral Backdrop Selection
When you build a dedicated call zone, a neutral, uncluttered backdrop reduces visual noise for you and distractions for everyone on the other end of the line. Choose matte, low-contrast finishes that minimize glare and camera exposure shifts; flat paint or fabric panels outperform glossy art and reflective frames.
Stick to calm color schemes—soft gray, warm white, greige, or muted blue—because high saturation and strong patterns can trigger visual scanning and fatigue. Keep your backdrop depth simple: one consistent tone beats busy shelves.
If you want personality, limit decorative accents to one or two small, nonreflective items with clean edges, placed off-center. Remove brand logos, high-contrast books, and dangling cords so your camera sees stable shapes, not clutter. Test on video and adjust until faces stay the focal point.
Dedicated Call Area Setup
To reduce cognitive load and keep calls running smoothly, carve out a small, repeatable “call zone” with a fixed camera angle, consistent lighting, and a clean background. Lock your chair and camera positions with floor tape so you don’t re-adjust each meeting.
Prioritize call area ergonomics: set your seat height so elbows rest near 90 degrees, place the mic 6–12 inches from your mouth, and keep your screen top at eye level to limit neck strain. Use stable, front-facing light (window or lamp) to reduce squinting and fatigue.
Apply soundproofing strategies: add a dense rug, hang a thick curtain, and place soft panels or a bookcase behind you to cut echo. Keep a dedicated charger and headset there for reliability.
Visual Distraction Control
Because your brain keeps scanning for motion and clutter, a clean, repeatable call-zone background lowers distraction and helps you stay on-script. Face a plain wall or a closed bookcase; remove bright posters, moving fans, and open doors from the camera frame.
Set a consistent “parking spot” for pens, mug, and headset so you don’t fidget-search mid-call.
Use simple Color schemes: one neutral backdrop plus one muted accent keeps visual load low and looks intentional on video.
Make smart lighting choices: place a diffused key light at 30–45 degrees from your face, keep window light to the side, and avoid overhead glare that creates eye shadows.
Hide cords, silence notification lights, and keep pets out during calls.
Add a Quick Admin Station for Short Tasks
Although your main desk might feel like the obvious place to handle every task, setting up a quick admin station for two-to-five-minute actions can cut context switching and keep deep-work sessions intact.
Place it just outside your primary sightline, within one step, so you don’t break focus with a full relocation. Equip it with only what supports streamlined tasks: a charging dock, labeler, stamp/pen, inbox tray, and a small timer.
Use a standing-height surface if possible; standing nudges you to finish fast and return to core work.
Batch micro-actions (signing forms, scanning receipts, filing) into two daily windows, and cap each window at 10 minutes.
For quick organization, add a single “done” tray and calendar capture pad.
Reset Surfaces: A Clutter-Free Layout Plan
When your work surfaces “reset” to empty at the end of each day, you reduce visual clutter that quietly taxes attention and increases stress. Treat your desk like a runway: only today’s tools land there, everything else gets grounded.
Research on attention shows competing items pull working memory, so use strict surface organization: one inbox tray, one active-project slot, and one pen cup. Assign every category a home within arm’s reach, then label it.
For clutter management, set a two-minute shutdown: file papers, return devices to a dock, wipe the surface, and stage tomorrow’s top three items. Limit décor to one calming object; more becomes noise.
If you can’t clear it in two minutes, it doesn’t belong on the surface.
Route and Hide Cables Before You Lock In Furniture
Before you commit to desk and storage placement, map your power and data paths so cables don’t become daily friction points. Trace outlet locations, modem/ethernet runs, and where you’ll charge devices, then measure cord lengths with slack for sit-stand movement.
Plan Cable management around human traffic: keep runs off foot paths and away from chair casters to prevent snags and trip risks. Use adhesive raceways along baseboards, under-desk trays, and velcro ties to bundle by function (power vs. data) to reduce interference and simplify troubleshooting.
Choose Furniture concealment tactics early: align desk grommets with power bricks, place a power strip under the desktop, and hide excess cord in a cable box. Label both ends for faster resets later.
Use Vertical Storage to Free Up Floor Space
Clean cable paths keep the area around your desk safe and snag-free, and you can protect that calm by moving storage up the walls instead of letting it sprawl across the floor. Vertical storage reduces visual clutter and shortens search time because items stay in consistent, labeled locations.
Mount shelves above your primary reach zone, and keep daily-use supplies at eye level to cut unnecessary bending and re-stacking. Use pegboards or rail systems for tools, headphones, and chargers so surfaces stay clear.
Add a narrow wall cabinet or floating drawers for paper, then cap it with a tray for in-progress work. Leave Floor space open for easy cleaning and fewer trip hazards.
Anchor heavy units into studs, and set weight limits.
Set Chair, Desk, and Monitor Heights Together
Although you might adjust your chair, desk, and monitor one at a time, they work as a single system, and mismatched heights quickly lead to neck, shoulder, and wrist strain that can raise stress and slow you down.
Start with seating comfort: set chair height so your feet rest flat and knees sit near 90–100°. Then set the desk so your shoulders stay relaxed and elbows land around 90°, with forearms level and wrists neutral while typing.
If the desk is fixed, use a footrest or seat cushion as ergonomic adjustments.
Place the monitor about an arm’s length away, with the top third of the screen at or slightly below eye level.
Finally, align keyboard and mouse close together to avoid reaching and tension.
Reduce Noise With Door, Desk, and Soft-Furniture Moves
Once your chair, desk, and monitor sit at the right heights, the next stress trigger to tackle is noise—because unpredictable sound spikes raise cognitive load and break focus. Start with your door: add a sweep and perimeter weatherstripping to cut hallway leaks.
Position your desk so your ears don’t face the door gap; rotate 90° or move deeper into the room to reduce direct sound paths. Use soft furniture as absorbers: place a loveseat, upholstered chair, or thick curtains on hard, reflective walls to lower reverberation and make speech less intelligible.
For targeted Soundproofing strategies, block and absorb: seal cracks, then add mass with a bookcase on the shared wall. Optimize Acoustic panel placement at first-reflection points beside and behind your monitor, and above if possible.
Update Your Layout as Your Schedule and Tools Change
As your calendar shifts and your tech stack evolves, your layout needs to evolve with it to keep friction—and stress—low. Audit your week: if you’re on calls most mornings, face your desk toward a neutral background, keep your mic and webcam within arm’s reach, and place reference notes at eye level to cut neck strain.
If you need schedule flexibility, use a rolling cart or caddy so your “meeting kit” and “deep-work kit” can swap in under two minutes.
When you add a second monitor, re-center your primary display and keyboard to your midline, then angle the secondary screen 20–30 degrees.
Upgrade ergonomic accessories (chair supports, wrist rest, footrest) after any height change, and recheck elbow and eye-line angles.
Conclusion
Start by choosing a layout goal, then place your desk where focus beats foot traffic and daylight doesn’t glare on your screen. Build your “power wall” to cut cable clutter and keep devices charged. Zone your room for deep work, calls, and admin so task-switching drops. Set chair, desk, and monitor heights together to reduce strain. Add soft surfaces and door positioning to lower noise. Treat your setup like a compass—recalibrate as tools and schedules change.