


Renovate a home on a tight budget by setting a hard max spend that includes permits, inspections, labor, materials, and a 10–20% cash contingency. Walk each room, fix safety and code issues first, then rank projects by livability and resale impact. Lock scope, allowances, exclusions, and change-order markups in writing, and get three comparable quotes. Phase work into inspection-ready chunks to avoid rework. Next, you’ll see where to splurge, save, and DIY safely.
Key Takeaways
- Set a firm total budget, then lock scope in writing with clear inclusions, exclusions, and realistic allowances per room.
- Prioritize safety and code items first, pulling permits and planning inspections to avoid rework and costly violations.
- Get at least three detailed bids using the same scope, and cap change-order markups with written approvals only.
- Buy midgrade, code-compliant materials, shop surplus and closeouts, inspect carefully, and purchase 10% extra for cuts.
- Save with DIY low-risk tasks like painting and caulking, while hiring licensed pros for electrical, plumbing, and structural work.
Build a Budget Renovation Game Plan (Fast)
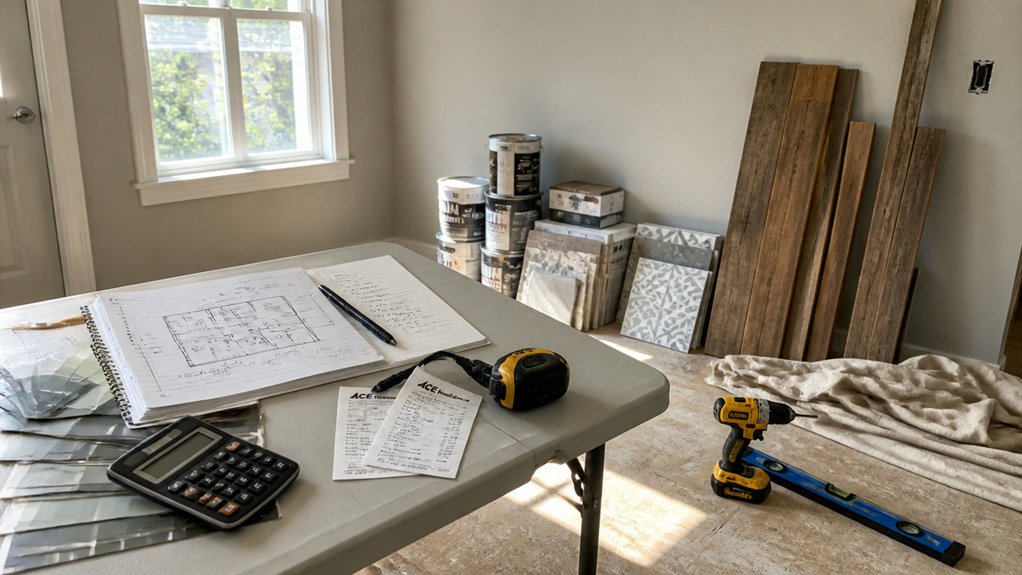
Before you buy materials or swing a hammer, map your renovation around three nonnegotiables: safety, code compliance, and budget. Walk every room, note hazards (wiring, leaks, structural cracks), and schedule pros for anything permitted or life-safety related. Pull required permits, plan inspections, and keep documentation so you don’t pay twice.
Next, list repairs and upgrades, then rank them by impact and difficulty. Group tasks by trade to cut mobilization costs, and plan demolition to expose issues early. Choose finishes that match Design trends but stay readily available and durable.
If you want Luxury upgrades, target high-visibility, low-scope swaps—hardware, lighting, faucets—without moving plumbing or walls. Finally, set a realistic timeline, include lead times, and reserve contingency days for surprises.
Set Your Maximum Renovation Budget Number
Now you’ve got a game plan, you need a hard maximum budget number that you won’t exceed. Calculate your total spend limit by pricing code-required permits, inspections, materials, and labor first.
Then, cap everything else to fit. Add a contingency buffer (typically 10–20%) so surprises don’t force unsafe shortcuts or failed inspections.
Calculate Total Spend Limit
Pick one hard number for your total renovation spend limit, and make it non-negotiable. Base it on cash you can pay today, not wishful financing.
Then list every scope item required for a safe, code-compliant job: permits, inspections, licensed trades, debris disposal, and required upgrades like GFCI/AFCI protection, ventilation, or handrails.
Price materials at midgrade, include tax and delivery, and lock allowances by room.
Next, rank wants versus needs. If the number doesn’t work, cut scope before you start: keep existing cabinets, refinish instead of replace, or simplify color palettes and furniture arrangements to avoid moving walls.
Put the limit in writing, share it with bids, and reject any proposal that exceeds it.
Add A Contingency Buffer
One number should define your true “do-not-cross” budget: your total spend limit plus a contingency buffer. Set it before you sign contracts so you don’t “borrow” from future phases.
For most tight-budget renovations, add 10–15% for unknowns; push to 20% if you’re opening walls, moving plumbing, or working on older homes.
Keep the buffer real cash, not credit, and don’t count DIY “savings” unless you’ve priced materials and permits.
Use it only for legitimate surprises: hidden rot during roof repair, failed inspections, code-required upgrades, or price spikes.
If you don’t spend it, roll it into finishing touches like landscaping design or energy-efficient fixtures, but only after final inspections close out.
Get Real Contractor Quotes (and Compare Scope)

Before you commit to any major renovation, get at least three written contractor quotes based on the same clearly defined scope, drawings, and finish schedule so you’re comparing apples to apples.
For Contractor selection, require proof of license, insurance, and permits where your jurisdiction demands them, and ask who’ll actually supervise the job.
Do a Scope comparison line by line: demo, framing, MEP rough-ins, insulation, drywall level, waterproofing, ventilation, trim, paint, cleanup, and hauling.
Confirm allowances for tile, fixtures, and flooring, and cap change-order markups in writing.
Check start dates, duration, payment schedule tied to inspections/milestones, and warranty terms.
If one bid is low, make the contractor explain exclusions before you sign.
Get everything in a contract.
Rank Rooms by Livability and Resale Impact
If you’re renovating on a tight budget, rank rooms by what makes the house livable now and what buyers pay for later, then spend accordingly. Put safety and function first: roof leaks, electrical hazards, plumbing failures, and HVAC issues must meet code and pass inspection.
Next, prioritize kitchens and bathrooms, where modest refreshes (paint, fixtures, lighting, resurfacing) raise value without costly Luxury upgrades.
After that, improve bedrooms and living areas with durable flooring, neutral finishes, and adequate egress and smoke/CO alarms.
Save cosmetic extras for last and avoid overbuilding for the neighborhood. If your home has character, choose repairs that support Historical preservation—restore trim, refinish doors, repair windows—because authenticity sells.
Document permits and receipts to reassure future buyers.
Phase Your Budget Renovation to Stay Cash-Flow Safe
Because tight budgets break when surprises pile up, phase your renovation into inspection-ready chunks you can finish and pay for without floating debt. Start with safety and compliance: roof leaks, electrical hazards, plumbing failures, and required permits.
Close each phase with a clear pass point—finaled inspections, tested systems, and a clean punch list—before you start the next scope. Lock material orders to the phase to avoid storage and change fees, and keep a 10% contingency per phase, not for the whole project.
Plan phase sequencing around furniture placement so you can live in the home without paying for moves. Choose stable color schemes early to prevent repainting and mismatched finishes.
Track invoices weekly and pause when cash tightens.
DIY the Right Jobs (Avoid Costly Mistakes)
When you DIY on a tight budget, treat your labor like a tool—use it where mistakes stay cheap and code requirements stay simple. Stick to paint, caulk, trim, cabinet pulls, and basic home decor updates that you can undo without tearing out work. Prep well: clean, sand, patch, and prime so finishes last and you don’t pay twice.
Leave high-risk, permit-heavy work to pros: electrical service changes, new circuits, gas lines, structural walls, roofing, and major plumbing moves. If you DIY near code, pull permits, follow manufacturer specs, and schedule inspections.
For curb appeal, handle low-risk landscaping ideas: mulching, planting, edging, and grading away from the foundation. Rent tools, use PPE, and stop if you’re guessing.
Where to Find Cheap Materials That Still Last

You can cut costs without sacrificing durability by shopping at salvage and reuse centers for doors, cabinets, and fixtures that still meet local code. You’ll often score solid materials for pennies on the dollar, but you should inspect for damage, verify ratings (like fire doors), and confirm you’re allowed to reuse them.
For new-but-cheap options, discount surplus suppliers can get you overstock tile, flooring, and hardware at steep discounts while keeping specs and warranties intact.
Salvage And Reuse Centers
Even if your budget’s razor-thin, salvage and reuse centers can supply durable doors, cabinets, flooring, lighting, and trim for a fraction of retail. Call ahead for inventory, measure openings, and bring photos so you buy once. Choose solid wood over particleboard, and inspect for rot, warping, and cracked glazing.
For electrical, only buy fixtures with intact housings and UL/ETL labels, then have a licensed electrician verify grounding and box compatibility.
Look for sinks and toilets with no chips at the flange, and confirm they meet current flow requirements.
Pair finds with upholstery cleaning and antique restoration to refresh furniture without replacing it.
Ask about return policies, and budget for new fasteners, shims, and code-rated fire-blocking materials.
Discount Surplus Suppliers
Two reliable places to score long-lasting materials for less are building-material surplus outlets and contractor overstock yards. You’ll find discontinued tile, unopened boxes of flooring, extra framing lumber, and sometimes windows or doors pulled from over-orders.
Ask for spec sheets and verify ratings (fire, moisture, slip, and structural) so your install stays code-compliant. Inspect for warping, cracked corners, missing fasteners, and expired adhesives.
Before you buy, measure twice and price out the full system: underlayment, trim, thinset, flashing, and proper fasteners. Some discount suppliers sell “as-is,” so confirm return policies and buy 10% extra for cuts.
Time your visits after large projects; that’s when surplus deals peak. Bring photos and a tape measure.
Splurge vs Save: What’s Worth Paying For
While it’s tempting to cut costs across the board, a tight renovation budget works best when you decide upfront where to splurge for durability, safety, and code compliance—and where to save without creating future repairs.
Put your money into licensed electrical work, updated panels, GFCI/AFCI protection where required, and proper plumbing connections; failed inspections cost more than the fix.
Invest in insulation, air-sealing, and ventilation fans vented outdoors to prevent moisture damage.
Choose premium materials only where they take abuse—stairs treads, entry flooring, exterior paint, and roofing details.
Save by keeping the existing layout, refinishing instead of replacing, and choosing standard fixtures over luxury upgrades.
Buy closeouts for tile, doors, and lighting, but confirm listings and fire ratings before install.
Kitchen Renovation on a Budget: Biggest Wins
Because kitchens combine water, heat, and heavy daily use, your biggest budget wins come from keeping the footprint, improving function, and spending only where failures get expensive.
Don’t move plumbing or gas lines unless a licensed pro requires it; relocating drains, vents, and circuits quickly blows your budget and can trigger permit upgrades.
Keep cabinets if they’re solid: reface doors, add soft-close hinges, and install full-extension slides for better storage.
Replace only failed countertops, and choose durable laminates or standard-depth butcher block.
Put money into safety: GFCI/AFCI where required, proper range hood venting, and shutoff valves you can reach.
Shop scratch-and-dent Kitchen appliances, and consider Vintage fixtures for character without custom millwork costs.
Bathroom Renovation on a Budget: Cheap Upgrades
If you keep the plumbing and the wet area layout exactly where it is, you can make a bathroom feel new with a handful of code-smart, low-cost upgrades.
Swap in a WaterSense toilet or aerating faucet to cut bills without permitting headaches.
Replace a tired vanity top with a remnant slab, then add a new P-trap and shutoff valves if they’re corroded.
Upgrade lighting with a damp-rated LED fixture and add a GFCI receptacle (and tamper-resistant cover) if yours isn’t protected.
Refresh the fan with a quiet, properly vented unit to curb moisture and mold.
For Vintage charm, install a simple framed mirror and classic lever hardware.
Choose eco friendly materials like low-VOC caulk and recycled-glass accessories.
Refresh Floors and Walls for Under $X
Three low-cost moves can make your floors and walls look newly finished for under $X: patch and prep the surface, refresh the finish, and keep connections clean and safe.
Start by pulling loose trim, setting proud nails, and filling dents with wood filler or spackle; sand smooth and vacuum dust so coatings bond.
For Floor refinishing, screen and recoat sealed hardwood instead of a full sand-down; use water-based polyurethane for faster dry time and lower odor.
On tile or vinyl, deep-clean, then spot-repair seams and replace damaged connection strips to prevent trips.
For Wall painting, wash, degloss, and prime stains; cut crisp lines and roll two thin coats.
Keep outlets covered, shut off circuits, and maintain required clearances.
Add a 10–20% Buffer and Lock the Contract Terms
Before you start demo, you’ll set aside a 10–20% contingency fund so inspections, permits, and hidden repairs don’t blow your budget.
You’ll lock the scope in writing, spell out code-required work, and define allowances for fixtures and finishes so bids stay apples-to-apples.
You’ll also require written change orders with pricing and schedule impacts approved before any extra work starts.
Build A Contingency Fund
Where do tight-budget renovations usually go off the rails? When hidden conditions and change orders hit and you’ve got no cash cushion. Build a contingency fund equal to 10–20% of your total project cost, and keep it separate from your daily account so you won’t “borrow” it. Use it only for legitimate surprises that affect safety or code compliance, like damaged framing, unsafe wiring, or plumbing leaks uncovered during demo.
Lock contract terms to protect that buffer: require written change orders with itemized labor/materials, set a clear payment schedule tied to inspections, and cap markups.
Even small choices matter—smart Painting techniques reduce rework, and planned Furniture placement prevents last-minute electrical moves.
Clarify Scope And Allowances
If you don’t pin down the scope and allowances in writing, your “cheap” renovation will creep into a series of pricey upgrades and change orders. Do tight scope clarification: list every room, surface, fixture, and finish, plus what’s excluded. Attach drawings, specs, and code-required items (venting, GFCI/AFCI, permits, inspections) so you’re not “surprised” later.
For allowance management, set realistic unit prices for tile, cabinets, lighting, and plumbing trim, and note quantities, brands, and where you’ll buy. Add a 10–20% buffer to allowances and contingency lines, not to vague “misc.” Require itemized bids that separate labor, materials, and allowances, and lock payment milestones to inspected progress.
Confirm lead times and substitutions upfront.
Secure Change Order Rules
Once you start opening walls and moving plumbing, small “quick fixes” can snowball into budget-busting extras unless you hardwire change-order rules into the contract. Require written approval before any extra work begins, with line-item pricing for labor, materials, permit fees, and inspections.
Spell out change order procedures: who can authorize, how long pricing is valid, and when schedule extensions apply. Tie every scope modification to updated drawings or specs, so code-required items (GFCI/AFCI upgrades, fire blocking, venting) don’t become surprises.
Add a 10–20% contingency buffer to your budget, but don’t let it replace discipline—treat it as last-resort money for concealed damage.
Lock unit rates and markups, and cap overhead/profit on changes. Include documentation and photos to verify conditions.
Conclusion
Keep your budget renovation brisk, basic, and building-code smart. You’ve set a hard cap, compared clear contractor quotes, and prioritized practical rooms that boost daily livability and resale. By phasing projects, you protect cash flow and prevent pricey pauses. In kitchens and baths, pick durable, low-cost finishes and water-wise fixtures, and follow permits where required. Refresh floors and walls for quick curb appeal. Finally, add a 10–20% buffer and lock tight terms.