

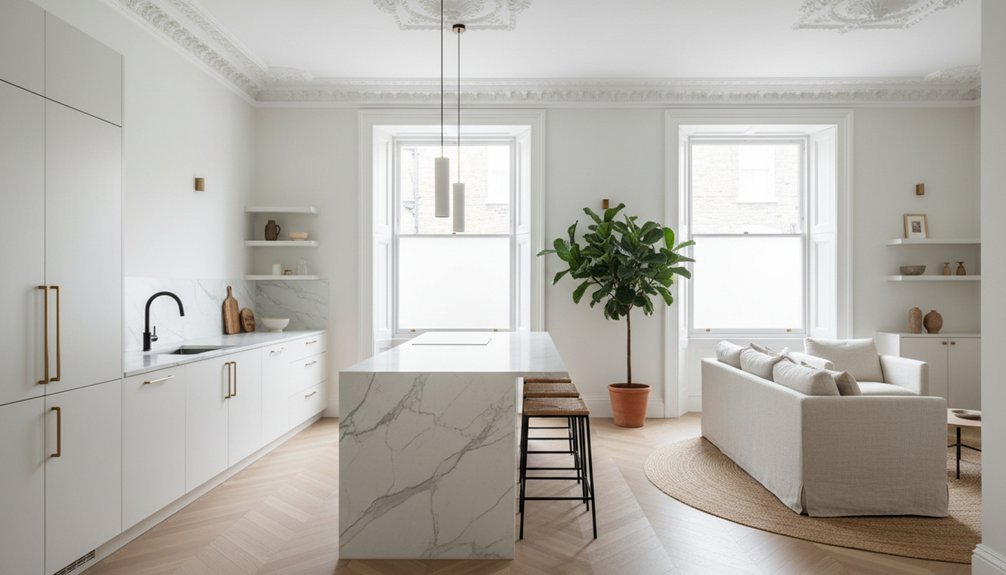
You’ll get a bright, modern Victorian maisonette by defining must-haves (light, flow, storage) and setting a measured budget with 10–20% contingency. Check planning, listed, and Party Wall constraints before you touch cornices, sash proportions, or chimney breasts. Improve layout with aligned sightlines and wider openings, but keep room ratios. Upgrade comfort with breathable insulation, secondary glazing, and fixed damp causes. First-fix electrics and plumbing early, then add flush built-ins and calm finishes—there’s more ahead.
Key Takeaways
- Set clear goals for light, flow, storage, and durability, while preserving key Victorian details like cornices, fireplaces, and sash proportions.
- Confirm constraints early: planning permission, listed building consent, and Party Wall notices, and choose discreet interventions that respect original fabric.
- Plan layout changes to suit Victorian proportions, using aligned openings and sightlines, and engineer wall removals with proper steel, propping, and approvals.
- Improve brightness and comfort with sympathetic glazing, breathable insulation, and moisture control, keeping ventilation paths clear and detailing reveals to avoid cold bridges.
- Upgrade electrics and plumbing with coordinated first-fix routes, modern protection, and integrated storage joinery, ensuring sockets, lighting, and furniture layouts work together.
Define Your Renovation Goals and Must-Haves

Before you lift a floorboard or strip a skirting, get clear on what you’re renovating for and what you refuse to compromise on. Decide if you’re chasing light, flow, storage, or long-term durability, then rank those needs.
In a Victorian maisonette, keep what anchors the period—cornices, fireplaces, sash proportions—while cutting back visual noise.
Write a must-have list that’s measurable: “two full-height cupboards,” “one continuous worktop run,” “quiet bedroom zone.” Map interior color schemes to daylight and original joinery: warm whites for north rooms, muted stone or ink for depth, no high-chroma fights with heritage details.
Sketch furniture placement early so sockets, switches, radiators, and clear walk paths land exactly where you’ll live.
Check Constraints: Planning, Listed, Party Wall
Even if your design feels modest, Victorian maisonettes come with legal tripwires that can stall a clean, modern update fast. Check whether you need planning permission for rear extensions, rooflights, or changing window proportions, and confirm if permitted development even applies to your flat.
If the building’s listed or in a conservation area, treat every original cornice, sash, and brick bond as protected; you’ll need listed building consent for alterations, even for rewiring routes that affect plaster. Specify modern lighting with discreet cable paths and minimal ceiling disturbance.
For shared structures, serve Party Wall notices before you cut into a party wall, lift floor joists, or underpin near your neighbour. Keep drawings tight, methods clear, and choose eco friendly materials that respect breathability and historic fabric.
Set a Realistic Budget and Contingency Early
Although a Victorian maisonette can read as “just a light refresh,” you’ll spend most of your money on the unseen: rewiring routes that protect plasterwork, levelling wonky floors, upgrading heating and ventilation, and repairing sash frames, lime plaster, or damp-prone masonry properly.
Start Budget planning with a measured survey and a line-by-line scope, then price labour, access, disposal, and making-good—Victorian work is slow and tidy by necessity.
Keep allowances for specialist trades: joinery repairs, lime, glazing, and matching cornices.
Fix your priorities early: what must be restored, what can be simplified, and what you’ll defer.
Hold contingency funds of 10–20% for hidden defects, late-stage compliance, and material lead times.
Agree payment stages, specify finishes, and track changes weekly.
Plan a Layout That Suits Victorian Proportions
Start by keeping the Victorian room ratios intact—those tall ceilings and narrow bays give the maisonette its calm, formal rhythm.
Then you can improve flow with wider openings or aligned sightlines that connect reception to kitchen without erasing original thresholds.
Finally, you’ll optimize light and storage by placing joinery in chimney-breast flanks, using glazed doors, and keeping circulation routes clean.
Respect Original Room Ratios
Before you shift a single wall, read the maisonette’s Victorian proportions like a plan: tall ceilings, long sightlines, and a clear hierarchy from public front rooms to quieter rear spaces. Keep each room’s length-to-width ratio legible, so cornice lines, chimney breasts, and window spacing still feel inevitable, not edited.
If you need storage or services, tuck them into side returns, alcoves, or existing nibs rather than squaring off corners. Let door openings stay centred where they were designed to balance fireplaces and bays.
Use consistent skirting height, architrave depth, and picture-rail lines to preserve Historical accuracy while supporting modern-minimalist interior decorating. When you add built-ins, match panel rhythms to original joinery and keep reveals crisp, so the old geometry reads cleanly.
Improve Flow Between Rooms
Once you’ve respected the original room ratios, improve the flow by treating the maisonette like a sequence of connected vistas rather than a single open-plan box. Keep thresholds legible: retain shallow reveals, align skirting and architraves, and let door openings frame a view to the next focal point.
Use furniture placement to guide movement, not block it. Float a sofa just clear of the chimney breast so circulation slips behind; angle a dining table to square up with bay windows; keep sideboards low on party walls to preserve sightlines.
Make transitions calm with restrained color schemes: repeat one wall tone across adjacent rooms, then shift texture, not hue, at fireplaces and alcoves. Place rugs to “stitch” routes, and keep pathways consistent door to door.
Optimize Light And Storage
Because Victorian rooms tend to be tall, narrow, and window-led, you’ll get the best results by planning light and storage as a single system: keep glazing visually dominant, then hide capacity in the “dead zones” that period layouts create.
Keep radiators, shutters, and cornices readable, and run low storage under sills or along chimney breasts with flush fronts. Use full-height wardrobes only on party walls, sized to original skirtings, so you don’t interrupt sash sightlines.
For color schemes, choose pale, warm neutrals on tall walls, then add depth with darker joinery to visually ground the room.
Let furniture placement follow the window axis: float a slim sofa opposite, keep circulation tight, and use nesting tables so surfaces disappear when you need light.
Remove Walls Safely: Structure, Steel, Approvals
While opening up a Victorian maisonette can flood the space with light, you can’t treat any internal wall as “just partition” until you’ve proved it. Start with a measured survey: look for joist direction, chimney breasts, nibs, and historic repairs that hint at load paths.
Bring in a structural engineer before you touch lath-and-plaster; you’ll often need Structural reinforcement, not guesswork, to prevent sagging floors and cracked cornices.
If the wall’s loadbearing, specify steel frameworks sized for span and bearing, with padstones to spread point loads. Protect neighbouring finishes with temporary propping, and sequence demolition in controlled cuts.
Then secure approvals: Building Control sign-off, party wall notices where applicable, and calculations filed before the first hammer swing.
Bring in Daylight: Borrowing Light and Roof Options
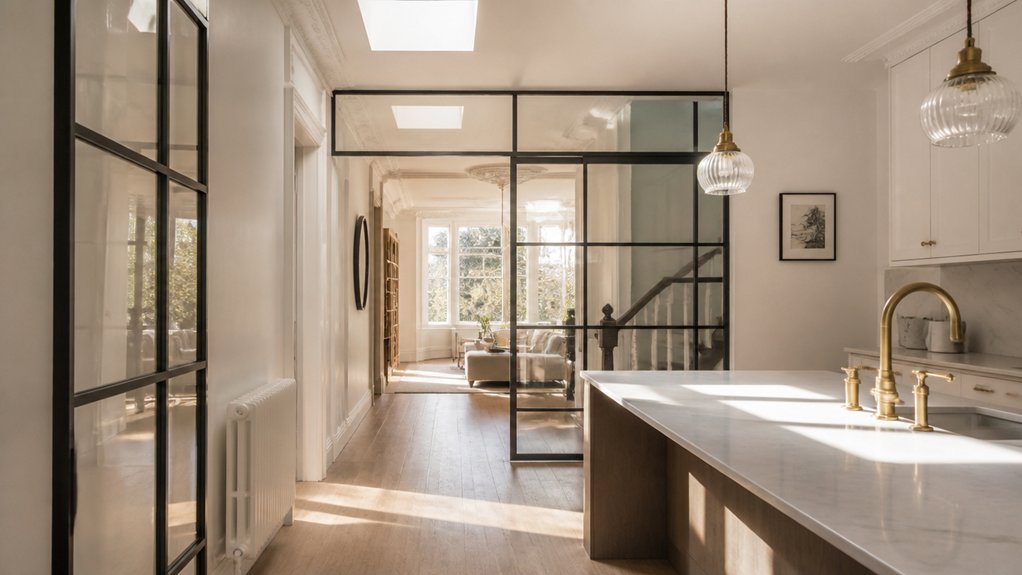
After you’ve opened up the plan, daylight still needs a route through Victorian bones that were designed for deep rooms and heavy trim. You can borrow light with internal glazing over doors, high-level screens, or a slim clerestory above joinery, keeping cornices intact while letting Natural light travel further.
Look up next: roof modifications often deliver the biggest lift without erasing character. Add a flat rooflight to a rear outrigger, align it with joists to avoid fussy soffits, and specify a minimal frame so you read sky, not hardware.
For lofted zones, a modest dormer can square usable space and brighten stairs; keep cheeks tight, align with existing bays, and match leadwork and slate detailing so it sits quietly.
Choose Period-Right Glazing: Sash, Slimline, Secondary
Once you’ve pulled more daylight into the plan, the glazing choice decides whether the maisonette still reads Victorian—or drifts into generic renovation.
Start with true sash windows where you can: slim meeting rails, correct horn profiles, and putty-line sightlines keep Victorian window styles intact.
If planning constraints bite, specify slimline double glazing in timber sections, with narrow cavity units and spacer colours matched to the paintwork, so reflections stay quiet.
For retained originals, add secondary glazing: choose a minimal aluminium frame, align it to existing mullions, and keep reveals crisp.
Demand careful glazing installation techniques—properly bedded panes, neat beads, and sympathetic ironmongery—so the work looks intentional, not “upgraded.”
Finish with consistent glazing bars and matching sash lifts.
Insulate Without Damp: Walls, Floors, Loft
Because Victorian fabric relies on breathability, you need insulation that slows heat loss without trapping moisture where it can’t escape. Start with external walls: keep air bricks clear, repair lime pointing, then choose wood-fibre boards or breathable mineral wool with lime plaster, not foil-backed foam.
If you must line internally, leave a ventilated service void and detail window reveals to avoid cold bridges. Use Damp proofing techniques sparingly: fix gutters, lower ground levels, and add French drains before you add layers.
For suspended floors, lift boards, fit mineral wool between joists on a net, and lay an airtight but vapour-open membrane; avoid sealing the perimeter.
In the loft, insulate between and over joists, maintain eaves ventilation, and place Moisture barriers only where hygrothermal modelling justifies them.
Update Electrics and Plumbing in the Right Order
While you still have floors up and plaster opened for insulation and repairs, plan your services so you only chase walls once: map every socket, light point, radiator, and sanitary run, then do the first‑fix electrics (new consumer unit, earthing and bonding, cable routes) and first‑fix plumbing (hot/cold feeds, soil and vent, heating pipework) in the same openings before any boarding or lime plaster goes back on.
Keep Electrical safety central: fit RCD/RCBO protection, label circuits, and use metal back boxes where lath and lime sit close. Route cables and pipes through joist notches to regs, then add nail plates. Pressure‑test and flush runs, and set valve positions for future access.
Only after second‑fix do you choose visible plumbing fixtures and period‑quiet switches that sit crisp against restored trims.
Build Storage Into Alcoves, Stairs, and Eaves

Even if you’re keeping the original cornice lines and skirting profiles intact, you can gain serious usable space by treating alcoves, stair runs, and eaves as bespoke joinery zones rather than awkward voids. Frame each opening square to the room, then fit flush doors so the storage reads like calm wall panelling, not add-ons.
In living rooms, turn chimney-breast alcoves into closed cupboards below and slim display shelves above, with Decorative alcove lighting recessed into the shelf underside to wash books and art without glare.
Under the stairs, prioritise Staircase storage solutions that suit your plan: pull-out drawers for shoes, a tall broom cupboard, or a hidden utility niche.
In eaves, use low, full-depth cabinets with finger pulls and soft-close hinges.
Materials That Bridge Old and New (Floors to Tiles)
When you choose materials that echo the Victorian shell but behave like a contemporary interior, the whole maisonette feels intentional rather than “old bit/new bit.” Start underfoot: retain and refinish original boards where they’re sound, then splice in reclaimed timber or a close-grain engineered oak in matching widths so the grain reads continuous across thresholds.
In wet zones, keep junctions crisp: run timber to a shadow gap, then drop to porcelain or terrazzo with a slim brass inlay. If you want Victorian tile patterns, scale them down and limit the palette—charcoal, off-white, and one muted accent—so they feel graphic, not fussy. Choose matte finishes and tight grout lines for a calm plane.
Among Modern flooring options, microcement works in kitchens for seamless light bounce, but specify anti-slip and a warm grey undertone.
Restore Key Features: Fireplaces, Cornices, Joinery
Because Victorian details carry most of the home’s identity, you should restore the pieces that frame every room before you add anything new: fireplaces, cornices, and original joinery.
Start with a careful survey: note cracks, missing moldings, and paint build-up that blunts profiles.
For fireplace restoration, strip back later surrounds, repair the hearth, and reline the flue so it’s safe, then keep the finish restrained—blackened iron, honed stone, or simple tiled slips.
For cornice preservation, splice plaster with lime-based mixes, take silicone molds from intact sections, and align mitres so shadows read crisp.
Treat doors, architraves, and skirting similarly: de-nail, patch with matching timber, and refit with slim, modern hardware to stay quiet.
Conclusion
If you’ve set clear goals, checked consents, and sequenced the messy works, your Victorian maisonette can feel calm, bright, and unmistakably original. Keep the proportions, then edit everything else: open only where the structure allows, run new services before plaster, and hide storage in alcoves and eaves. For example, a Clapham two-bed gained a slim steel and Crittall-style glazing—daylight traveled, the ceiling rose, and the restored cast-iron fireplace still anchored the room.