

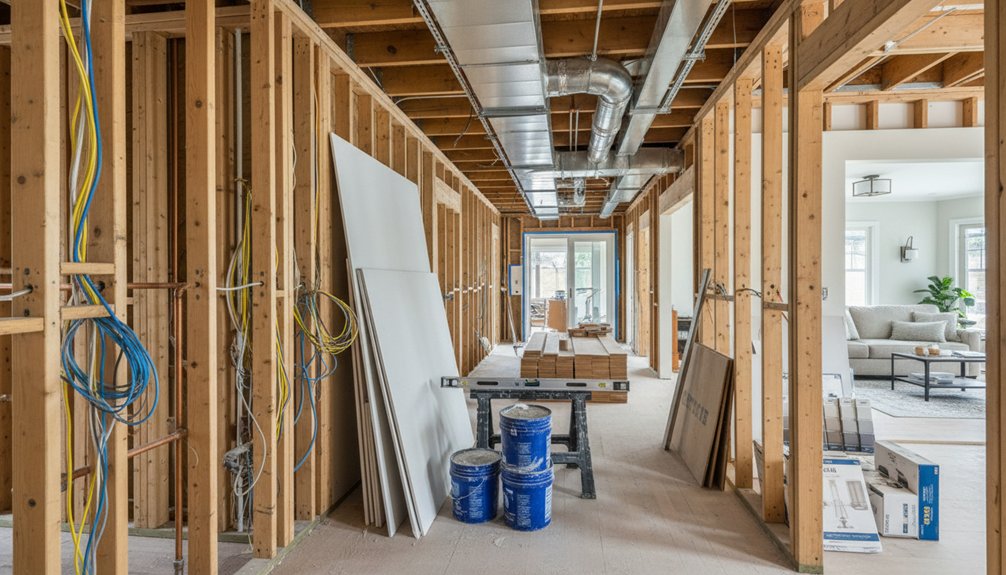
Start by defining what stays, what goes, and your must-keep structural and MEP constraints, then lock engineered drawings, permits, and an inspection sequence. Build a budget with allowances and contingency, hire your architect/GC and key trades, and set a permit-aware schedule with float. Protect the site, then demo safely top-down. Complete structural changes and dry-in the exterior, run plumbing/electrical/low-voltage and HVAC, insulate and air-seal, pass rough inspections, then drywall/prime/trim. Paint, floor, set fixtures, and punch next. Keep going to see the full checklist.
Key Takeaways
- Define scope, document existing conditions, set budget and schedule, then assemble your architect/GC/trades team early.
- Finalize engineered drawings, pull permits, and pre-plan inspection milestones before demolition or finish selections.
- Prepare and protect the site: containment, staging, temporary power/lighting, safe egress, and utility shutoffs before any tear-out.
- Complete structural changes and dry-in the exterior—framing, beams, roof, windows, doors, flashing, and weather barriers—before interior systems.
- Run MEP rough-ins, then air-seal and insulate, schedule inspections, and only then close walls and start finishes and fixtures.
Whole-House Renovation Order (Quick Checklist)
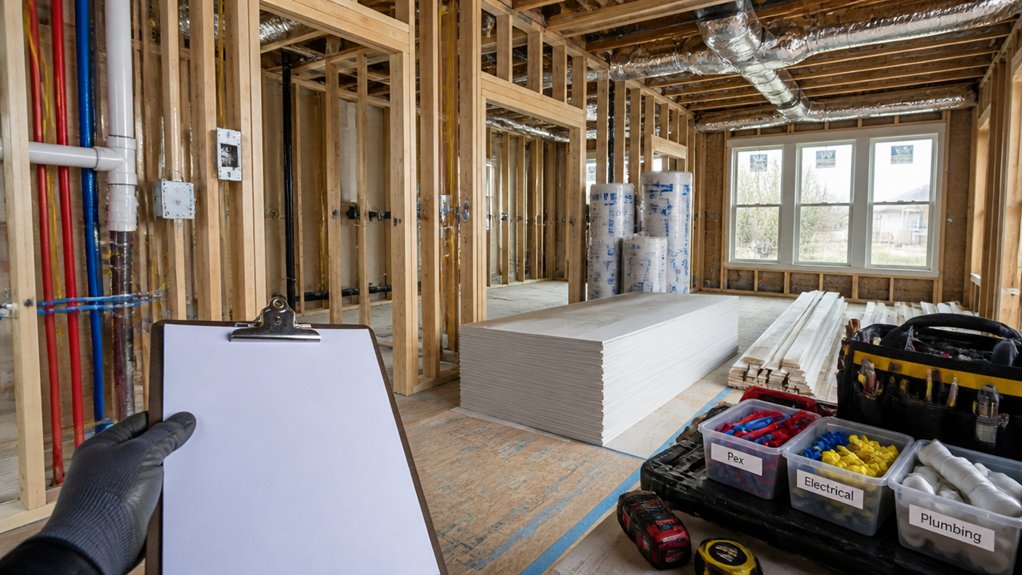
Before you pick finishes or order furniture, lock in a code-compliant sequence that keeps inspections, rough-ins, and drying/curing times from colliding. Start with permits, engineered drawings, and a site safety plan.
Complete selective demolition, then address structural repairs, framing, and window/door replacements to dry-in the shell.
Schedule rough HVAC, plumbing, and electrical, followed by required inspections.
Install insulation and air/vapor control layers per local code, then hang and finish drywall.
Prime and paint before hard flooring; protect floors during trim and cabinetry.
Set tile after substrate prep and waterproofing cures.
Do your material selection early so lead times don’t stall.
Finish with fixtures, appliances, hardware, final electrical trims, punch list, and final inspection.
Confirm design aesthetics at each handoff.
Define Scope: What Stays, What Goes
Before you pull permits or schedule trades, you’ll lock the scope by listing must‑keep elements (structural walls, stairs, windows you’re preserving, and any MEP runs you won’t relocate).
Next, you’ll set demolition priorities in the right sequence—remove nonstructural finishes first, protect rated assemblies, and flag anything that needs engineering or abatement before it’s touched.
Finally, you’ll document existing conditions with dated photos, field measurements, and notes on cracks, moisture, and code issues so your drawings, budget, and timeline stay accurate.
Identify Must‑Keep Elements
Even if you plan to gut most of the house, you’ll save time, money, and permit revisions by locking in the must‑keep elements first—structural walls, stair locations, plumbing stacks, electrical service size, HVAC runs, and any historic features you can’t alter.
Verify each item in the field: measure load paths, confirm beam sizes, and document stair rise/run for code. Map stack and vent routes before you shift rooms. Confirm service amperage and panel location so your lighting and appliance plan won’t trigger a late upgrade.
Identify ducts you’ll reuse and required clearances at returns and equipment. Photograph and tag protected trim, brick, or windows. Let these fixed points guide your design inspiration and material selection, then freeze them on drawings before pricing, approvals, and scheduling.
Decide Demolition Priorities
Once you’ve locked in the must‑keep elements, set demolition priorities by drawing a hard line between what stays and what goes, room by room. Mark structural walls, load paths, and any fire‑rated assemblies as no‑demo unless an engineer and permits say otherwise. Flag plumbing stacks, gas lines, and electrical feeders so you don’t create unsafe, unplanned outages.
Sequence demo to protect egress and maintain required temporary lighting and GFCI protection.
Plan demolition timing around lead times for replacement items and inspections, so you don’t leave openings exposed. Start with isolated areas, then move to systems‑heavy rooms. Coordinate shutoffs and cap lines to code.
Lock in debris management: staging zones, covered chutes, haul‑off cadence, and dust barriers to keep the site safe and moving.
Document Existing Conditions
Where do you start if you want a renovation scope that won’t drift mid‑build? You document existing conditions before you price, permit, or order. Perform a Site assessment room by room: measure wall lengths, ceiling heights, door swings, stair geometry, and window sizes; photo every elevation; map outlets, circuits, shutoffs, vents, drains, and structural lines.
Document conditions you’ll keep versus remove, and tag anything suspect—water staining, undersized beams, knob‑and‑tube, asbestos tile—so your team plans abatements and engineering early.
Verify code triggers: egress windows, stair rise/run, GFCI/AFCI, ventilation rates, insulation requirements, and smoke/CO locations.
Convert findings into an as‑built set and a “stay/go” schedule, then lock it for bidding and inspections.
Set Budget, Timeline, and Contingencies
Before you swing a hammer, lock in a realistic budget, a permit-aware timeline, and clear contingencies so your renovation stays compliant and on schedule.
Start Budget planning by pricing scope items from your existing-conditions notes: structural fixes, MEP upgrades, insulation, windows, finishes, and required inspections. Separate hard costs, soft costs, and fees, and set allowances only where selections aren’t final.
Build a schedule that follows code-driven sequencing: design submittals, permit review, lead-time ordering, rough-in, inspections, close-in, and final approval. Add float for utility shutoffs, inspection rechecks, and backordered materials.
Do contingency planning with a defined percentage and trigger rules (hidden damage, code-required upsizing, rot, or asbestos). Track spend weekly against milestones.
Hire Your Team: Architect, GC, Key Trades
Even if you’re enthusiastic to demo, you’ll save weeks by hiring the right architect (or designer), GC, and key trades early so the plan, permit set, and scope align with code and inspection sequencing.
Start by vetting licenses, insurance, and workload, then lock a decision-maker and communication cadence.
Your architect drives design integration: layouts, structural intent, MEP routing allowances, and finish constraints that prevent rework.
Your GC builds a critical path, confirms lead times, and coordinates site logistics, safety, and temporary protections.
Bring key trades (framing, electrical, plumbing, HVAC) in for constructability checks and realistic durations, not guesswork.
Prioritize Team collaboration with shared scopes, RFIs, and change-control rules so every handoff stays clean and schedule-safe.
Permits, Drawings, and Inspection Schedule
Once you’ve hired your architect and GC, lock the permit set and inspection sequence so your schedule matches what the building department will actually approve and sign off. Confirm scope, occupancy, and whether you trigger energy, sprinkler, or structural reviews. Freeze the drawings: plans, elevations, structural calcs, MEP layouts, and product specs tied to code notes. Submit once, track comments, and answer RFIs fast to keep the permits process moving.
Next, build a written inspection scheduling plan: demo (if required), footing/foundation, framing, rough plumbing, rough electrical, rough mechanical, insulation, drywall (where required), and final. Assign responsibility for call-ins, lead times, and re-inspection buffers. Don’t cover work until you’ve passed. Keep stamped plans and approved revisions on site.
Protect and Isolate the Work Zone
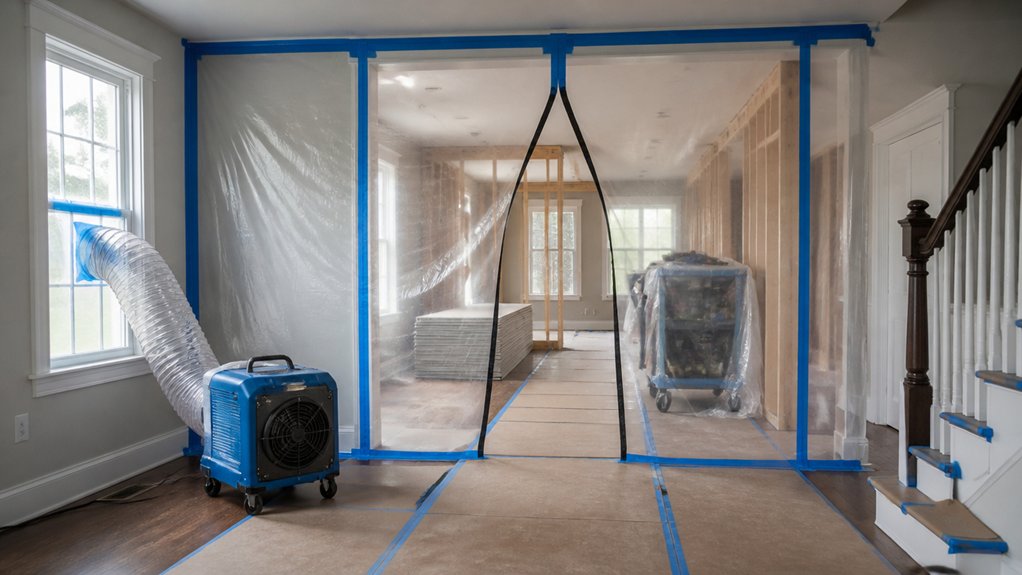
While permits move through review and materials start arriving, set up jobsite protections and a hard separation between construction and living areas. Install Protective barriers at doorways, stairs, and any openings to occupied rooms; use framed plastic or zip walls, not loose sheets.
Establish containment strategies: seal returns and supplies in the zone, add a filtered negative-air fan exhausting outdoors where allowed, and place tack mats at exits.
Post “No Entry” signage and maintain a clear egress path per code at all times.
Lay down floor protection rated for the surface, then cover adjacent trim and windows.
Create a dedicated material staging area, a debris route, and a lockable tool zone.
Verify temporary lighting, GFCI-protected power, and fire extinguishers before work begins.
Demolition: Safe Tear-Out and Haul-Away
After you’ve sealed off the work zone and verified temporary power and lighting, start demolition with a safety-and-structure plan, not a sledgehammer. Pull permits as required, then review shutoffs and confirm you’ve isolated electrical circuits, gas, and water serving the area.
Use PPE, HEPA filtration, and negative air as needed; these safety precautions keep dust and fibers contained and support code-required cleanliness.
Work top-down and room-by-room so trades can follow on schedule. Use controlled tear out techniques: score caulk lines, remove trim with pry bars, cap plumbing, and bag debris immediately.
Separate clean wood, metal, drywall, and hazardous waste for proper disposal. Stage a dumpster path, protect egress routes, and haul away daily to prevent trip hazards.
Structural Work: Framing, Beams, Layout Changes
After demolition, you’ll verify which walls are load-bearing and get engineered drawings and permits before you cut or move anything.
You’ll install temporary shoring, then set new beams, posts, and headers to maintain required spans, bearing, and fastening per code and the engineer’s specs.
You’ll finish by reinforcing joists (sistering, hangers, blocking) and locking in the new layout so rough-ins can start on a stable, inspected frame.
Load-Bearing Wall Changes
Because moving or removing a load-bearing wall changes how your house carries roof and floor loads, you should schedule this structural work immediately after demolition and before any rough-ins.
Confirm the wall is load bearing with site observations and stamped plans, then pull permits and book inspections early to avoid trade delays.
Lay out the new opening with precise dimensions, verify clearances, and protect adjacent finishes you’re keeping.
Install temporary support walls before you cut studs, remove headers, or alter top plates, and keep supports in place until the new framing is fully fastened.
Complete all wall modifications, including new king/jack studs, blocking, and firestopping at penetrations, then call for framing inspection before electrical, plumbing, or HVAC crews start.
Beam And Joist Reinforcement
Once you’ve opened up walls and set new spans, reinforce beams and joists before any mechanical rough-ins so the structure won’t shift out of level. Get an engineer’s sizing and stamped details, then pull the structural permit if required.
Install temporary shoring on solid bearing, verify plumb, and keep loads off cut members.
For beam reinforcement, set LVL/steel per plans, use specified hangers, bolts, and bearing lengths, and tighten hardware to manufacturer torque.
For joist strengthening, sister or add flitch plates, blocking, or new joists, and reattach subfloor with approved fasteners and adhesive.
Confirm deflection limits, fire-block penetrations, and inspection sign-off before insulating or running ductwork, plumbing, and wiring.
Document changes for final approval.
Exterior “Dry-In”: Roof, Windows, Weatherproofing
Before you schedule interior framing, mechanical rough-ins, or insulation, get the exterior “dried in” by locking down the roof, installing windows and exterior doors, and completing the primary weather-resistive barriers (WRB), flashings, and temporary or permanent water-shedding details.
Start with structural roof repairs, then underlayment, drip edge, and code-required ice barrier where applicable.
Set windows plumb, level, and square; integrate pan flashing, jamb/head flashing, and shingle-lapped WRB seams to maintain drainage continuity.
Seal penetrations, but don’t trap moisture—verify venting and dry-out paths.
If you’re adding Exterior insulation, coordinate furring, fastener schedules, and cladding clearances now.
Lock gutters/downspouts and temporary grade control to protect sheathing while your landscaping design finalizes surface drainage.
Rough-Ins: Plumbing, Electrical, Low-Voltage
Once you’ve dried-in the exterior, you can start rough-ins by locking the rough plumbing layout in place—set fixture locations, slope drains correctly, and size vents and supply lines per code before walls close.
Next, you’ll rough-in electrical circuits by mapping loads, running cable, and setting boxes at compliant heights and clearances so you’re ready for inspection.
In the same window, you’ll establish low-voltage wiring paths (data, audio, security) with proper separation from line voltage and accessible routes for future pulls.
Rough Plumbing Layout
After you’ve finalized the floor plan and framing changes, lay out your rough plumbing to lock in every fixture location and meet code clearances before walls close up. Mark each plumbing fixture centerline, drain height, and supply stub-out, then confirm rough-in dimensions against manufacturer specs and local requirements.
Plan pipe routing to maintain slope on horizontals, protect bores in studs with nail plates, and keep fittings accessible. Set vent paths early so you don’t trap arms or exceed allowable distances. Verify cleanout locations, shutoff placement, and water-heater connections.
Coordinate penetrations through plates and beams, and firestop as required. Before insulation or drywall, schedule pressure tests for water lines and an air or water test for DWV, and document inspections so the build stays on track.
Electrical Circuit Rough-In
Although the walls are still open, you should rough-in electrical circuits now so every receptacle, switch, and hardwired load lands on the right circuit and meets code spacing and box-fill rules.
Start by mapping dedicated loads (range, dryer, HVAC, disposal) and required small-appliance and laundry circuits, then size breakers and conductors to match circuit capacity.
Place boxes at compliant heights, keep receptacles within required spacing, and plan GFCI/AFCI protection by location and breaker type.
Drill and staple cable within required distances, maintain nail-plate protection at studs, and keep clearances from plumbing and heat sources.
Label every homerun at the panel, leave proper conductor length in boxes, and schedule the rough-in inspection before insulation to verify Electrical safety.
Low-Voltage Wiring Paths
Before you close the walls, lay out low-voltage wiring paths so data, TV, speaker, security, and control runs stay separated from line voltage, protected from damage, and easy to service later. Map device locations, rack or panel space, and home-run routes before insulation.
Keep low voltage wiring at least several inches from power, and cross at 90 degrees when you must intersect. Use listed low-voltage rings or boxes, add nail plates where studs get bored, and avoid sharing holes with NM cable.
Maintain bend radius, don’t kink coax, and pull in a spare string or conduit for future adds. Label both ends, document cable pathways, and test continuity before drywall.
Coordinate with HVAC and plumbing so chases stay accessible and code-friendly.
HVAC, Insulation, and Air Sealing
Once your framing and rough plumbing/electrical runs are locked in, shift to HVAC, insulation, and air sealing so you can close up walls without trapping leaks or undersized ducts. Confirm Manual J/S/D calculations, register locations, and clearances to combustibles, then set equipment pads, sleeves, and condensate drains with proper traps and cleanouts.
Seal all duct seams with mastic, pressure-test if required, and verify returns to avoid negative pressure and backdrafting.
Next, choose insulation materials that meet local R-values and fireblocking rules; install batts or blown-in without gaps, compression, or blocked soffit vents. Air-seal top plates, rim joists, and penetrations with rated foam or caulk, then schedule a blower-door test before finishes to document HVAC efficiency.
Close-Up: Drywall, Prime, and Trim Carpentry
After you’ve passed rough inspections and you’ve sealed and insulated the shell, you can close the walls and start locking in finished dimensions with drywall, primer, and trim. Hang drywall with correct fastener spacing, adhesive where allowed, and proper backing at seams and fixtures. Keep clearances at tubs, shower pans, and masonry, and maintain required fire- and smoke-rated assemblies.
Schedule tape, mud, and sanding as a continuous run so humidity and temperature stay stable for drywall finishing. Before trim, spray or roll a dedicated primer to seal paper and compound and to reveal flaws for spot repairs.
Then install trim carpentry: set doors, jambs, and casing; scribe to uneven floors; shim plumb; and leave uniform reveals and expansion gaps.
Finish Out: Paint, Floors, Fixtures, Final Punch
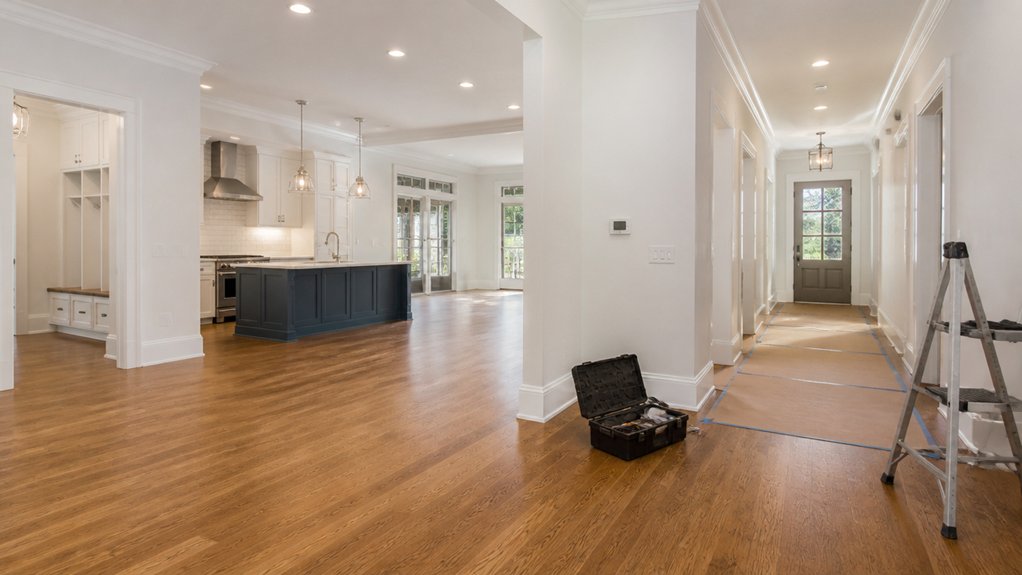
When the walls and trim lock in your finished planes, shift to finish-out work in a tight sequence that protects new surfaces and keeps inspections moving. Finalize Color schemes now so touchups match across rooms and sheen stays consistent. Paint ceilings first, then walls, then doors and trim; mask hardware, keep wet-film thickness per spec, and ventilate to meet VOC and cure-time requirements.
After paint cures, install floors from farthest rooms out, maintaining required expansion gaps and progressions at rated doors. Then set fixtures: lights, devices, plumbing trim, and appliances. Verify GFCI/AFCI locations, torque lugs, and test shutoffs and traps for leaks.
Close with a punch walk: caulk, align reveals, adjust doors, and confirm furniture placement clears egress paths and registers.
Conclusion
Wrap your whole-house renovation in the right sequence, and you’ll keep the job moving like a train on schedule. Lock scope, budget, and contingencies, then hire your architect/GC and line up key trades. Pull permits, confirm drawings, and map inspections before you open walls. Run plumbing, electrical, and low-voltage rough-ins, then complete HVAC, insulation, and air sealing. Close up with drywall, primer, and trim. Finish with paint, floors, fixtures, and a final punch list.