

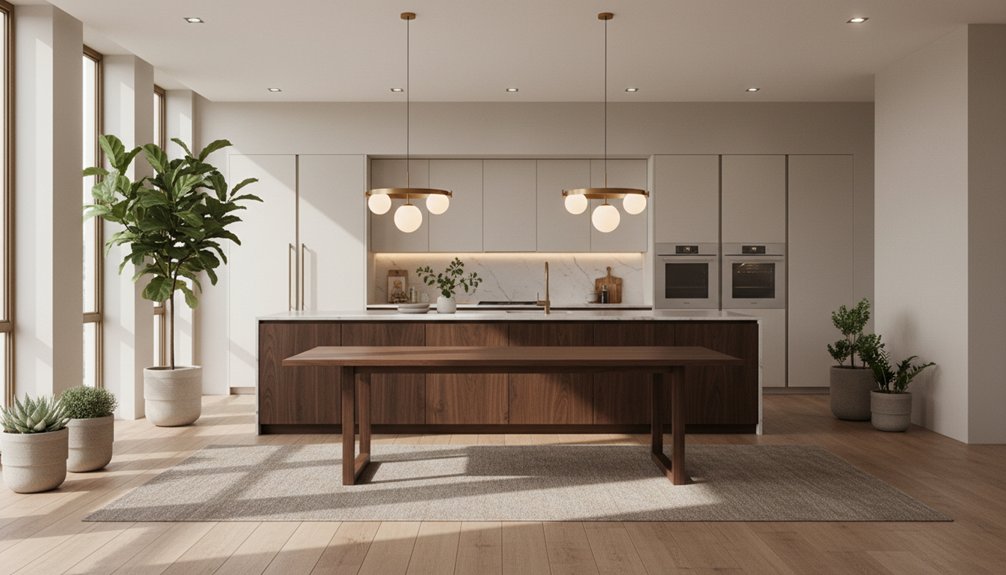
You’ll blend kitchen and dining spaces seamlessly by planning how you’ll use them, then locking in clear traffic paths (42–48 inches on main routes) between fridge, sink, range, and table. Keep flooring continuous, or match tones and plank direction if you switch materials, and size a rug so chairs slide without blocking walkways. Use one shared palette with consistent undertones, and repeat key materials and metals at least twice. Layer dimmable ambient, task, and accent lighting to unify zones. Keep going to fine-tune furniture, sightlines, and serving flow.
Key Takeaways
- Plan activities first, then choose a layout with clear sightlines and unobstructed paths between fridge, sink, range, and dining.
- Keep flooring continuous across both zones, or closely match tone and pattern to avoid a visual break.
- Use a tight, repeated color palette with consistent warm/cool undertones across cabinetry, walls, furniture, and textiles.
- Repeat key materials and finishes—woods, stone, and one or two metal finishes—so kitchen and dining feel intentionally connected.
- Layer lighting with matching color temperature, combining ambient, task, and dining pendants on dimmers for flexible continuity.
Decide How You’ll Use the Kitchen-Dining Space
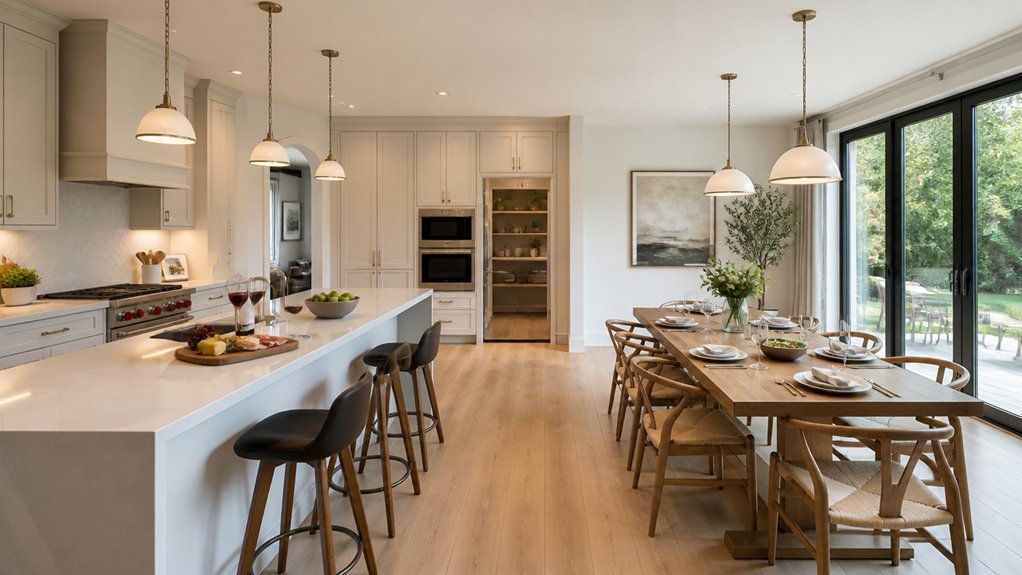
Before you start moving walls or picking finishes, decide exactly how you’ll use the combined kitchen-dining space day to day. List your primary activities: quick breakfasts, weeknight cooking, homework at the table, hosting, or meal prep for the week.
Assign each activity a must-have surface, seat count, and nearby storage solutions (dishware, linens, small appliances, serving platters).
Next, define your cooking style and equipment needs so appliance placement supports it. If you batch-cook, prioritize counter runs near the fridge and oven; if you entertain, keep beverage storage and a prep zone close to the dining area.
Confirm whether you need a pantry, coffee station, or bar, and specify what each holds. Set priorities now, and your layout decisions will stay consistent later.
Plan Kitchen-Dining Traffic Flow and Sightlines
Next, you’ll map how people move between the kitchen and dining area so paths stay direct and unobstructed.
You should size walkways and clearances around islands, chairs, and appliance doors so nothing bottlenecks during prep or serving.
Then you’ll align key sightlines—cooktop to table, sink to entry—so you stay connected and the spaces read as one.
Optimize Walkways And Clearances
Because the kitchen and dining area often share one open zone, you’ll want to map traffic flow first, then protect it with consistent clearances. Sketch primary routes from entry to fridge, sink, range, and table, and keep them unobstructed to support smart space utilization and reliable traffic management.
Aim for 42–48 inches on main paths, especially behind seated diners or between an island and perimeter counters. Keep 36 inches for secondary routes, and avoid pinching corners with stools, chair backs, or cabinet pulls.
When you place an island, leave enough room to open appliances and drawers without forcing someone to step into the dining zone. If you use a sideboard or bar cart, park it outside the working lane so serving doesn’t jam the cook line.
Align Sightlines For Connection
Even if your clearances are perfect, the space won’t feel seamless unless you align kitchen and dining sightlines so you can see—and speak to—people across the room while you work. Stand at the sink, cooktop, and prep zone, then check what you can view: the table, entry, and main window.
Keep islands low-profile, choose open shelving sparingly, and avoid tall pantry towers on the shared wall. Use storage solutions like drawers, pull-outs, and appliance garages to reduce countertop clutter that blocks views.
Coordinate window treatments so they filter glare without cutting the room in half; mount shades high and keep fabric light.
Finally, place the dining table where traffic skirts it, not through it, so conversations stay uninterrupted.
Use Flooring and Rugs to Connect Kitchen and Dining
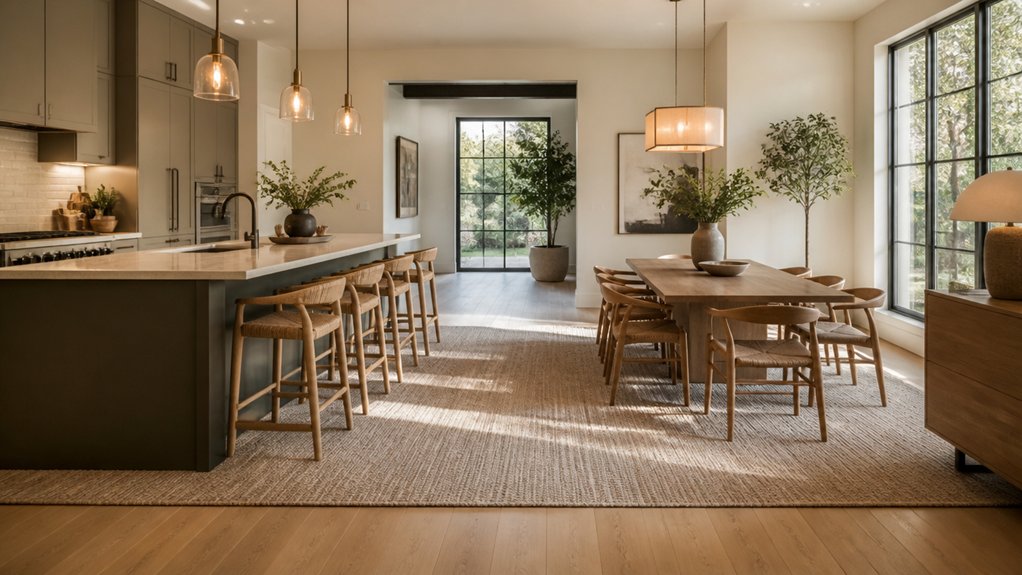
Carry the same flooring from the kitchen into the dining area whenever you can, so the shift reads as one continuous zone.
If you need a change in material, match tone and plank/tile scale to keep the surfaces visually aligned.
Anchor the dining table with a rug that mirrors the kitchen’s palette and places its edges clear of major walk paths, so you maintain comfort without breaking the connection.
Continuous Flooring Choices
When you run the same flooring through both the kitchen and dining area, you instantly create a single visual zone that feels intentional and easy to navigate. Choose one core material—engineered wood, LVP, large-format tile, or polished concrete—and keep plank direction or tile layout consistent so sightlines stay clean.
Prioritize durability where you cook: select a water-resistant finish, low-gloss sheen, and grout that resists staining. If you want color contrast, use it in cabinetry, wall paint, or chair upholstery instead of switching floors.
Match transitions at doorways by skipping threshold strips when possible, and flush-mount any unavoidable reducers. Then repeat decorative accents—brass pulls, black fixtures, or warm wood tones—so the continuous floor feels designed, not accidental.
Coordinated Rug Placement
Continuous flooring sets the stage for a unified kitchen-and-dining zone, and rugs let you fine-tune how each area reads without breaking that connection. Use coordinated rug placement to define the dining table while keeping walkways clear from sink to seating.
Size the dining rug so chairs stay on it when pulled out; aim for 24 inches beyond the table on all sides. In the kitchen, choose a low-profile runner with grippy backing, aligned parallel to cabinets to reinforce the room’s axis. Keep pile heights similar so passageways feel intentional.
For pattern blending, repeat one color from your flooring or cabinetry, then vary scale: a subtle geometric in the kitchen, a larger motif under the table. Match border thicknesses to visually stitch zones together.
Tie Kitchen and Dining Colors Into One Palette
Even if your kitchen and dining area serve different functions, they’ll feel like one cohesive space once you tie them to a shared color palette. Start by choosing one dominant neutral that can live comfortably in both zones, then add one mid-tone and one accent to support it.
Aim for Color harmony by repeating each color at least twice—once in the kitchen, once in the dining area—so nothing looks accidental.
Plan a seamless palette transition at the boundary: keep cabinetry, walls, and large surfaces within the same undertone (warm or cool), then shift emphasis with smaller elements.
If your kitchen runs bright, echo that brightness in the dining space with coordinated paint, textiles, or artwork. Keep contrast consistent for balance.
Repeat Key Materials Across Kitchen and Dining
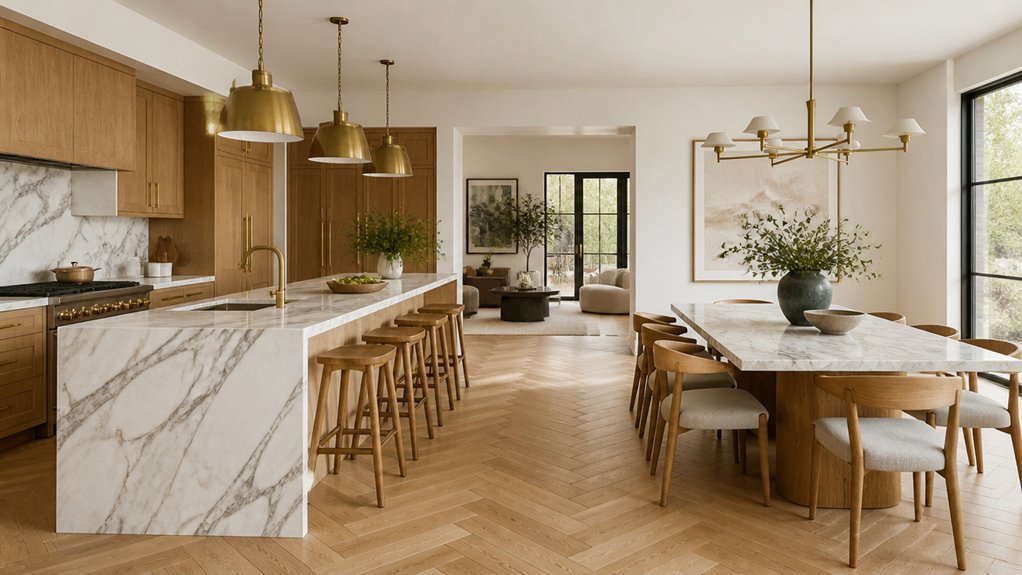
Although your kitchen and dining areas may use different furnishings, repeating a few key materials makes them read as one unified space. Pick two or three Shared materials and use them in both zones in practical, touchable ways.
If you’ve got stone or solid-surface counters, echo that material on a dining tabletop, a buffet top, or even a serving ledge. If your kitchen features tile, repeat it as a slim backsplash on a dining bar, a niche surround, or a framed inset on a sideboard.
Carry upholstery or woven textures across stools and dining chairs so the connection feels intentional. Keep the scale consistent—large-format surfaces pair best with fewer seams. That discipline delivers Visual cohesion without matching everything.
Match Metal and Wood Finishes Throughout
Match your metal sheens across both zones—if you choose brushed nickel in the kitchen, echo that finish in dining lighting or hardware so it reads intentional.
Repeat wood undertones by pairing warm oak cabinets with a similarly warm dining table (or keep everything cool-toned with walnut or ash) to prevent a visual mismatch.
If you’re mixing materials, balance the ratios by repeating each finish at least twice in both spaces, so no single metal or wood feels like a one-off.
Coordinate Metal Sheens
When your kitchen and dining area share sightlines, metal finishes can either pull the look together or make it feel visually choppy. Start by choosing one dominant metal finish for high-visibility items like cabinet pulls, faucets, and dining lighting, then keep everything else in the same sheen family.
Prioritize sheen coordination: pair brushed or satin with brushed or satin, and reserve polished for a deliberate accent.
Check undertone and reflectivity under the same bulbs you’ll use daily; warm LEDs can soften chrome while cool light can make brass read harsher. If you’re mixing metals, limit it to two and assign roles—primary for hardware, secondary for frames or décor.
Repeat each sheen at least twice across both zones so it reads intentional.
Repeat Wood Undertones
Metal sheen sets the tone, but wood undertones carry the space from kitchen to dining just as strongly. Choose one dominant wood temperature—golden oak, reddish walnut, or cool ash—and echo it in both zones so the connection feels intentional. If your cabinets read warm, specify a dining table with the same warmth, even if the grain differs.
Lock in finish consistency by matching sheen levels: pair matte cabinet fronts with a matte tabletop, or satin with satin. Repeat wood accents in small, fixed elements you’ll keep long-term, like open shelving, chair frames, or a sideboard.
When you add metal details, pick hardware and lighting that complement the wood’s undertone (warm brass with warm woods, nickel with cool woods) for a clean, seamless link.
Balance Mixed Material Ratios
Although you can mix wood and metal across an open kitchen–dining plan, you’ll get a seamless look only if you control the ratios and repeat the same finishes in both zones. Pick a lead material (about 70%) and a secondary (about 30%) so the material contrast reads intentional, not chaotic.
If your kitchen has walnut cabinets with brushed brass pulls, echo walnut in the dining table or shelving and repeat brushed brass in the chandelier, chair frames, or hardware. Keep sheen consistent: don’t pair satin brass with high-gloss gold or raw steel.
Limit metals to one, or two at most, and match their undertone (warm vs cool). Use one “bridge” piece—like a brass-framed bar cart with wood trays—to lock in design harmony.
Pick One Unifying Kitchen-Dining Style
To blend your kitchen and dining areas without visual clutter, choose one unifying style and let it guide every major decision. Start by naming it—modern, transitional, farmhouse, or Scandinavian—then stick to its core forms, finishes, and lines across both zones. Repeat cabinet profiles, tabletop shapes, and hardware silhouettes so the eye reads one continuous system, not two competing rooms.
Lock in color harmony with a tight palette: one dominant neutral, one supporting tone, and one accent you can repeat in textiles, art, or small appliances. Keep wood tones consistent in undertones (warm vs cool) and match metal finishes within one family.
If you mix materials, make the mix intentional and proportional, not random. You’ll get cohesion without sacrificing function or personality.
Layer Lighting for Prep, Serving, and Ambience
When you layer lighting with intent, the kitchen and dining areas read as one continuous space while still supporting distinct tasks. Start with even ambient light: recessed cans or a low-profile ceiling fixture on a dimmer keeps both zones balanced and eliminates harsh contrast at the boundary.
Next, prioritize prep with bright, shadow-free task lighting. Install under-cabinet LEDs and aim them toward counters and the sink, then match color temperature across all bulbs for a unified look.
For serving, add focused light over the pass-through or island so plates read true and guests navigate safely. Finish with Accent lighting—toe-kick strips, shelf lights, or picture lights—to add depth.
Choose decorative fixtures that echo finishes and scale, then group controls so scenes switch quickly.
Choose Kitchen-Dining Furniture That Fits and Clears
Since furniture sets the physical flow between cooking and eating, pick pieces that match the room’s scale and preserve clear walkways. Measure the room and map door swings, appliance clearances, and seated pull-back space before you buy.
For tight layouts, choose a round or oval table, slim-profile chairs, or a banquette to reduce traffic pinch points. Keep table height aligned with nearby counters for visual continuity, and repeat finishes so the zones read as one.
Furniture placement should maintain consistent aisles around islands and table edges, so you’re not sidestepping corners. In Space planning, anchor the dining set under the light fixture, then position stools and chairs so they don’t collide when occupied.
Add a narrow sideboard only if it won’t crowd paths.
Create an Easy Prep-to-Table Serving Path
Clear walkways and well-sized furniture set the stage, but you’ll still feel friction if food has to weave around chairs to reach the table. Position your primary prep zone, sink, and cooktop so you can pivot toward the dining surface in a straight, unobstructed line.
Aim for a continuous counter landing spot near the exit point, then keep a 36-inch minimum corridor to the table edge for two-way traffic.
Add a slim console or rolling cart as a staging bay for platters, water, and linens, and use creative storage—drawer inserts, tray dividers, and a nearby cabinet—for serving pieces.
Finish with decorative accents like a coordinated runner and a small centerpiece that won’t block passing dishes.
Quick Fixes for Common Kitchen-Dining Mismatches
Even if your layout technically works, small mismatches between the kitchen and dining zone can make the whole space feel disjointed. Start by fixing Color harmony: repeat one cabinet or wall tone in your dining textiles, art, or chair upholstery, and match metal finishes across pulls, faucet, and lighting.
If the dining set feels too formal, swap in simpler chairs or add a tailored bench to echo streamlined kitchen lines.
Correct scale issues fast: choose a rug that fits all chair legs, and lower an oversized pendant so it centers over the table.
Use Texture contrast on purpose—pair smooth countertops with woven placemats or a wood table—so differences feel designed, not accidental.
Finally, unify storage with one tray, centerpiece, or bar cart that bridges both zones.
Conclusion
When you blend kitchen and dining, start with how you’ll live in the space, then shape traffic flow and sightlines so movement feels effortless. Connect zones with consistent flooring, a shared color palette, and repeated materials that carry across surfaces. Layer task, serving, and ambient lighting to match each moment. Choose furniture that fits, clears walkways, and supports serving. Build a smooth prep-to-table path—because the devil’s in the details.