

You keep a renovation eco‑friendly and energy efficient by setting measurable targets (energy, IAQ, durability, embodied carbon) and tying them to a realistic budget. Plan pre‑demo salvage, verify lead/asbestos, and deconstruct selectively to maximize reuse and diversion. Air-seal first and verify with a blower door, then install continuous, code‑plus insulation and moisture control. Right-size HVAC with Manual J and meet ASHRAE 62.2 ventilation. Finish with LEDs, simple controls, and energy tracking—next steps make it easier.
Key Takeaways
- Set measurable goals for energy, indoor air quality, durability, and embodied carbon, then align scope and budget to the highest-impact upgrades.
- Plan demolition for reuse and recycling: inventory materials, deconstruct selectively, and track diversion with haul tickets and sorted bins.
- Prioritize air sealing and continuous insulation, then verify performance with blower-door testing and installed R-value checks.
- Optimize windows by repairing or adding storm inserts first; if replacing, choose climate-appropriate U-factor/SHGC and install with proper flashing.
- Right-size and commission HVAC and ventilation after envelope upgrades: Manual J sizing, ASHRAE 62.2 airflow verification, and efficient heat-pump equipment.
Set Goals, Budget, and Biggest Eco Wins

Before you pick finishes or hire trades, set clear performance goals (energy use, indoor air quality, durability, and embodied carbon) and tie them to a realistic budget so you can prioritize the upgrades that move the needle most.
Start with a simple energy model or utility baseline, then target code-plus air sealing, continuous insulation, and right-sized heat-pump HVAC.
Specify ventilation that meets ASHRAE 62.2 and verify with airflow testing.
Protect durability by controlling bulk water, vapor, and thermal bridges, and require blower-door and duct-leakage tests where allowed.
Reduce embodied carbon by choosing low-GWP insulation, low-cement concrete mixes, and long-life assemblies.
For finishes, insist on Sustainable sourcing and Eco friendly certifications, and document chain-of-custody and VOC limits.
Track savings per dollar, then lock the scope.
Plan Pre-Demo Salvage and Deconstruction
Once you’ve locked your performance goals and budget, protect those eco wins by treating demolition as a materials-planning step, not a smash-and-haul line item.
Start with a room-by-room inventory, photos, and a labeled takeoff so trades know what stays, what’s removed, and what’s protected for Historical preservation.
Confirm hazardous materials (lead, asbestos, mold) with testing and follow required containment and disposal rules to keep IAQ and worker safety compliant.
Specify selective deconstruction sequences in your scope: remove fixtures, trim, doors, and framing in reversible order, then separate wood, metal, masonry, and gypsum for certified recycling.
Require weight tickets and diversion tracking so you can verify Material conservation outcomes and adjust procurement and waste hauling capacities accordingly.
Reuse and Refurbish to Avoid New Materials
Because the greenest product is often the one you already own, prioritize reuse and refurbishment to cut embodied carbon, reduce waste, and shorten supply chains without sacrificing performance.
Start by auditing doors, cabinets, flooring, and fixtures for salvageable cores; solid wood and cast iron often offer exceptional Material durability when refinished. You can reglaze tubs, reface cabinets, and repair hardware to restore function while preserving Vintage charm.
Verify any reused components meet current code: confirm egress and fire ratings for doors, use listed wiring devices, and ensure plumbing fittings are lead‑free where required.
Upgrade performance strategically—add gaskets, weatherstripping, and low‑VOC finishes—so reused elements integrate with your air‑sealing and moisture‑management plan.
Document conditions and maintenance to support long service life later.
Cut Jobsite Waste With Smart Ordering and Recycling
You’ll cut jobsite waste fastest when you right-size material orders to actual takeoffs and code-required allowances, so you don’t pay for overage you can’t use.
Set up a plan to reuse and salvage what’s sound—doors, trim, framing, and fixtures—before you buy new, and confirm it meets applicable standards for your assembly.
Then sort debris at the source into dedicated bins (wood, metal, masonry, cardboard, and landfill) so recycling stays clean, compliant, and measurable.
Right-Size Material Orders
Even if your design is energy-smart, overordering materials can erase those gains through unnecessary manufacturing, transport emissions, and landfill tipping. Start by takeoffs that reflect verified field measurements, not plan assumptions, and translate them into exact Material quantities by unit (SF, LF, counts).
Improve ordering accuracy by aligning allowances with real waste factors: tighter for panel goods and tile, higher for complex framing, and confirm lead times to avoid “just in case” pallets.
Specify code-compliant products in correct dimensions so you don’t trim excess to meet ASTM/ICC-listed installation requirements. Phase deliveries to match install sequencing, keep materials dry, and prevent damage-driven reorders.
Track receipts versus installed quantities daily; when you’re over, stop ordering and redirect unopened surplus to recycling streams required by your waste plan.
Reuse And Salvage Materials
Tight takeoffs and phased deliveries cut surplus, but the lowest-impact material is the one you don’t buy at all—so plan for reuse and salvage before anything hits the dumpster. Start with a pre-demo inventory: doors, cabinets, framing lumber, brick, and trim. De-nail and store them dry to preserve structural integrity and indoor air quality.
Reuse Vintage fixtures where code allows; verify listing/labeling, grounding, and GFCI/AFCI requirements before reinstalling. Keep Antique hardware, but confirm egress and accessibility clearances for doors, windows, and guards.
Design around what you’ve got: adjust rough openings, choose compatible fasteners, and standardize sizes to reduce custom cuts. If you must replace, specify take-back programs and modular components so future swaps don’t create waste.
Sort And Recycle Debris
Because demolition can turn into a mixed-waste problem fast, set up a source-separation plan before the first wall comes down: designate labeled bins for clean wood, metal, cardboard, concrete/brick, and landfill, and align them with your hauler’s accepted streams so loads don’t get rejected.
Build Debris sorting into your workflow: post signage, brief every trade, and keep bins within a short carry distance to reduce contamination.
Use Recycling strategies that match local code and facility rules—separate treated wood, keep gypsum dry, and bag insulation to prevent airborne fibers.
Cut waste upstream by ordering takeoffs accurately, requesting supplier take-back for pallets and wrap, and staging materials under cover so you don’t toss water-damaged stock.
Track weights on haul tickets and adjust purchasing accordingly.
Choose Low-VOC, Low-Impact Materials
While you’re upgrading finishes, choose low-VOC, low-impact materials to protect indoor air quality and reduce the renovation’s overall environmental footprint. Specify paints, primers, sealants, and adhesives that meet CDPH Standard Method v1.2 or GREENGUARD Gold, and verify compliance with your local VOC limits.
Select FSC-certified or reclaimed wood, recycled-content gypsum and metal, and durable flooring with low-emitting binders. Favor natural finishes like plant-based oils and hardwax oils when they meet performance needs and manufacturer specs.
Use formaldehyde-free composite wood (NAF or ULEF) and look for CARB Phase 2 / TSCA Title VI documentation. Request EPDs and HPDs to compare embodied carbon and chemical hazards.
Then stage materials dry, protect them from moisture, and install per ASTM/ANSI instructions for lasting performance.
Air Seal First to Stop Drafts and Moisture

Before you add insulation or new finishes, air seal the building enclosure so you cut heat loss, prevent humid indoor air from reaching cold surfaces, and reduce the risk of condensation-driven mold and rot.
Start with a blower-door guided plan if possible, then seal the big leaks first: rim joists, attic penetrations, top plates, plumbing and wiring chases, and around windows and doors.
Use durable, code-accepted materials—taped sheathing, gaskets, sealants, and fire-rated caulk where required at penetrations.
Maintain continuity at junctions so you don’t create hidden bypasses.
Pair air sealing with verified ventilation to protect Indoor air quality while supporting moisture control.
Finally, confirm results with follow-up testing and visual checks for missed gaps.
Upgrade Insulation for a Tighter Envelope
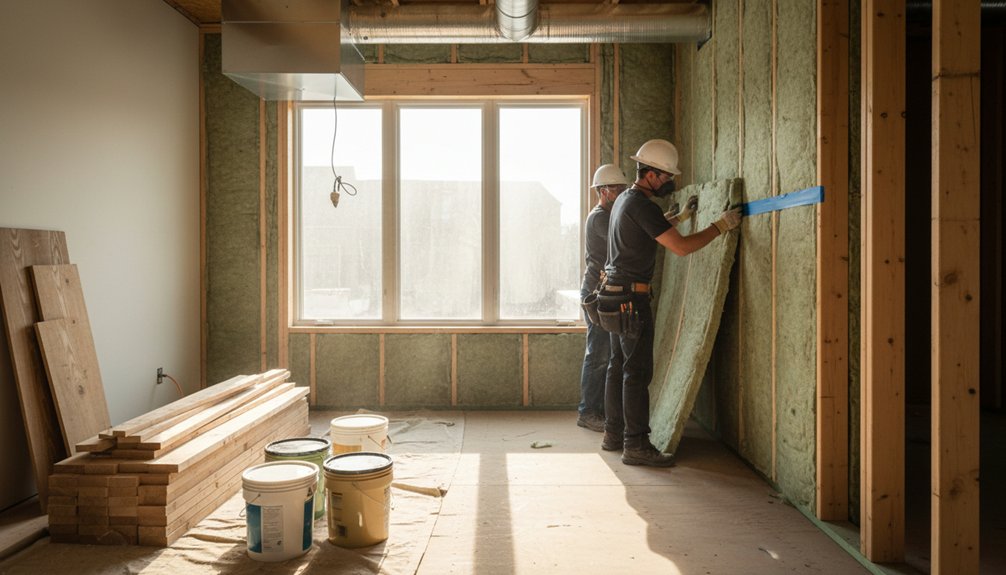
After you’ve air sealed, you’ll get the best energy and comfort gains by upgrading insulation to meet or exceed code-required R-values for your climate zone.
You can choose high-performance materials—dense-pack cellulose, mineral wool, or closed-cell spray foam where appropriate—to control heat flow while managing moisture and fire requirements.
Don’t bury leaks: seal penetrations, rim joists, and top plates before insulating so the whole assembly performs as a tight, durable system.
Choose High-Performance Materials
Because most energy loss in a home happens through the building envelope, upgrading insulation is one of the highest-impact, code-aligned moves you can make in an eco-friendly renovation. Target assemblies to meet or exceed local IECC R-value requirements: dense-pack cellulose for walls, high-R batts or blown fiber for attics, and rigid insulation where thermal bridging is unavoidable. Verify thickness, compression, and continuity so the labeled R-value performs as installed.
In basements and slabs, choose foam with lower global-warming potential and protect it with required ignition or thermal barriers. Manage moisture with the right class vapor retarder for your climate zone and keep drying paths intact.
Pair these upgrades with durable Eco friendly finishes and Sustainable flooring to reduce lifecycle impacts without compromising indoor air quality.
Seal Air Leaks Thoroughly
Even if you install high-R insulation, uncontrolled air leakage can bypass it and drive heat loss, moisture transport, and comfort problems, so you’ll get the best performance by tightening the envelope first. Start with a blower-door-guided air-sealing plan that targets the biggest pathways: attic penetrations, rim joists, top plates, and duct chases.
Prioritize attic sealing around recessed lights, bath fans, plumbing stacks, and the attic hatch using code-approved fire-rated sealants where required, then add insulation only after the air barrier is continuous.
Use durable Weatherstripping techniques at doors, operable windows, and access panels, and back them with proper door sweeps and latch alignment.
Keep combustion appliances safe by verifying venting and providing makeup air if the house gets tighter.
Decide If You Need New Windows (or Not)

While new windows can reduce drafts and improve comfort, they don’t always deliver the best energy return for your renovation budget. Start by measuring performance: if you’ve already sealed air leaks, use an IR scan or blower-door results to confirm the windows are the weak link, not trim gaps or rough openings.
If frames are sound, you may get better payback from repairs, weatherstripping, or low‑e storm inserts than full replacements.
When you do replace, compare window options by U‑factor, SHGC, and air-leakage ratings, and match them to your climate and orientation. Follow code-required flashing, pan sills, and water-resistive barrier tie-ins to control bulk water.
Add proper air sealing at the perimeter without blocking weep paths. Account for framing considerations so insulation and drainage remain continuous.
Right-Size HVAC After Envelope Upgrades
After you tighten the envelope with air-sealing and insulation, you can’t assume your old HVAC size still meets code-required comfort and ventilation targets.
So, you should recalculate heating and cooling loads (e.g., ACCA Manual J).
Then you can select high-efficiency equipment that matches those revised loads to avoid short-cycling, humidity issues, and wasted energy.
Finally, you should verify airflow and duct sizing (Manual D/T) so delivered CFM, static pressure, and room-by-room balancing align with the new building performance.
Recalculate Heating And Cooling Loads
Once you tighten the envelope with air sealing, added insulation, and better windows, your home’s heating and cooling loads change, so you can’t assume the old HVAC size still fits. Recalculate with an ACCA Manual J (or equivalent) using updated R-values, infiltration targets, window SHGC/U-factors, and shading.
Confirm ventilation rates per code (ASHRAE 62.2 or local requirements), because added mechanical fresh air affects both sensible and latent loads. Check duct location and leakage, since losses to unconditioned spaces can drive oversizing.
Use room-by-room results to verify airflow needs and comfort in edge rooms. Then align controls—like smart thermostats—with the new load profile and your plans for renewable energy, so setpoints, schedules, and future electrification assumptions stay realistic.
Choose High-Efficiency HVAC Equipment
Because your air sealing, insulation, and window upgrades cut peak loads, you should replace “like-for-like” HVAC swaps with right-sized, high-efficiency equipment matched to the updated Manual J results.
Select ENERGY STAR heat pumps or high-AFUE furnaces and pair them with variable-speed blowers so capacity tracks real demand instead of short-cycling. Use AHRI-rated matches and verify refrigerant type and GWP align with your climate goals and local code.
For energy-efficient upgrades, prioritize high SEER2/HSPF2 and sensible-latent performance that fits your humidity conditions.
Choose smart controls that meet current efficiency requirements and enable setback without comfort swings.
Lock in performance with a commissioning plan and documented HVAC maintenance intervals: filter changes, coil cleaning, and annual combustion or refrigerant checks.
Verify Airflow And Duct Sizing
Even if you’ve selected a right-sized, high-efficiency HVAC unit, it won’t deliver rated efficiency or comfort unless the ducts and airflow match the new load profile created by your envelope upgrades.
After air sealing and added insulation, your rooms need different CFM and static pressure targets, so don’t assume the old layout still works.
Require Airflow verification at each supply and return using a flow hood or test-and-balance report, then compare results to the design (Manual J/S with Manual D distribution).
Fix excessive external static pressure by upsizing restrictive trunks, adding returns, shortening flex runs, and sealing joints to code with mastic, not tape.
Confirm total airflow meets manufacturer specs for cooling and heat pump performance, and check temperature rise or subcooling accordingly.
You’ll cut fan energy, noise, and comfort complaints.
Consider Heat Pumps and Heat-Pump Water Heaters
If you’re upgrading HVAC or hot water during your renovation, consider heat pumps and heat-pump water heaters as high-impact electrification moves that cut energy use while improving comfort.
Size them from updated loads after air sealing and insulation, and verify design temperatures for your climate; right-sizing improves efficiency and dehumidification.
Use ducted or ductless units where distribution fits, and keep refrigerant lines and condensate drains installed per code and manufacturer specs.
Pair controls with a Smart thermostat to reduce run time without sacrificing comfort.
For hot water, place a heat-pump water heater in a space that can handle cool exhaust air, provide required clearances, and add a drain pan where mandated.
If you’re adding Solar panels, electrification helps you self-consume clean power better.
Switch to LEDs and Simple Smart Controls
While you’re opening walls and updating fixtures, swap every remaining incandescent or CFL for LED lamps and LED-rated luminaires. Then add simple smart controls (occupancy/vacancy sensors, dimmers, and timers) to cut lighting energy without changing how you live.
Choose ENERGY STAR or DLC-listed LEDs with high efficacy and appropriate color temperature, and match drivers to dimmers to prevent flicker. Use Smart lighting only where it supports real loads: schedules for exterior lights, vacancy sensors in baths, closets, and garages, and motion sensors in circulation areas.
Keep controls accessible and install per manufacturer instructions and local electrical code, including proper box fill and grounding. Treat lighting as part of the whole system: lower wattage reduces cooling demand and lets you downsize future HVAC runs.
Confirm Savings With Blower Door and Tracking
LEDs and smart controls cut demand, but air leakage and operating habits often decide whether you see those gains on the utility bill.
Schedule a blower door test after air-sealing and again after finishes so you can quantify ACH50, locate leaks with smoke or infrared, and verify you haven’t blocked required combustion or ventilation pathways.
If you tighten the envelope, confirm mechanical ventilation meets local code (often ASHRAE 62.2) and balance bath, kitchen, and HRV/ERV flows so moisture and IAQ stay controlled.
Pair that with energy monitoring: track whole-home kWh, peak demand, and HVAC runtimes before and after the retrofit.
Compare weather-normalized data and set alerts for abnormal loads so you catch stuck dampers, misprogrammed thermostats, or failing equipment early.
Conclusion
You wrap your renovation like a tight, quiet coat: sealed air leaks, upgraded insulation, and right-sized HVAC that meets code and actually fits the load. You salvage doors and trim before demo, then reuse what you can so dumpsters stay empty and forests stay standing. Low-VOC paints dry without the chemical haze. LEDs snap on, smart controls trim runtime, and heat pumps sip electricity. A blower-door test proves the envelope—and your bills confirm it.