

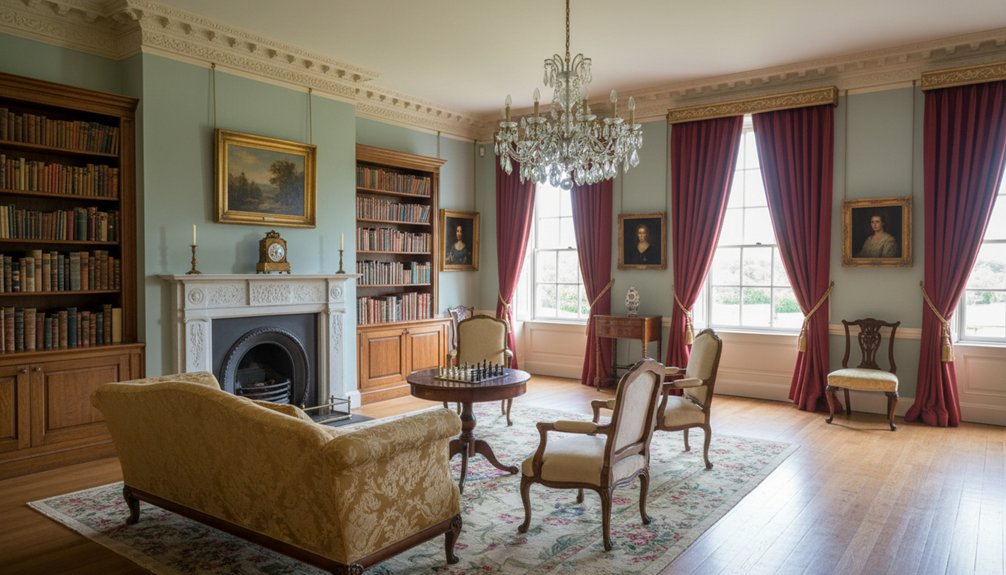
You restore a Regency home best by treating its joinery, plasterwork, and proportions as primary evidence. You’ll photograph and measure ovolo mouldings, pegged frames, and crisp lime plaster, then repair rather than replace using like-for-like timber, lime, and reclaimed materials. You shouldn’t over-sand floors or bulk up sash glazing bars; splice repairs, overhaul cords, and add discreet draught seals. Finish with muted period colours, breathable paints, and restrained ironmongery—there’s more to refine next.
Key Takeaways
- Survey and photograph original Regency features—joinery, mouldings, plasterwork—measuring profiles to guide accurate, minimal intervention restoration.
- Prioritise conservation over replacement, repairing existing cornices, skirtings, and architraves rather than “neatening” or removing period fabric.
- Use like-for-like materials and traditional methods: matching timber species, lime plaster with hair, hessian scrim, and mould casts from intact sections.
- Repair floors, sash windows, and shutters with careful splicing and overhauls, keeping slim glazing bars and avoiding over-sanding or modern hardware swaps.
- Restore authentic finishes and details using paint-layer analysis, muted Regency palettes, breathable paints, and period-appropriate lighting and ironmongery.
Assess What’s Original (and Worth Repairing)
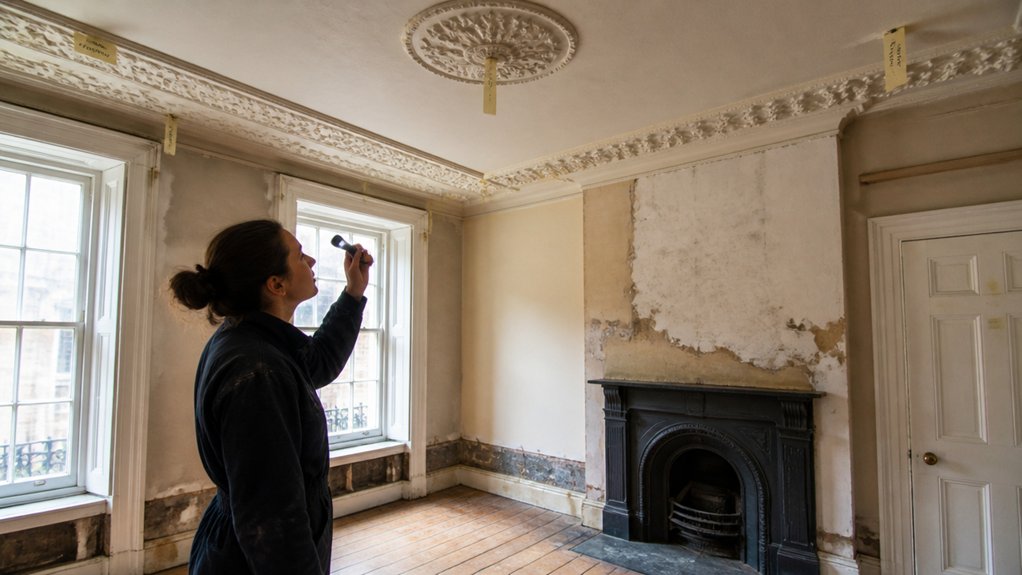
Before you plan any upgrades, walk the house like a conservator and identify what genuinely dates to the Regency period (c. 1811–1820) and what arrived later.
Start with joinery: look for hand-planed tool marks, fine ovolo mouldings, and pegged mortise-and-tenon frames in doors, shutters, and stair parts.
Check plasterwork for crisp running moulds, shallow coves, and hair-reinforced lime plaster rather than gypsum.
Read paint stratigraphy at skirtings and architraves; early layers often show muted stone, buff, and verdigris tones.
Fireplaces may retain original marble, hob grates, and register plates, while later inserts sit on altered jambs.
Prioritize Historical accuracy by photographing profiles and measuring details.
Let Material sourcing follow evidence: match species, lime, and aggregate to what you find.
Plan the Work: Repair vs Replace + Permissions
Once you’ve pinned down what’s genuinely Regency, map each element to a “repair-first” or “replace-only-when-failed” decision and tie that plan to the approvals your house requires.
Prioritise consolidation, splicing-in like-for-like timber, lime-based patching, and gentle cleaning before you contemplate wholesale renewal. Where loss is unavoidable, specify replicas from measured drawings and surviving profiles so the Historical context remains legible and workmanship stays period-credible.
Next, audit permissions early: check listing grade, conservation-area controls, and any Article 4 directions; then confirm whether works need listed building consent, planning permission, or only building control sign-off.
Keep a method statement, samples, and photographs ready for the conservation officer. Let Modern adaptations sit reversibly behind original fabric and document every intervention for future caretakers.
Restore Regency Cornices and Ceiling Roses
Although cornices and ceiling roses can look purely decorative, in a Regency room they’re often key evidence of date, taste, and original proportions, so you’ll get the best result by conserving the existing plasterwork rather than “neatening” it into something generic.
Start by mapping profiles and motifs room by room, then compare them with documented Regency pattern books and local precedents to support Historical accuracy.
Test paint layers before stripping; aggressive scraping can erase crisp enrichment and tool marks.
Consolidate friable lime plaster with compatible lime-based fillers, and use hessian scrim and casting plaster only where traditional practice supports it.
For missing runs, take silicone moulds from intact sections and cast repairs in lime/gypsum mixes matched to hardness.
Prioritise careful Material sourcing: reclaimed enrichments and hand-run moulds beat modern foam.
Repair Regency Floorboards (Don’t Over-Sand)
If you treat original Regency floorboards like modern timber and machine-sand them flat, you’ll erase the very evidence that helps date and value the room—subtle crown, hand-planed undulation, and nail patterns.
For Floorboard preservation, lift only the loose boards, label them, and fix the cause first: joist bounce, failed cut nails, or historic moisture ingress.
Re-secure with tapered plugs and hand-cut nails where evidence shows they were used, or discreet screws into joists when structure demands it.
Splice repairs with matching species, width, and grain, and align end joints over joists.
Choose Surface sanding techniques that stay light: scrape, spot-sand, and feather edges, keeping the patina intact before you oil or wax.
Restore Regency Sash Windows and Panel Shutters

Because Regency joiners built sash windows and panel shutters as repairable systems rather than disposable units, you’ll get the best preservation outcome by retaining as much original timber and ironmongery as possible and fixing the causes of failure first.
Start by diagnosing water ingress: failed putty, open joints, and blocked sash box drainage. Splice in matching softwood where rot is localized, and keep glazing bars slim; wholesale replacement usually erases Historical accuracy.
Overhaul cords, pulleys, and weights, then ease sticking sashes by planing minimally and reinstating staff and parting beads with draught seals discreetly.
For shutters, tighten mortise-and-tenon joints, repair panels with like-for-like grain, and clean hinges and catches rather than upgrading.
Prioritize Material sourcing: salvaged period glass, hand-forged fasteners, and linseed-oil paint systems outperform modern acrylics.
Choose a Regency Fireplace and Surround That Fits
When you choose a Regency fireplace and surround, you should match documented early-19th-century forms—reeding, fluting, and restrained classical pilasters—rather than later Victorian profiles.
You’ll get the most authentic result by selecting period-appropriate materials and finishes, such as painted timber, scagliola, or fine marbles.
Avoid high-gloss or overly ornate treatments.
Keep proportions, scale, and placement consistent with the room’s original openings and chimney breast so you preserve both the architectural balance and any surviving historic fabric.
Authentic Regency Surround Styles
Although Regency rooms varied by region and budget, fireplace surrounds followed a clear classical vocabulary—clean lines, shallow relief, and carefully proportioned elements that framed the grate without overpowering the wall.
You’ll usually choose between a reeded or plain frieze, slim pilasters, and a restrained shelf, often with corner blocks or delicate paterae rather than deep carving.
In grander houses, you can reference the Greek Revival taste: antae-like jambs, crisp entablatures, and minimally enriched mouldings aligned to door and window architraves.
In smaller parlours, you’ll keep profiles flatter and openings tighter, echoing the lightness of Regency furniture.
If your plan includes Regency gardening views, size the surround to preserve sightlines and daylight, not compete with them.
Material And Finish Choices
While your surround’s proportions set the Regency tone, the material and finish determine whether it reads as an authentic early‑19th‑century feature or a later pastiche.
Prioritise original stone where you can: white statuary marble, veined Italian types, and darker marbles were widely specified, often with crisp, tooled arrises. If you must replace, source reclaimed mantelpieces or commission like‑for‑like from petrographic samples.
Timber surrounds should use tight‑grained mahogany or painted pine; keep early paint layers, and match them with linseed‑oil paint or shellac rather than plastic gloss. Use a restrained polish—waxed marble and french‑polished wood suit the period.
Align sheen with Furniture styles and Fabric choices so the room feels coherent and historically credible.
Proportions, Scale, And Placement
Because Regency rooms rely on measured symmetry and calm vertical emphasis, you’ll get the most convincing result by sizing the fireplace surround to the chimney breast and the room’s principal axis rather than treating it as a stand‑alone “feature.” Keep the opening modest, centre it precisely on the breast, and let the jambs and frieze read as an architectural frame with clear margins to skirtings, dados, and cornice lines.
Aim for architectural balance: the shelf shouldn’t over-project, and the frieze height should relate to door architraves and window heads. If your room is tall, favour slimmer jambs and a higher, restrained tablet. In smaller parlours, reduce projection and avoid bulky consoles.
Place the grate slightly forward only if historic ash pits or hearth stones require it. Preserve original hearth depth and slips to maintain decorative symmetry.
Use Authentic Regency Paint Colours and Finishes
To restore a Regency interior convincingly, you’ll need to match not just the colour but the period finish, since early 19th-century rooms relied on finely ground pigments and binder-specific sheens rather than today’s uniform paints.
Prioritise Historical accuracy by commissioning paint analysis or carefully exposing original layers on skirtings and architraves.
Expect complex, muted palettes: stone, drab, pea green, ochre, and soft pinks, often offset by crisp whites on mouldings.
Use matt distemper or chalky emulsion on plaster where breathability matters, and reserve oil-based gloss for joinery only if evidence supports it.
Choose linseed-oil paints for appropriate depth and brush marks.
For Modern adaptations, select low-VOC, breathable equivalents that match sheen and undertone without sealing historic fabric.
Choose Regency Lighting, Switches, and Door Furniture (Avoid Common Mistakes)
If you get the lighting and small ironmongery wrong, even a well-painted Regency room can read as “heritage pastiche” at a glance, since early-19th-century interiors relied on candle and oil-light levels and the understated presence of brass, gilt, and ebony rather than today’s bright fittings and chrome.
Choose simple lanterns, cut-glass bell shades, or restrained chandelier forms, and keep lamp colour warm and low; don’t copy later Victorian illumination with over-ornate gasoliers or harsh white LEDs.
Hide drivers in ceiling roses and reuse existing drops to protect plasterwork.
Specify Modern switchgear in a discreet, period-friendly faceplate (brass or painted), placed where historic evidence allows.
For doors, pick rim locks, brass knobs, and plain escutcheons; avoid bulky lever handles and polished chrome.
Conclusion
When you restore a Regency home, you’re not just renovating—you’re stewarding a record. Start by keeping original fabric wherever repair will do; conservation studies consistently show retention protects value and authenticity. Use like-for-like lime plaster, match cornice profiles, and ease off aggressive sanding so boards keep their patina. Refurbish sash windows and shutters before you replace them, and confirm listed-building permissions early. Done right, the house sings again, like a well-tuned instrument.